A little work before a snowstorm can save you a whole lot of hassle the next morning. Instead of fighting a frozen door, scraping a sheet of ice off the windshield, and dragging a stiff brush across your paint, you can make the cleanup much easier before the snow even starts.
These are the simple tricks I use to prepare my car and truck for snow, then clear them off afterward with less risk of damage. Most take only a few minutes, and several use things you probably already have around the house.
What You'll Learn
- Prepare before snowfall by filling the tank, backing into your spot, and topping off winter washer fluid.
- Treat weatherstripping and suitable lock and latch mechanisms to help prevent moisture from freezing them shut.
- Cover the windshield and mirrors so frozen buildup collects on removable barriers instead of the glass.
- Use touchless snow removal when possible, and keep ice scrapers off paint and side mirrors.
Table of Contents
- 1. Fill Your Fuel Tank Before the Storm
- 2. Back Into Your Parking Spot
- 3. Top Off Your Winter Windshield Washer Fluid
- 4. Help Prevent Frozen Locks, Door Seals, and Hood Latches
- 5. Cover Your Side Mirrors With Resealable Bags
- 6. Keep Snow and Ice Off the Windshield
- 7. Wax Your Snow Shovel So Snow Slides Off
- 8. Wrap Your Snow Brush in Microfiber
- 9. Use a Leaf Blower for Touchless Snow Removal
- 10. Remove Remaining Ice Without Damaging the Car
- Make the Next Snowy Morning Easier
1. Fill Your Fuel Tank Before the Storm
The first thing I check is the fuel gauge. If you're low, fill up before the weather gets bad, not after.
There are three good reasons to do this:
- Fuel may be harder to get afterward. Gas stations could be closed, or getting to one could be difficult.
- You have a reserve if you get stranded. Fuel gives you the option of running the engine for heat when it is safe to do so.
- Fuel adds weight. On vehicles with a rear-mounted tank, that extra weight can help load the rear tires, which is especially useful on a rear-wheel-drive car or truck.
Gasoline weighs roughly six pounds per gallon. A full 20-gallon tank holds about 120 pounds of gasoline, although the amount you actually add depends on how much fuel is already in the tank. The tank's location also determines how that weight is distributed.
Some people add sandbags or other ballast to the bed or trunk for traction. Filling the tank is a simple starting point because you need fuel anyway. Just don't mistake the extra weight for a guarantee of grip on snow or ice.
If you become stranded, never run the engine with the exhaust blocked by snow, and never run it in an enclosed space. Carbon monoxide is a serious danger. The NHTSA winter driving guide has additional advice for staying safe if your vehicle gets stuck.
2. Back Into Your Parking Spot
I like to “combat park,” which simply means backing into the driveway or parking space so the vehicle faces out. It's useful in general, but especially before a snowstorm.
The next morning, you can pull forward instead of reversing toward the street. That makes it easier to see approaching cars, snowplows, and kids playing outside on a snow day.
There's another benefit: snowplows tend to leave a ridge of packed snow across the driveway entrance. Facing forward makes it easier to see and judge that obstruction as you leave.
That doesn't mean you should try to power through a big frozen snowbank. Clear a safe exit first. The point is to position the vehicle before the storm so you have better visibility and an easier departure afterward.
3. Top Off Your Winter Windshield Washer Fluid
Washer fluid is one of those things that's easy to forget until it runs out. Before the storm, open the hood and top off the washer reservoir.
Use winter windshield washer fluid with a temperature rating suitable for your conditions. The deicer fluid I use is alcohol-based and designed to help deal with winter buildup on the windshield.
Make sure you're filling the washer reservoir, then reinstall its cap securely. Having fluid available is a small preparation step that makes a big difference when you need to keep the glass clear.
4. Help Prevent Frozen Locks, Door Seals, and Hood Latches
A door can freeze shut in two different ways. Moisture can freeze inside the lock cylinder, or water on the rubber weatherstripping can freeze the seal to the body. You need to address both.
The trick I use is a light application of silicone spray. Silicone repels water, helping reduce the moisture that can freeze these parts together. Check that the product is suitable for the material and application, and follow your vehicle manufacturer's care instructions.
Treat the lock cylinder
- Hold a paper towel beneath the keyhole to catch any runoff.
- Apply a small amount of suitable silicone lubricant inside the lock.
- Insert and remove the key a few times to help distribute it.
- Wipe away any excess around the opening.
You don't need to flood the lock. A little goes a long way.
Wipe down all the door weatherstripping
The rubber seals around the door opening keep water out of the interior, but a little moisture can remain on their surfaces. When that freezes, the rubber can stick to the metal, leaving you pulling on a door that won't move.
Spray silicone onto a towel, then wipe a thin, even coating over the entire rubber seal. Treat the weatherstripping on both the body opening and the door itself.
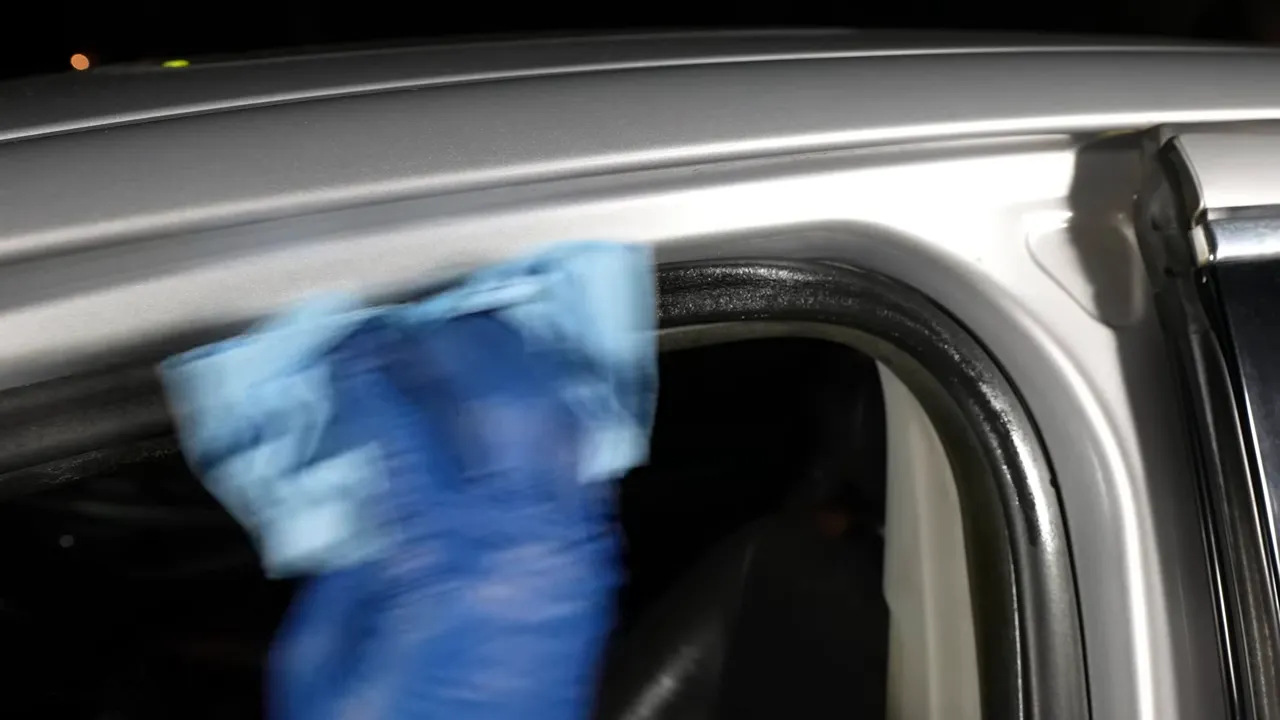
Complete coverage matters more than a thick coating. Keep the product off the interior trim and wipe away excess. This isn't something I redo before every snowfall; the treatment can last a long time, but check the seals during the season and follow the product's directions.
Don't forget the hood latch
A frozen hood latch is easy to overlook until you need to open the hood for a jump-start.
Give the latch mechanism a light application of suitable lubricant to help displace moisture. Many vehicles have one latch near the center of the front panel. My Jaguar has two, so I treat both.
This does not prevent a weak battery from going flat. It simply helps keep the hood accessible if you need to get underneath it.
5. Cover Your Side Mirrors With Resealable Bags
Frozen side mirrors are a pain because they aren't a place where you want to attack the ice with a scraper. Prevention is much easier.
Slip a resealable plastic bag over each mirror, pull it fully around the housing, and close the opening as snugly as the mirror mount allows. The idea is to keep snow, sleet, and freezing rain off the mirror surface.
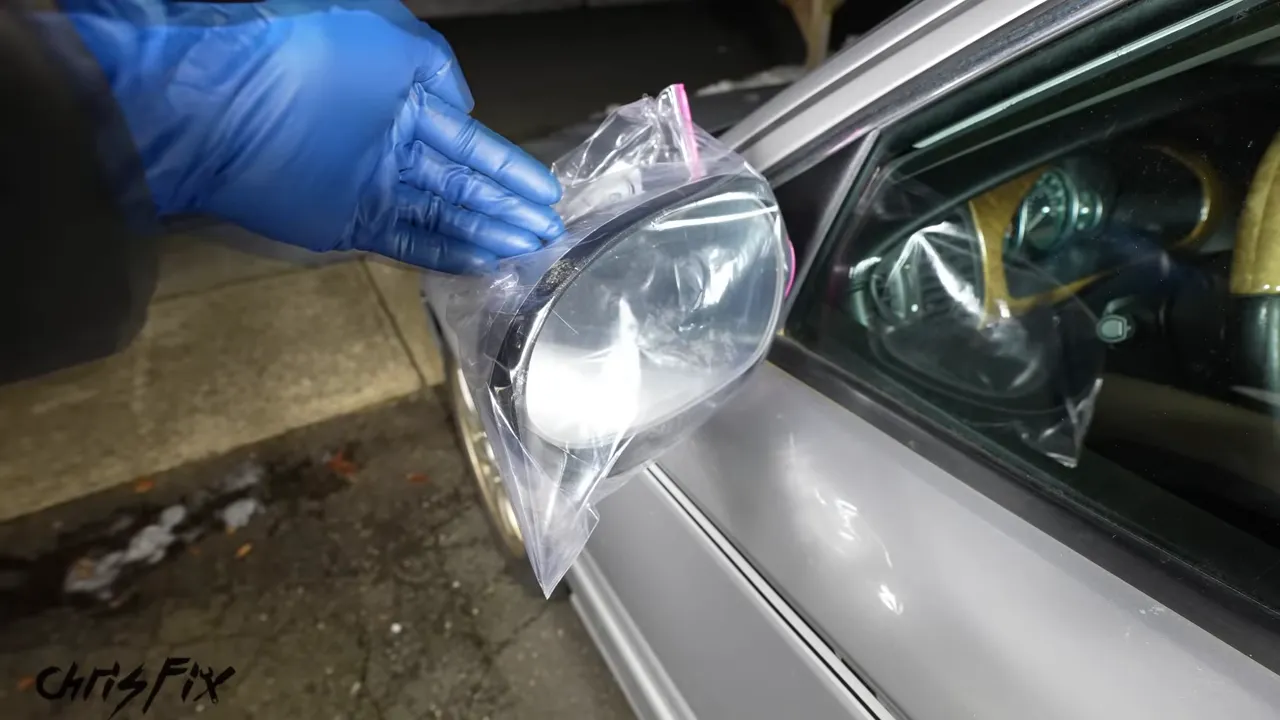
In the morning, remove the bag and the ice buildup comes off with it. On my vehicles, the bags collected the frozen moisture while the mirrors underneath stayed clear.
Use bags large enough to fit without forcing anything, and remember to remove both before driving. Simple, inexpensive, and a lot easier than dealing with ice stuck directly to the mirror.
6. Keep Snow and Ice Off the Windshield
The less ice that bonds directly to the windshield, the less scraping you'll have to do later. I use either a dedicated windshield cover or, in a pinch, garbage bags.
Use a purpose-made windshield cover
A windshield snow and ice cover is the more secure option. The one I use covers the glass and has soft straps that loop around the mirrors.
- If your vehicle permits it, lift the wiper arms away from the glass so the blades don't freeze to it.
- Spread the cover across the entire windshield.
- Fit its lower edge around the wiper area to reduce exposed gaps.
- Secure the straps according to the cover's instructions.
Check your owner's manual before lifting the wipers. Some vehicles require a service position, and you don't want an arm striking the hood or snapping back against the glass.
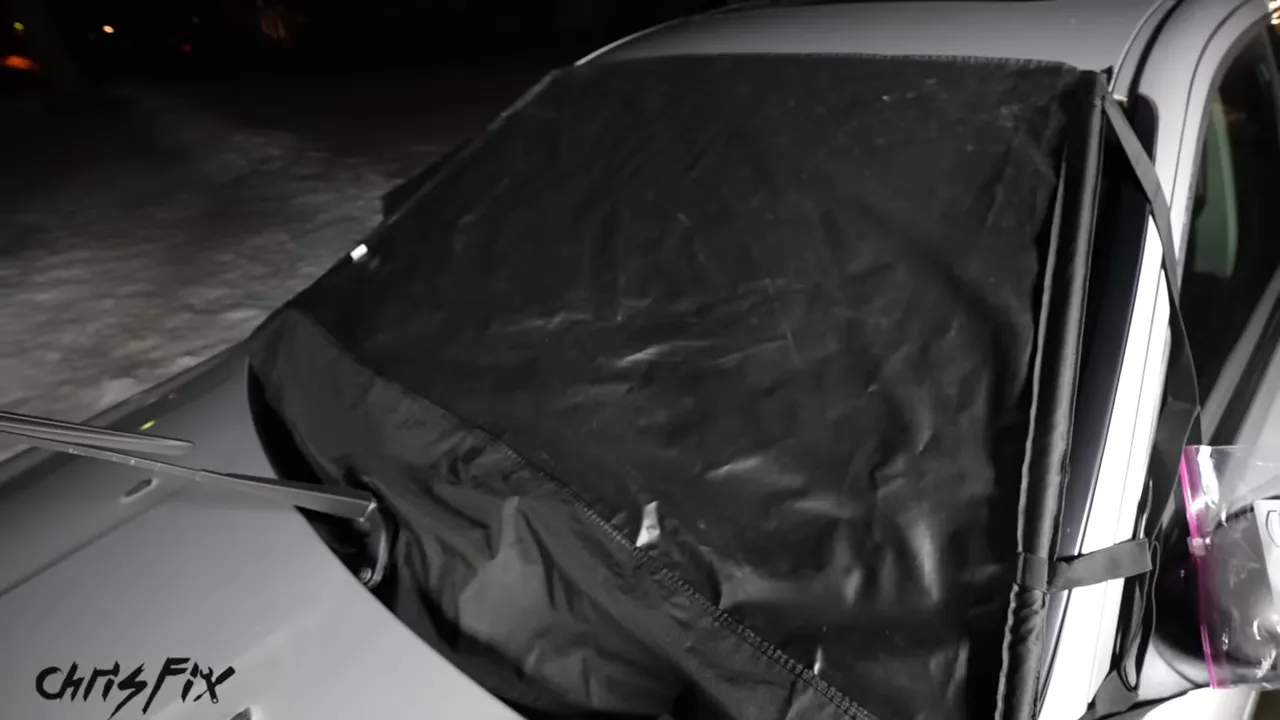
Once you've cleared the bulk of the snow the next morning, lift away the cover. The frozen buildup comes off with it instead of staying attached to the windshield.
Use garbage bags as a temporary alternative
If you don't have a dedicated cover, large garbage bags can act as a barrier. I used two to cover the truck's windshield.
Lay them flat against the glass so they cling closely, and lower the wipers over the bottom edges to hold them in place. For the garbage-bag method, the wipers rest on the bags rather than directly on the glass.
Wind is the weakness here. A few small pieces of painter's tape along the upper edge can help, but only use tape suitable for the surface, and be cautious with damaged or refinished paint. Remove it promptly.
The bags aren't as secure as a fitted cover, but they worked well on my truck. When I removed them after the storm, the protected windshield was clear of snow and ice.
7. Wax Your Snow Shovel So Snow Slides Off
Once the storm is over, I start by clearing the driveway and the space around the vehicles. Wet snow can pack onto the shovel, making every scoop heavier and leaving less room for the next load.
A slick coating on the shovel helps prevent that buildup. You can use paste wax, spray wax, or an appropriate ceramic detailing spray.
- Remove all the snow and water from the shovel blade.
- Dry the surface thoroughly.
- Apply the coating across the blade.
- Allow it to sit as directed. For the spray ceramic I used, I waited about five minutes.
- Buff it off with a clean microfiber towel.
After treating my shovel, the snow slid off instead of remaining packed against the blade. It's a handy use for a detailing product you may already have in the garage.
8. Wrap Your Snow Brush in Microfiber
A stiff snow brush can scratch your car's finish. Even a squeegee edge can cause damage if it drags grit across the paint.
To reduce that risk, wrap the brush head in a clean, soft microfiber towel. I use binder clips to secure the towel on the back of the brush, away from any surface that could touch the car.
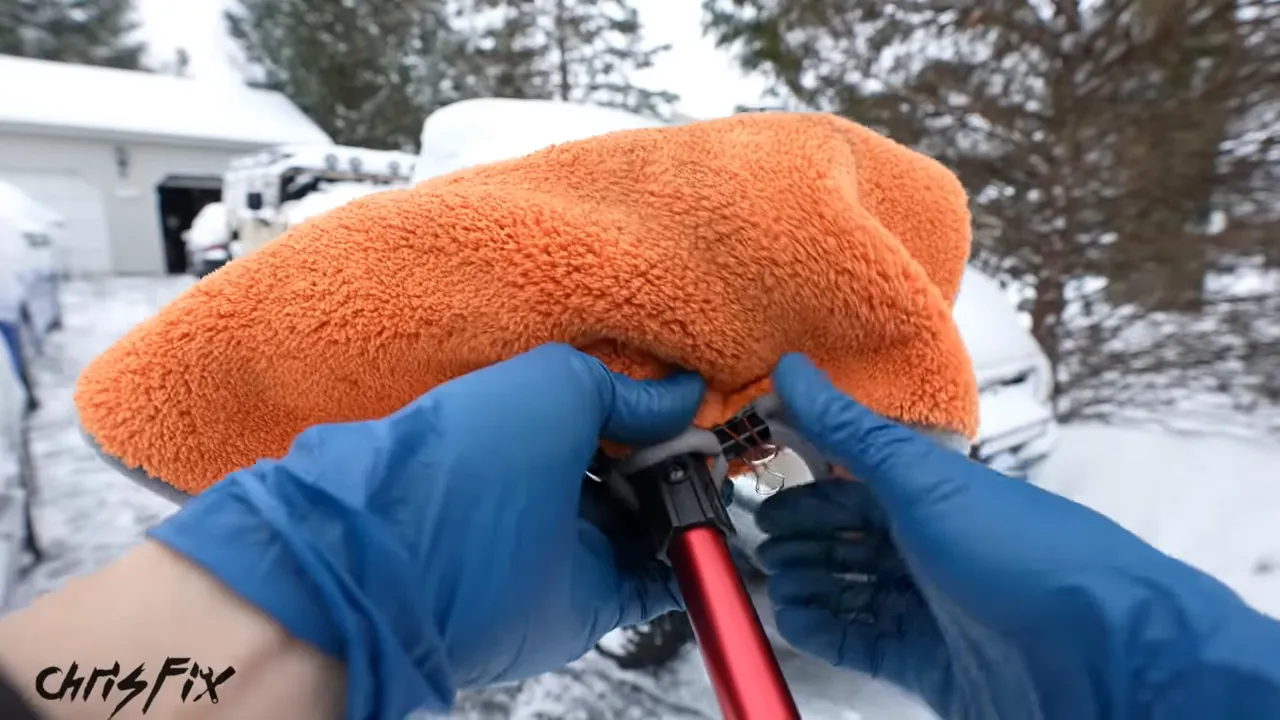
Make sure the towel fully covers the hard edges and bristles, and check that it stays secure while you work.
The technique matters just as much as the towel:
- Use a light touch. Don't push the brush down into the paint.
- Move the snow gently. Let the covered head skim lightly rather than scrubbing the surface.
- Keep the microfiber clean. A towel containing grit is no longer a soft protective barrier.
- Don't force off bonded ice. Brushing loose snow and scraping frozen paintwork are very different jobs.
This reduces the risk of scratching, but it doesn't make contact completely risk-free. If you can remove the snow without touching the paint, that's even better.
9. Use a Leaf Blower for Touchless Snow Removal
This is one of my favorite winter car tricks: use a leaf blower to clear loose snow without touching the vehicle's finish.
It works best on fresh, dry, powdery snow, before the snow has melted, refrozen, or bonded to the surface. An electric or gas blower can work, provided you use it according to its instructions and in suitable conditions.
On fresh powder, the snow blows off remarkably easily. On my truck, it also moved a fair amount of heavier snow that had started to freeze, although it wasn't as effortless.
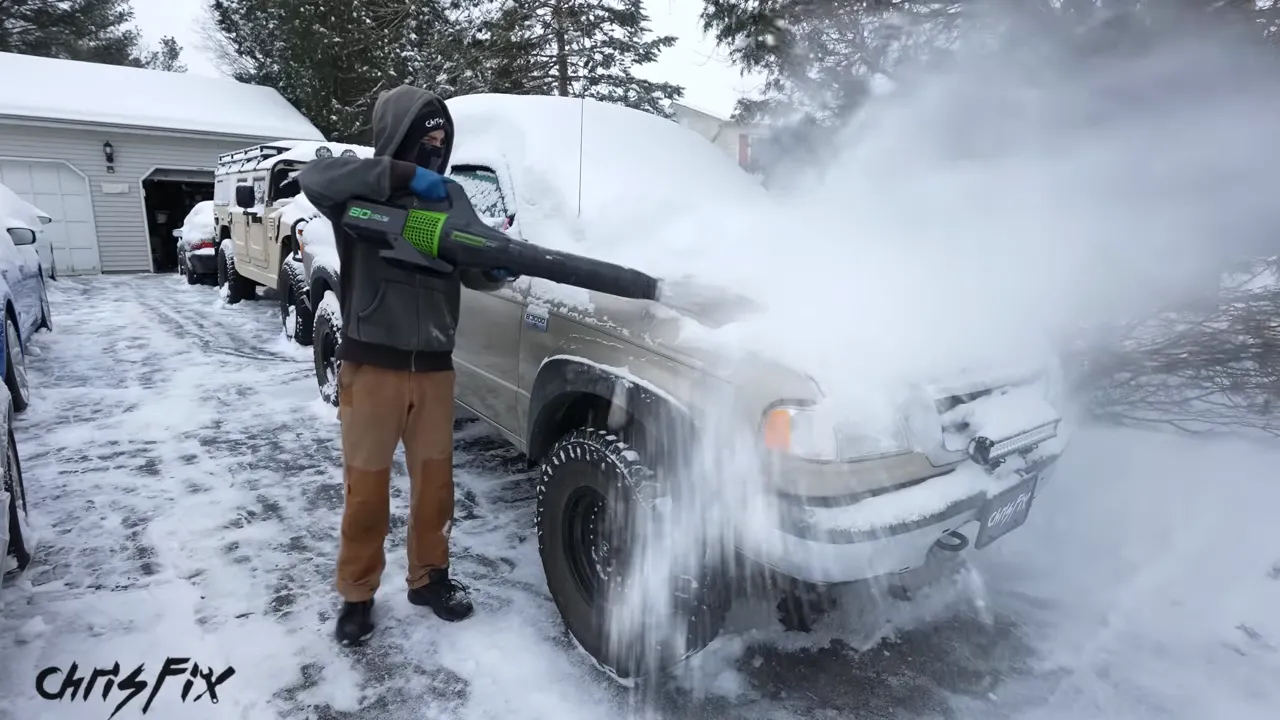
Keep the nozzle safely away from the paint. Touchless removal stops being touchless if you bump the bodywork with the blower.
A blower is especially useful around awkward areas, such as a roof rack, where a brush can struggle to reach. I also used it to clear the truck's bed cover.
If you're planning to use this method, clear the loose snow before warming the vehicle enough to melt it against the body. Once the snow becomes wet or freezes onto the surface, a blower is much less effective.
For heavy snow that won't blow away, switch to the microfiber-covered brush. Then remove the windshield cover and mirror bags, collecting them rather than letting them blow away.
10. Remove Remaining Ice Without Damaging the Car
Even with good preparation, you may still have ice on unprotected windows. The important thing is to use the right tool on the right surface.
Keep the plastic scraper on the windows
Never use an ice scraper on painted panels. An icy hood is still a painted hood, and scraping it can leave serious damage.
Use a clean plastic scraper on the windshield and side-window glass, keeping its edge away from paint and trim. Don't use it on the side mirrors, either. Let those defrost rather than trying to chip the ice away.
A plastic card can work in a pinch
If you're away from home without a scraper, a plastic gift card or similar card can remove a light layer of ice from window glass.
Support most of the card with your hand and use its edge in short strokes. Don't bend it sharply or use a card you can't afford to damage. It isn't as convenient as a proper scraper, but it can get the job done when you're stuck without one.
Never pour boiling water onto frozen glass
Pouring boiling or very hot water directly onto an icy windshield can crack the glass because of the sudden temperature change. Don't do it.
Another method I demonstrated uses water inside a sealed resealable bag, sliding the bag gently over the ice to transfer warmth without pouring water over the car. The same approach can help melt buildup on a window, mirror, or headlight.
A bag does not eliminate thermal-shock risk. If you use this approach, choose lukewarm water rather than hot water, make sure the bag is securely sealed, and avoid sudden heating or pressure, especially on chipped or cracked glass. The vehicle's defroster and a suitable automotive deicer are more controlled options when you're unsure.
Make the Next Snowy Morning Easier
The biggest time-saver is doing the preparation before the storm. Fill the tank, park facing out, top off the washer fluid, treat the seals and latches, and cover the windshield and mirrors.
Afterward, clear a safe path, blow off loose powder where possible, and use a clean microfiber-covered brush gently for the rest. Remove every cover and bag, and make sure the roof, windows, mirrors, and lights are clear before heading out.
That's the goal: less frozen hardware, less scraping, and less risk to your paint. A few simple steps the night before can make a snowy morning a whole lot easier.


