A corroded bathroom faucet and a leaking drain can look like a big plumbing job, but this is a repair you can tackle at home with common hand tools. The key is to shut off the water, keep the sealing surfaces clean, and pay attention to how the gaskets fit.
My old faucet had reached the point where polishing no longer helped. The plating was so thin that cleaning it exposed the metal underneath. The drain was in similar shape, and underneath the sink, water was pouring out around the pivot rod that operated the stopper.
The replacement kit I used cost about $50 and included the faucet, supply hoses, and drain assembly. Compared with the roughly $400 professional replacement estimate I was working with, that meant about $350 saved by doing it myself. Your costs will vary, but this is a rewarding upgrade: you fix the leak and give the sink a cleaner, more modern look.
What You'll Learn
- Shut off both supply valves and verify the water stops before disconnecting any hoses.
- Clean the mounting surface and tighten the faucet evenly so its gasket seats correctly.
- Gasketed supply hose fittings seal without thread tape, and longer hoses need smooth, kink-free loops.
- Align the replacement drain’s overflow opening and test every connection before refilling the cabinet.
Table of Contents
- Tools and Supplies You Need
- 1. Clear the Cabinet and Shut Off the Water
- 2. Disconnect and Remove the Old Faucet
- 3. Clean the Sink and Position the New Faucet
- 4. Install the New Water Supply Lines
- 5. Remove the Old Drain and P-Trap
- 6. Align and Install the New Drain
- 7. Reinstall the P-Trap
- 8. Turn On the Water and Check for Leaks
Tools and Supplies You Need
The two main tools for this installation are an adjustable wrench and large tongue-and-groove pliers. Most of the new connections start by hand, and several only need hand tightening.
- Replacement faucet kit: I used this faucet kit, which included the matching drain and new supply lines.
- Adjustable wrench: For loosening and snugging the water supply connections.
- Large tongue-and-groove pliers: For the old drain’s large mounting nut.
- Plastic scraper and soapy water: For removing old gasket material without scratching the sink.
- Shallow container and towels: For catching water left in the hoses and P-trap.
- Gloves: Especially useful when cleaning the old drain.
- Small mirror and a piece of tape: Helpful for locating and marking the sink’s internal overflow opening.
As an Amazon Associate, I earn from qualifying purchases.
This installation uses a faucet with two mounting shanks and a gasket, plus a push-operated replacement drain. Follow the instructions supplied with your particular kit where its sealing or mounting arrangement differs.
1. Clear the Cabinet and Shut Off the Water
Start by emptying the cabinet underneath the sink. You need enough room to reach the supply valves, faucet mounting nuts, and drain connections.
Locate the hot and cold water shutoff valves on the wall. On the valves used here, turning the handles clockwise closes them. Turn each one until it is snug, but do not force or overtighten it.
Next, open both faucet handles to confirm that the water is off. Do not disconnect the hoses until you have verified that neither side continues supplying water.
Place a shallow container or towel underneath the connections. Even with the valves closed, the supply hoses still contain water, and that water will come out when you loosen them.
2. Disconnect and Remove the Old Faucet
Remove the supply hoses
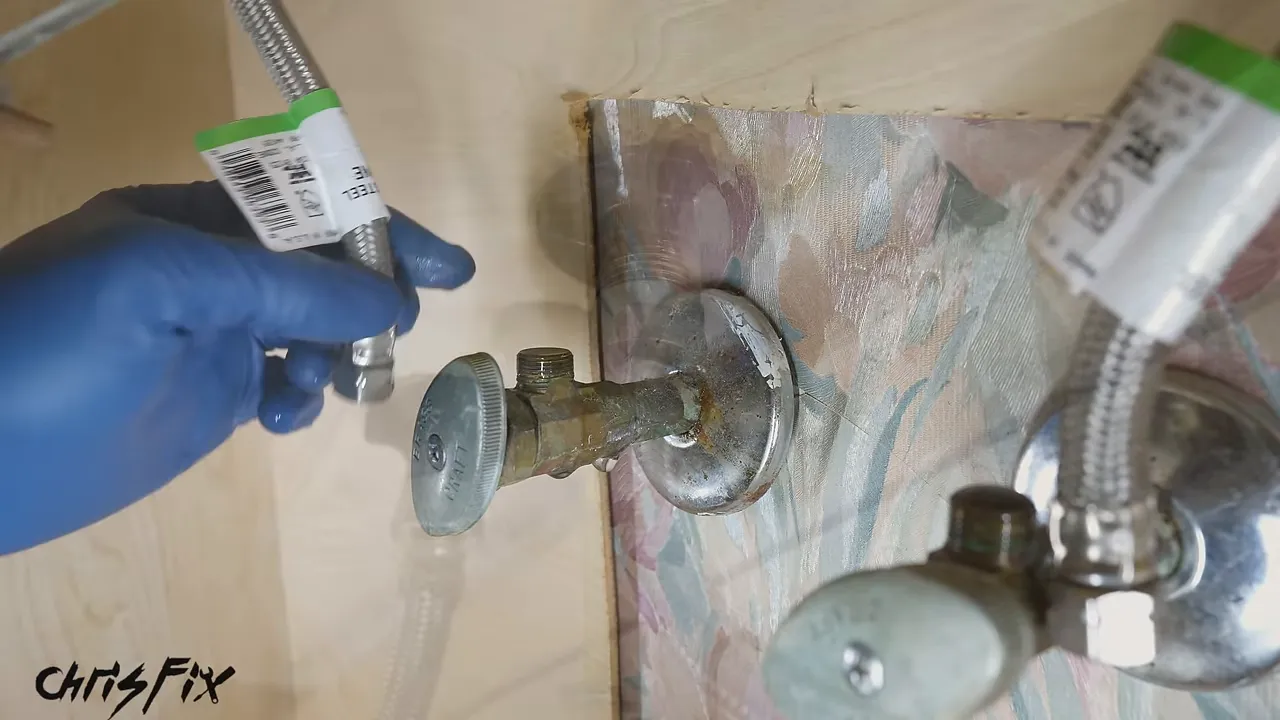
Use an adjustable wrench to break loose the nut connecting one supply hose to its shutoff valve. Once the nut turns freely, unscrew it the rest of the way by hand and let the remaining water drain into your container.
Repeat this on the other supply hose. Move both loose ends aside.
Now reach up to the underside of the faucet. Disconnect each hose from the faucet’s threaded inlet in the same way: loosen it with the wrench, then finish by hand.
Remove the mounting nuts and stopper linkage
The old faucet is held against the sink by two large screw-on mounting nuts. Remove them completely from the threaded faucet shanks.
If the old faucet has a lift rod for the drain stopper, disconnect its clevis strap underneath the sink. That is the linkage connecting the vertical lift rod to the drain’s horizontal pivot rod. Pull the lift rod out through the faucet.
With the hoses, linkage, and both mounting nuts removed, lift the old faucet off the sink.
3. Clean the Sink and Position the New Faucet
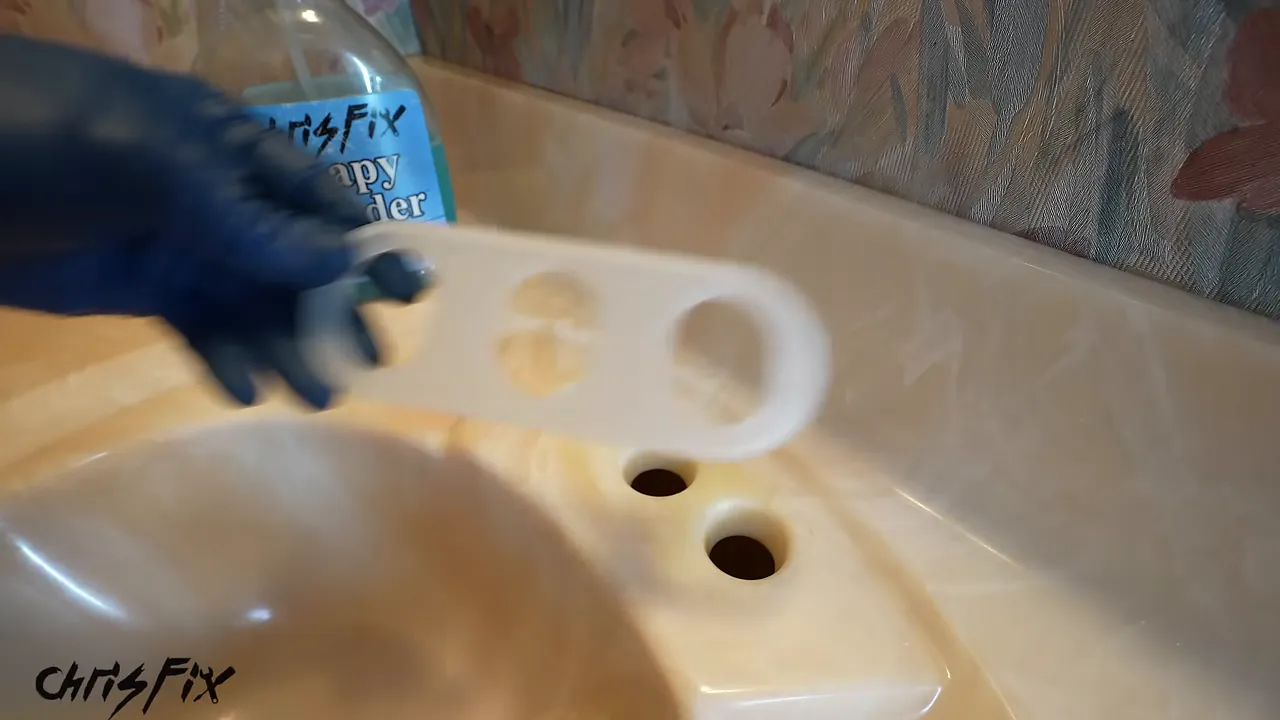
Before installing anything new, remove the old gasket and any material stuck around the mounting holes. A new gasket needs a clean, even surface to sit against.
- Peel away the loose gasket material.
- Spray the stubborn areas with soapy water.
- Use a plastic scraper to lift the remaining residue.
- Wipe the surface clean.
Do not use a metal scraper here. The plastic scraper removes the stuck material without the same risk of scratching the sink.
Lay the new faucet gasket over the mounting holes, then lower the faucet into place. Check the gasket all the way around the base. It should line up evenly rather than sticking out on one side or disappearing underneath the other.
That alignment matters for both appearance and sealing. On this faucet, the supplied gasket seals the base against water getting underneath it.
Secure the faucet evenly
From underneath the sink, thread the new mounting nuts onto the faucet shanks. Tighten both by hand until they are snug.
Work back and forth between the two nuts, tightening each a little at a time. This pulls the faucet down evenly instead of clamping one side completely before the other.
Check the faucet from above. It should be straight, the gasket should sit evenly against the sink, and the faucet should not move when you gently try to shift it.
4. Install the New Water Supply Lines
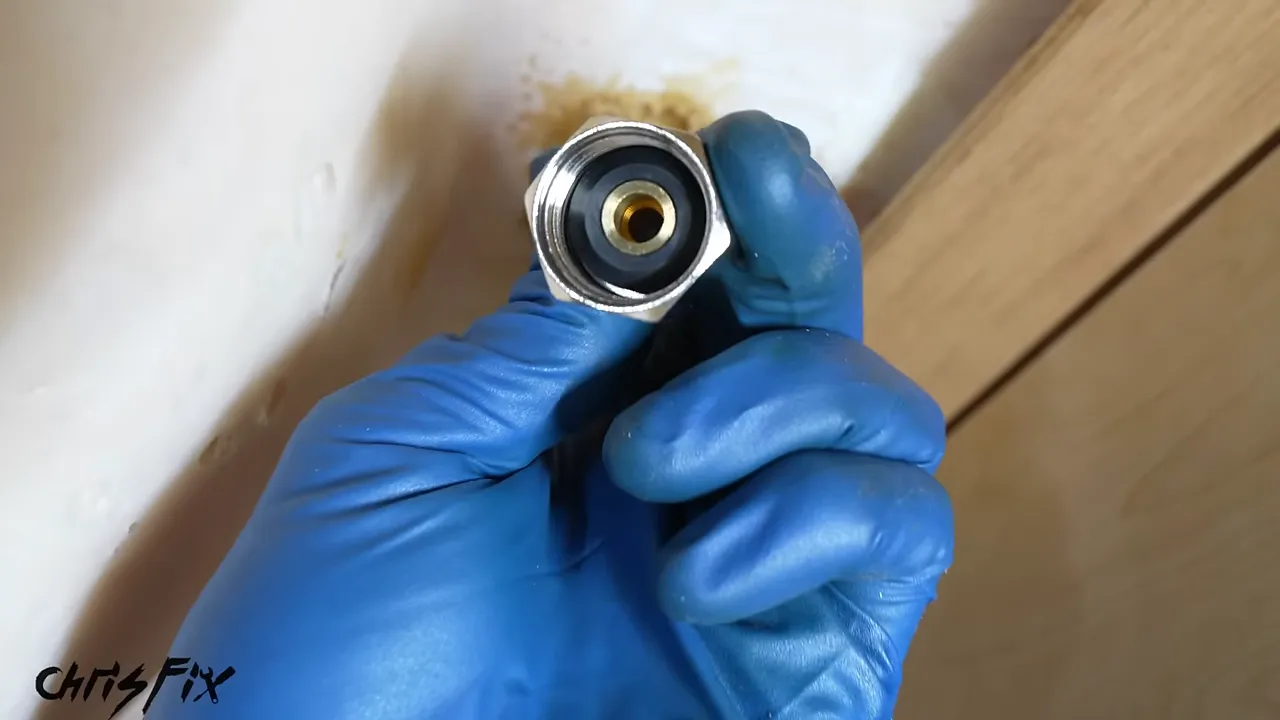
I used the new supply hoses included with the kit so that everything would be new. Before connecting a hose, look inside its fitting. On these hoses, there is a rubber gasket inside the nut.
That gasket makes the seal, not the threads. These gasketed connections do not need thread tape or pipe-sealing compound.
- Thread the cold water hose onto the correct faucet inlet by hand.
- Use the adjustable wrench to snug the nut without overtightening it.
- Route the other end to the cold water shutoff valve.
- Start that connection by hand, then snug it with the wrench.
- Repeat for the hot water hose.
The hoses in this kit are color-coded: blue for cold and red for hot.
If the new hoses are longer than the old ones, route them in smooth loops. Do not force the extra length into a sharp bend or kink.
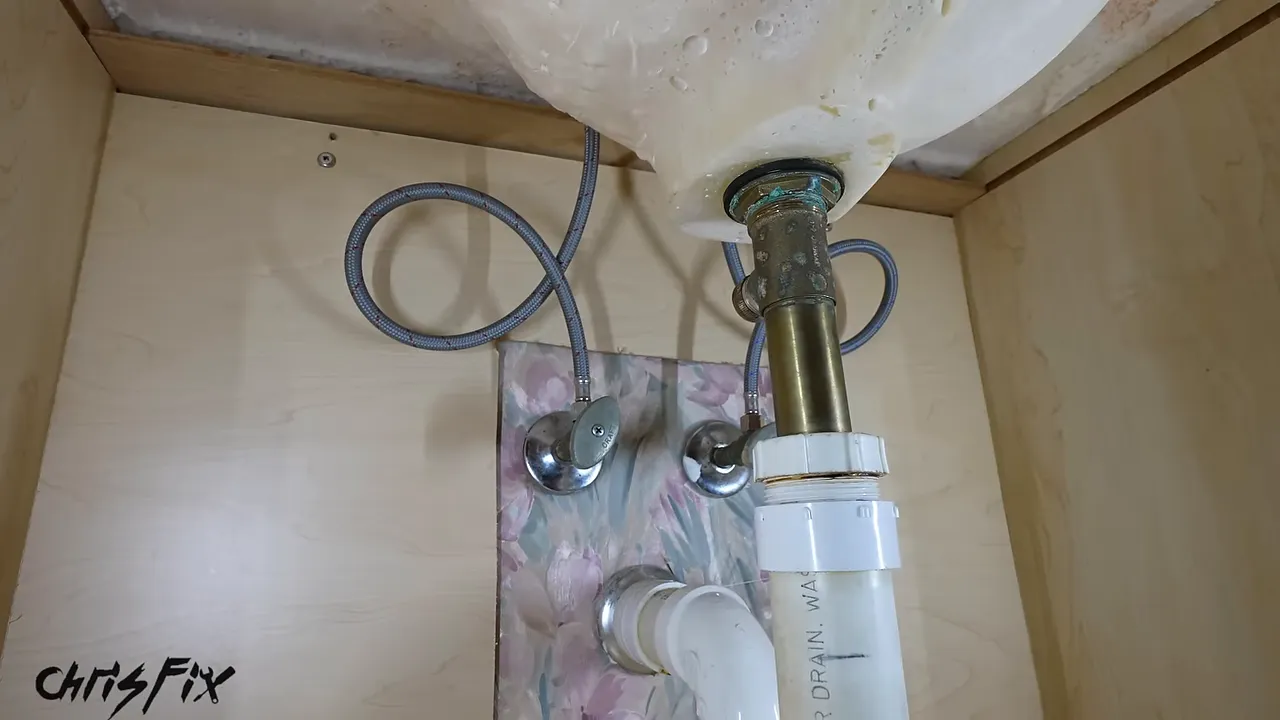
At this point, the faucet is installed. If you are keeping a sound existing drain, you can move on to testing. Mine was leaking badly, so I left the water off and replaced the drain first.
5. Remove the Old Drain and P-Trap
The old drain assembly is held against the underside of the sink by a large mounting nut. Use tongue-and-groove pliers to loosen it. Their wide-opening jaws make them useful for a fastener this size.
Once that nut is loose, the drain can move, but the P-trap still needs to come off before you can remove the assembly.
- Place a catch container directly underneath the P-trap.
- Loosen the upper slip nut where the trap connects to the drain tailpiece.
- Loosen the rear slip nut where the trap connects toward the wall.
- Carefully pull the trap free and empty its water into the container.
Why the P-trap matters
The curved section underneath the sink holds water. That standing water creates a barrier that helps stop sewer gases from coming back through the drain and into the house.
It is also a common place for hair and debris to collect. If a sink drains slowly, removing and cleaning the P-trap is a useful place to check before assuming the blockage is farther down the drain line. Mine was already clean, so I could reuse it.
Separate the drain body from the flange
Slide the loose slip nut off the old drain tailpiece. Then unscrew the lower drain body from the flange sitting inside the sink.
If both pieces spin together, hold the old flange stationary from above while turning the drain body below. I used pliers pressed into the old drain opening to provide resistance.
Once the pieces separate, remove them and clean the accumulated gunk from the sink’s drain opening. This is where those gloves really come in handy.
6. Align and Install the New Drain
Locate the overflow passage
The overflow opening near the upper part of the basin connects through an internal passage to the main drain opening. The new drain used here has a side opening that must line up with that passage.
With the old drain removed, locate where the overflow passage enters the drain opening. A small mirror makes it easier to see. I marked that direction with a piece of tape on the basin so I could keep track of it while lowering the new drain into place.
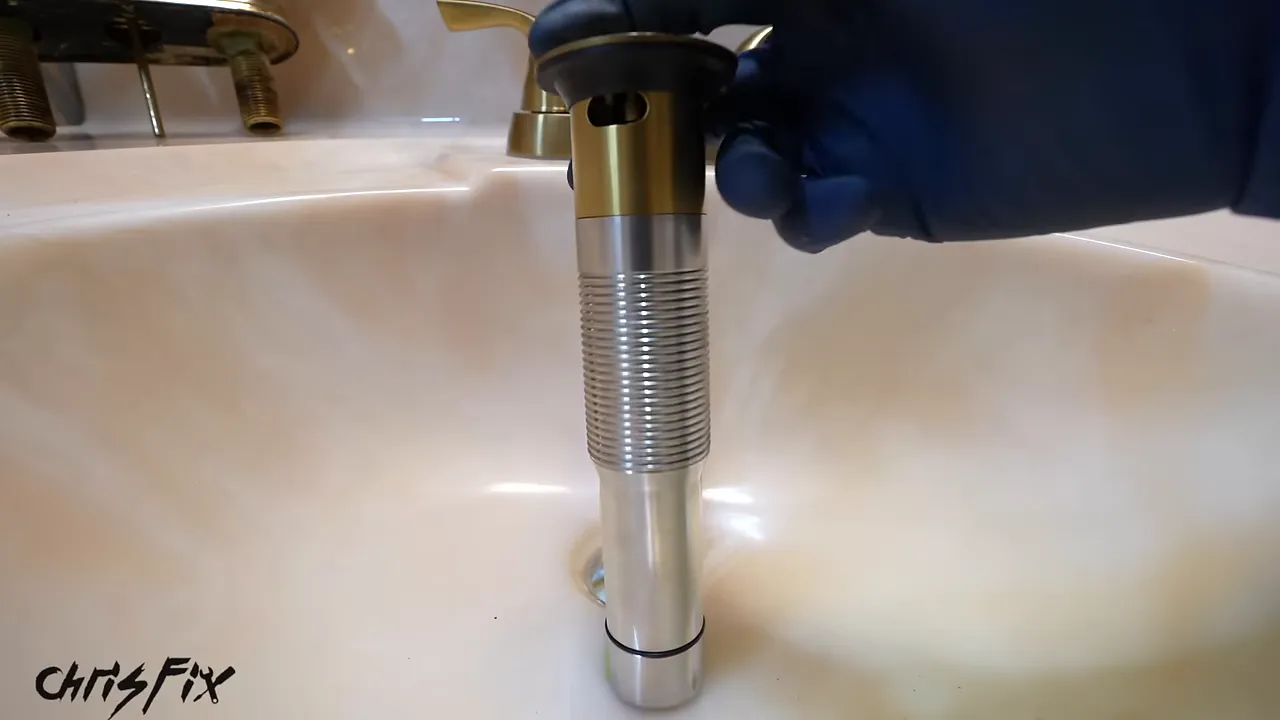
Lower the new drain through the sink while keeping its side opening pointed toward the overflow passage. Do not assume every drain has the same arrangement. Use the orientation specified for your replacement.
Fit the lower gasket and mounting nut
Underneath the sink, slide the new rubber gasket up the drain body. On this kit, the wider end of the gasket faces upward against the sink.
Thread the mounting nut onto the drain body and tighten it snugly against the gasket. This particular assembly only calls for hand tightening. Keep the drain aligned as you secure it.
7. Reinstall the P-Trap
Slide the upper slip nut onto the new drain tailpiece first, followed by its sealing washer.
Washer direction matters. On the washer used here, the flat side faces upward against the nut, and the curved or tapered side faces down toward the trap connection.
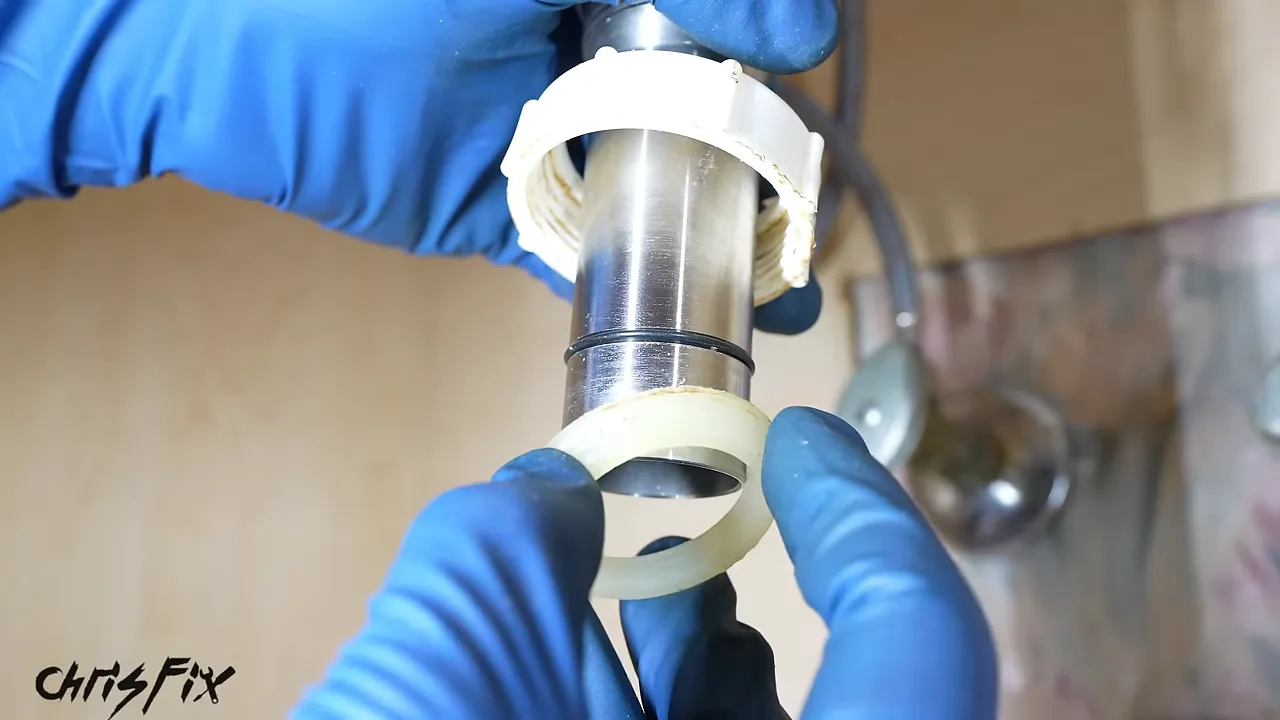
Lift the P-trap into position so it connects to both the new tailpiece and the existing pipe toward the wall. Tighten the rear slip nut until snug, then tighten the upper slip nut.
Make sure the washer seats properly as the upper nut tightens. The washer seals the joint, so correct placement is more important than simply tightening harder.
8. Turn On the Water and Check for Leaks
With the faucet, supply hoses, drain, and P-trap connected, reopen the cold and hot water shutoff valves.
Place a dry paper towel underneath the plumbing. It makes small drips much easier to spot than looking at the cabinet floor alone.
- Run the hot water. Check that it flows normally.
- Run the cold water. Confirm that side works too.
- Close the stopper. Let some water collect in the basin to check its operation.
- Open the stopper. Make sure the water drains away.
- Inspect underneath. Check the supply connections, drain mounting area, both P-trap joints, and the paper towel for moisture.
My finished installation did not leave a single drip on the towel. That is the result you want before putting everything back in the cabinet. For broader household leak checks, the EPA’s WaterSense leak resources are a useful reference.
And that is the job: the old corroded faucet is gone, the leaking drain is replaced, and the sink looks much better. With a couple of hand tools and careful attention to the seals, this is a satisfying repair you can be proud of every time you use the sink.


