Old, yellow headlights can look a whole lot better with something you probably already have at home: toothpaste. With the right type of paste, some scrubbing, and a coat of wax afterward, you can improve the clarity of an oxidized headlight without buying a restoration kit.
The important part is figuring out where the yellowing is. This method works on the outside of the lens, not discoloration inside the headlight. Here is how to check your headlights and work through the process by hand.
First, Check Whether Toothpaste Will Help
Run your fingers across the outside of the headlight. On the headlight I restored, the surface felt rough and pitted rather than smooth. It also had visible spots and yellowing on the outside. That surface damage is what we are trying to polish away.
My truck has a different problem. Its headlight looks yellow, but the outside feels smooth and relatively clean. The discoloration is inside, so rubbing toothpaste onto the exterior would not fix it.
- Rough, hazy, yellow exterior: This is the type of surface this method can help improve.
- Smooth exterior with yellowing inside: Exterior polishing will not reach the problem.
- Uncertain condition: Clearing the exterior may make it easier to tell whether there is also an issue inside.
What You Need
- Regular toothpaste with a gritty texture, not a gel
- Baking soda, if your toothpaste does not have much grit
- A toothbrush for working the paste into the lens
- A spray bottle filled with warm water
- Paper towels, including clean ones for the final wipe
- Automotive wax for the finishing step
I used a baking soda and peroxide whitening toothpaste. The key feature here is its gritty texture, which lets it act as a mild polishing abrasive. If your toothpaste is not gritty, you can mix in some baking soda.
This is a low-cost approach, especially if you already have the supplies. When I did this repair, the toothpaste cost about a dollar compared with roughly $15 to $20 for a headlight restoration kit. Those are example costs, not current price guarantees.
1. Spread Toothpaste Across the Headlight
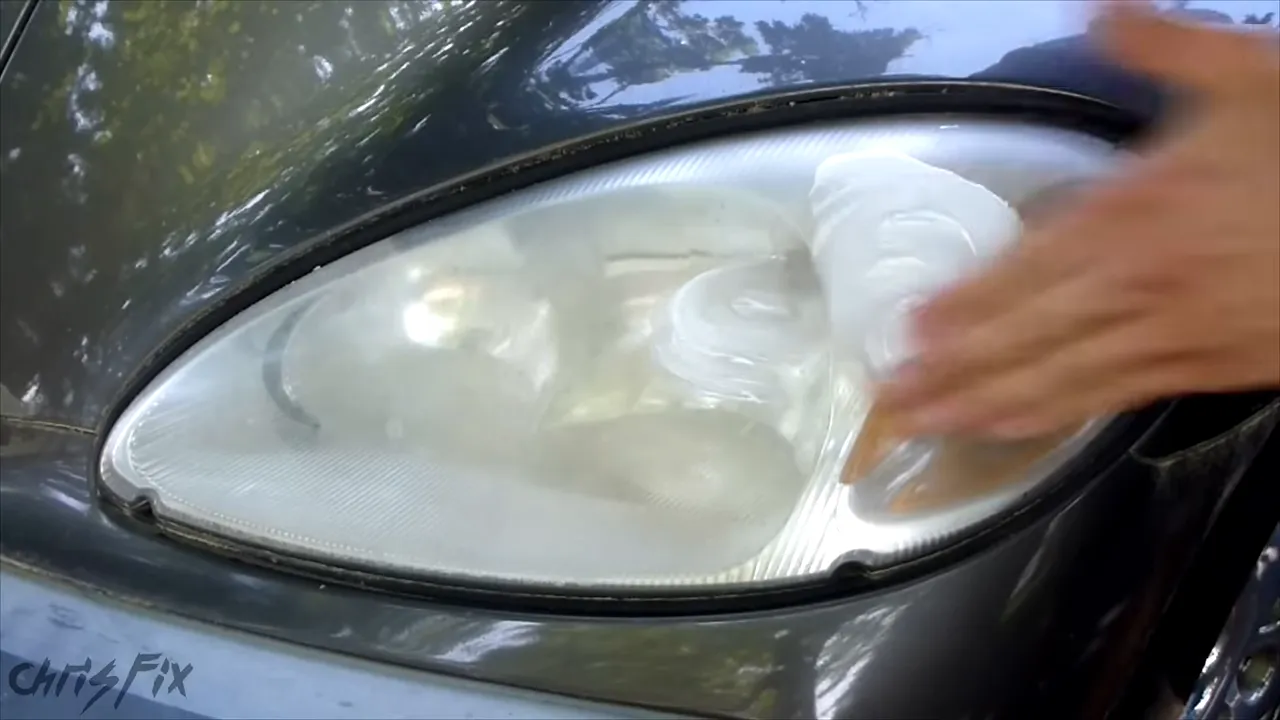
Apply a generous amount of toothpaste and rub it over the entire outside surface of the lens. Work it in thoroughly rather than just leaving a thin dab in the middle.
Make sure you cover the edges and the curved areas, too. You want to work on the whole hazy surface, not just the easiest section to reach.
2. Scrub the Lens Thoroughly
Use the toothbrush to work the toothpaste into the surface. This is the part that takes some effort. As I scrubbed, the white paste became yellowish and the toothbrush picked up dirty residue. That is a useful sign that material is coming off the surface, although the real test comes after rinsing.
The older, yellower, and hazier the headlight is, the more scrubbing it may need. A single application can make a noticeable difference, but a more weathered lens may need a second round.
And no, you do not need dental floss. The toothbrush is far enough into the bathroom supplies for this job.
Optional: Using a Rotary Tool
A Dremel or similar rotary tool with a small buffing wheel is another way to work the toothpaste into the lens. It may speed up the polishing, but it is not necessary. I completed this headlight by hand.
If you use a rotary tool, keep it on a low-speed setting. Spinning the wheel too fast can generate enough heat to melt the plastic. Faster is not better here.
3. Spray, Wipe, and Remove All the Paste
Spray the headlight with warm water, then use a paper towel to wipe away the toothpaste. Apply firm pressure as you buff off the residue.
Once most of the paste is gone, switch to a clean paper towel and give the lens a final wash and wipe. Remove the toothpaste completely before judging the result or moving on to wax.
If the exterior still looks hazy, another application may improve it further. Repeat the same process rather than expecting one quick pass to clear every headlight.
4. Finish With Wax
After cleaning off all the toothpaste, apply automotive wax to the lens and buff it off. This adds a protective layer intended to help slow the return of yellowing and keep the surface looking clearer.
Treat the wax as a finishing step, not a promise that the headlight will stay clear permanently. The result and how long it lasts depend on the condition of the lens.
The Result After One Application
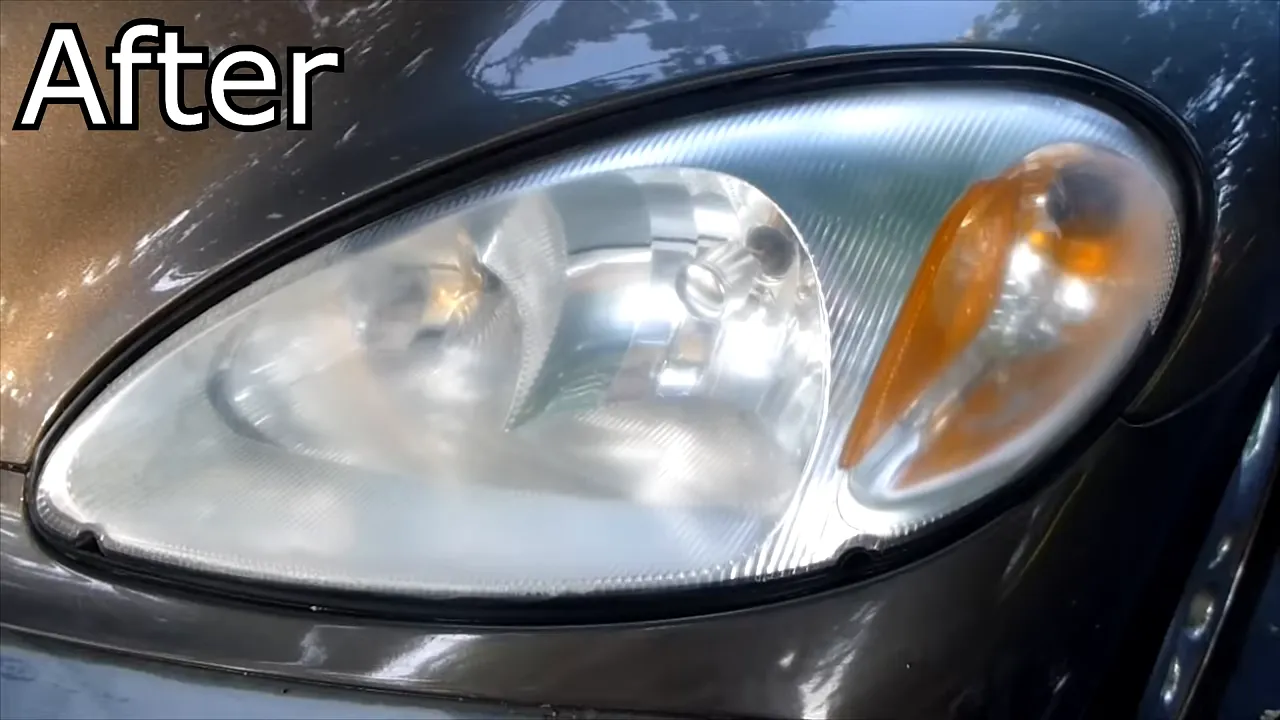
On this headlight, one application of toothpaste followed by wax made a clear visual difference. The yellow haze was reduced, and the reflectors behind the lens became much easier to see. It was not necessary to use a powered buffer to get that improvement.
If toothpaste does not get your exterior haze clear enough, my alternative headlight restoration method covers another approach. Just remember the first check: if the discoloration is inside the assembly, more exterior scrubbing will not solve it.
For rough, externally yellowed headlights, this is a simple, inexpensive method worth trying. Choose gritty toothpaste, work it in thoroughly, clean it off completely, and finish with protection.


