How much weight is hiding inside a car’s interior? A lot more than you might think. Seats are an obvious place to start, but carpet, plastic trim, sound deadening, and even the fasteners holding everything together add up quickly.
I’m turning this BMW E46 330xi into an endurance race car for a 16-hour race. Removing weight means less mass to accelerate, slow down, and carry through every corner. The interior also needs to be gutted so the cage builder can fit and weld in the roll cage.
Rather than just pile parts on the driveway and guess at the improvement, I measured the car’s weight and tested its acceleration and braking before and after. The result? The BMW went from 3,370 pounds to 2,940 pounds, and its best 0 to 60 mph time dropped below six seconds.
Here’s where that weight came from, how I removed it, and what actually changed at the track.
Key Takeaways
- Interior stripping reduced this BMW’s measured weight from 3,370 pounds to 2,940 pounds before cage installation.
- Factory seats provided the biggest single interior reduction, weighing 180 pounds before adding a racing seat.
- Dry ice made bonded sound deadening brittle enough to remove in chunks.
- The best 0 to 60 mph time improved from 6.79 seconds to 5.97 seconds.
Table of Contents
- Establishing the Baseline: Weight, Acceleration, and Braking
- 1. Removing the Factory Seats: 180 Pounds Out
- 2. Gutting the Trunk and Fitting a Lighter Battery
- 3. Removing Interior Plastic, Seat Belts, and the Center Console
- 4. Removing the Carpet: Another 45 Pounds
- 5. Removing Bonded Sound Deadening with Dry Ice
- 6. Removing the Headliner and Sunroof
- 7. Stripping Major Dashboard Components
- The Final Weight and What Stayed in the Car
- Did Removing 430 Pounds Make the BMW Faster?
- The Big Lesson: Small Parts Add Up
Establishing the Baseline: Weight, Acceleration, and Braking
This is an all-wheel-drive 330xi with about 250,000 miles on it. Before taking anything apart, I brought it to the track to establish a repeatable baseline.
For each acceleration run, I lined up in the same spot and launched at 4,500 rpm. The all-wheel-drive system made the launches pretty easy to repeat, and a GPS performance meter recorded the results:
- Run 1: 6.79 seconds from 0 to 60 mph.
- Run 2: 6.88 seconds.
- Run 3: 6.83 seconds.
All three runs landed right around 6.8 seconds. For a car with this many miles, that absolutely exceeded my expectations.
Braking was a different story. I accelerated to 60 mph, held that speed until the cones, and then braked hard, using the GPS to measure the stopping distance. The car consistently needed about 170 feet to stop from 60 mph.
Consistent is good for comparison, but that distance was not good. The old brakes and tires were possible contributors, and both were on the replacement list before the race. For this test, though, I wanted to see what happened after removing weight.
Back home, I carefully lowered each tire onto a pad from the four-wheel race scale set. With about a quarter tank of fuel, the starting weight was 3,370 pounds. My goal was to get below 3,000 pounds.
1. Removing the Factory Seats: 180 Pounds Out
The seats were the first big target, and man oh man, these things were heavy.
This is a dedicated race-car conversion, not a recommendation to strip safety equipment from a street car. Seat wiring, belt pretensioners, and airbags require the appropriate service procedures. Disconnect the battery and follow the manufacturer’s restraint-system precautions before working on those components.
Removing the Front Seats
Each front seat has four main mounting fasteners: two at the front and two at the rear. The basic removal sequence on this E46 was:
- Slide the seat all the way back to expose and remove the two front nuts.
- Move the seat forward to reach and remove the rear bolts.
- Lift the seat enough to access the bolt attaching the seat belt to it.
- Tilt the seat to reach the electrical connector underneath.
- Release the connector, check that everything is disconnected, and carefully lift the seat out.
Plan your seat position before disconnecting power if you need the electric adjustment to expose the fasteners. These seats are awkward as well as heavy, so protect the surrounding trim as you move them through the door opening.
Removing the Rear Seats
The lower rear cushion pops up and out. The two side bolsters also release separately. To remove the folding backrests, fold them forward, remove the center fastener holding the two sections together, and lift each section out.
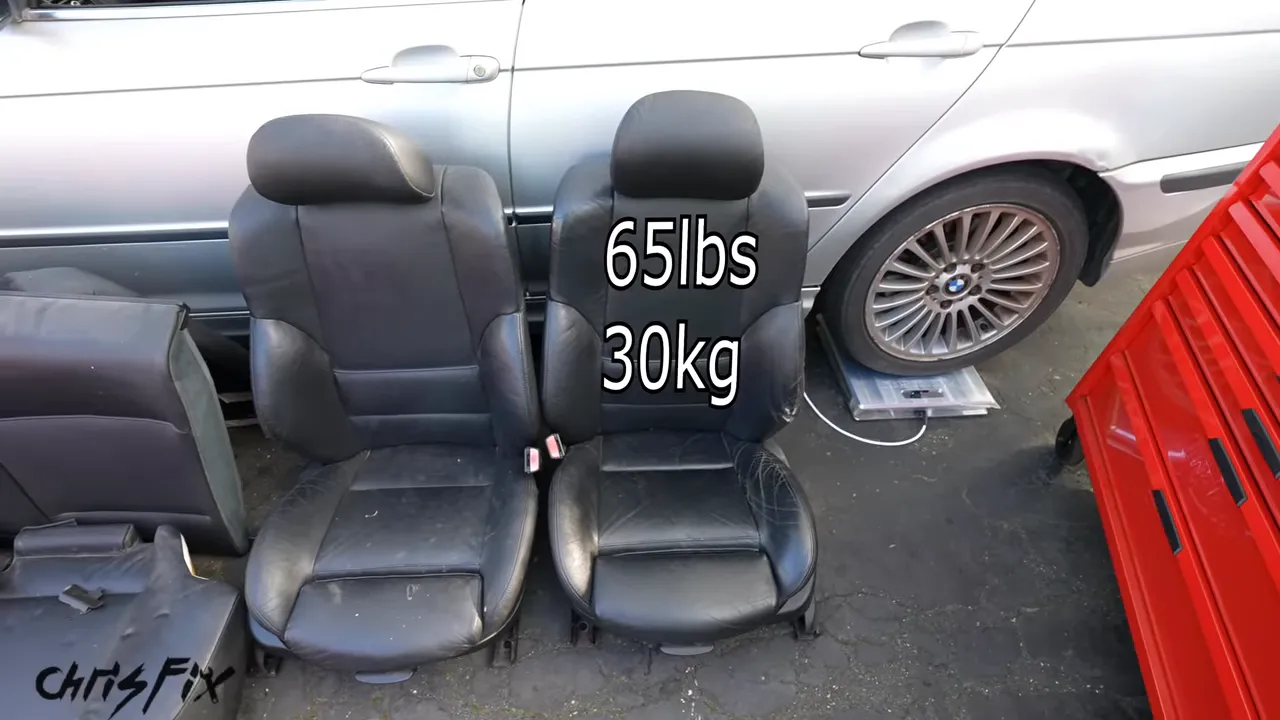
Here’s what the complete factory seating weighed:
- Driver’s seat: 65 pounds.
- Passenger seat: 65 pounds.
- Rear seating: 50 pounds.
- Total removed: 180 pounds.
Factory seats contain substantial structure, adjustment hardware, and, depending on the design, motors and restraint components. Comfort and safety equipment bring weight with them.
With all the seats out, the car weighed 3,190 pounds. Of course, I still needed somewhere to sit. The replacement racing seat and its brackets weighed about 30 pounds, so that weight would go back into the car before the final test.
2. Gutting the Trunk and Fitting a Lighter Battery
There was plenty of junk in this trunk, but first I dealt with the battery. When disconnecting a battery, remove the negative terminal first, followed by the positive.
The original BMW battery weighed over 45 pounds. It still worked, so I sold it and picked up a used Prius auxiliary battery from a junkyard for $25. That replacement weighed about 25 pounds, saving roughly 20 pounds.
For this stripped-down race-car setup, the smaller battery worked because I was removing most of the accessory electronics. That doesn’t make it a universal battery recommendation for every E46 or every climate.
Next came the removable trunk contents:
- Loose belongings and supplies.
- The wooden trunk floor panel.
- The spare tire and jack.
- Plastic trim and carpeted liners.
- Accessible loose insulation and sound deadening.
- The factory audio amplifier.
- The trim on the underside of the trunk lid.
The amplifier was worth keeping with the Harman Kardon audio components to sell. It also weighed around five pounds. That’s a nice combination: lose weight and recover some of the project’s cost.
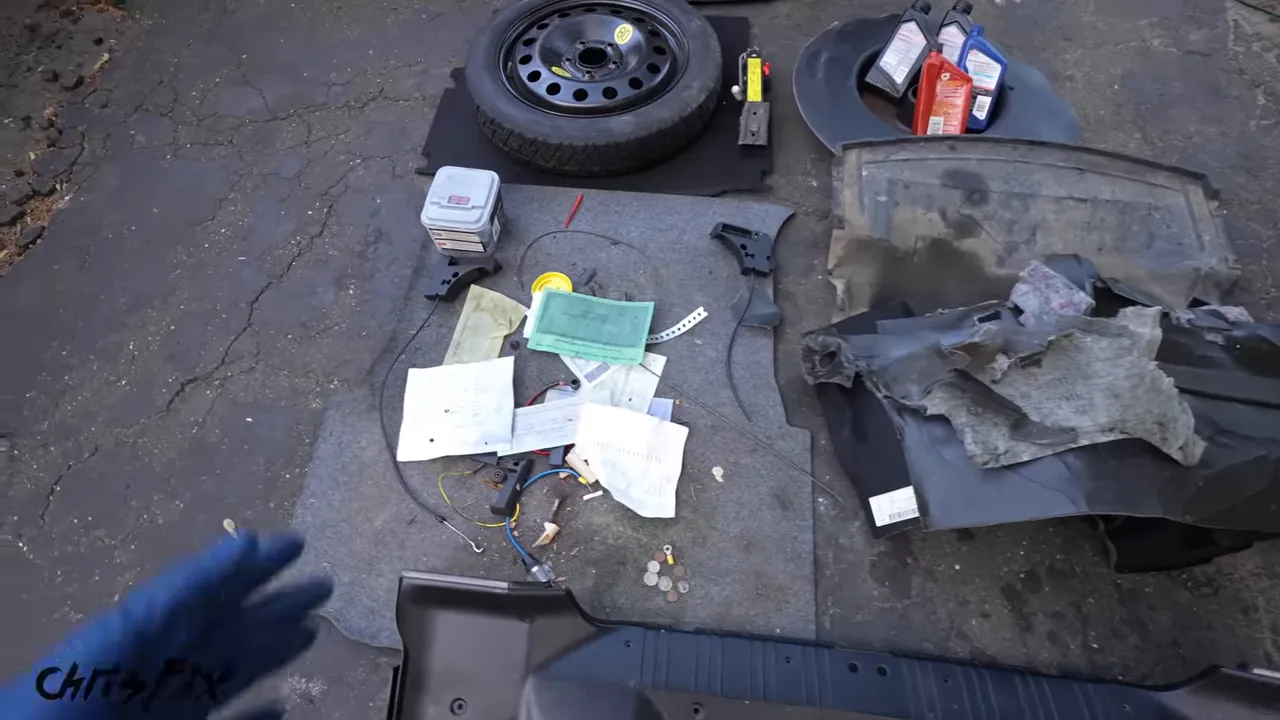
The trunk contents and trim removed in this stage weighed about 75 pounds, separate from the battery weight reduction. Roughly 25 pounds came from liners, plastics, carpet, and some insulation. About 50 pounds came from the spare, tools, fluids, and other contents.
And yes, there was extra oil in there. It is a BMW, after all.
I left the bonded sound deadening in the spare-tire well for later so I could tackle it with the rest of the cabin’s sound deadening.
3. Removing Interior Plastic, Seat Belts, and the Center Console
A single piece of plastic trim doesn’t feel like much. An entire interior’s worth is a different story.
I started at the front pillars and worked toward the rear. On this car, the A-pillar trim has three Torx screws. Other pieces, such as the door-sill trim and lower dashboard panels, use clips.
Find the screws and understand the clip direction before pulling. For the clip-in pieces here, a short, firm pull released them more effectively than slowly bending the plastic. That does not mean every panel should be yanked without checking how it attaches.
One small detail matters near the driver’s footwell: I temporarily removed the hood-release handle to get the surrounding trim off, then reinstalled the handle. I still needed to open the hood.
Working Through the Rear Cabin
The B-pillar covers exposed the seat-belt hardware. At the rear, I disconnected the lights in the C-pillar trim before removing those panels.
The rear deck needed a little more disassembly:
- Pop off the speaker covers.
- Remove the three screws securing each rear speaker assembly.
- Disconnect the speaker wiring and remove the speakers and their trim.
- Lift out the rear deck panel.
- Remove the rear belt hardware, remaining trim, insulation, and loose sound deadening.
The wiring to these rear speakers was already disconnected, which fit right in with some of the questionable wiring I found in the trunk. Rather than start cutting things, I left the main wiring alone for now.
Removing the E46 Center Console
The center console was in good condition, so I wanted it out without damage. Selling usable interior pieces helps offset the cost of the car.
- Remove the rear tray and disconnect its wiring.
- Remove the two screws underneath and lift away the rear trim section.
- Pop up the leather shift boot.
- Remove the two screws securing the shifter trim.
- Move that trim aside to reach the additional console screws.
- Lift the console, disconnect the hazard-switch harness, and remove it.
- Remove the two bolts securing the armrest assembly and lift it out.
After removing the armrest, I tightened the shared hardware back down so the parking-brake assembly remained secured. Removing a component shouldn’t leave something you still need loose.
This entire stage removed about 50 pounds. Approximately half was plastic trim, including a center console weighing roughly 8 to 10 pounds. The other half came from belt assemblies, pretensioners, speakers, and the rear-deck insulation and sound deadening.
The scale now read 3,043 pounds. That 3,000-pound goal was getting close.
4. Removing the Carpet: Another 45 Pounds
I expected the carpet to weigh something. I did not expect it to weigh this much.
With the seats and console gone, the main obstacles were the accelerator pedal, its bracket, and the remaining carpet fasteners.
- Release the locking tab at the accelerator pedal’s base and slide the pedal off its mount.
- Disconnect the pedal’s electrical connector.
- Remove the upper bolt and carefully release the lower attachment on its mounting bracket.
- Remove the remaining screw-in and plastic carpet fasteners.
- Make the shallow cuts needed to free the carpet from beneath the dashboard area.
- Lift out the front and rear carpet sections, along with the foam blocks underneath.
- Remove the rear floor vent that is no longer needed for this build.
Be especially careful when cutting carpet: wiring runs underneath it. Cut only as deeply as necessary, and don’t blindly push a blade through the floor covering.
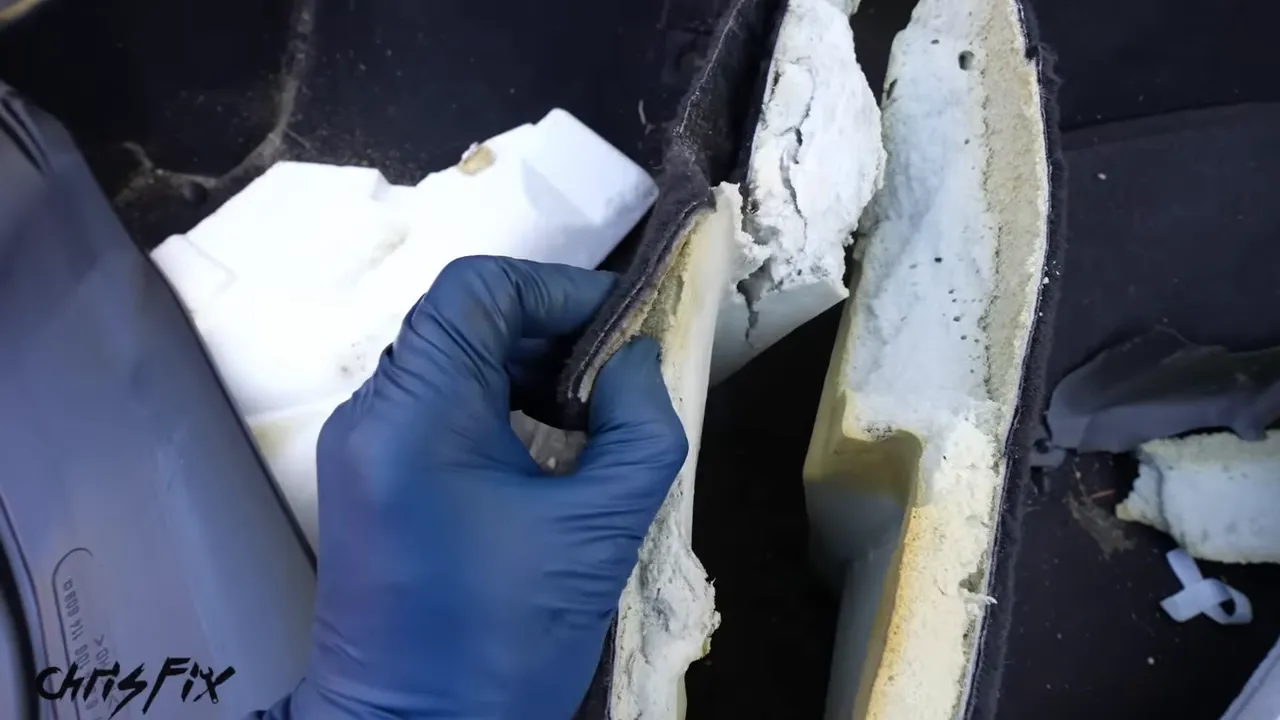
The carpeting and associated material removed here weighed about 45 pounds. Look at that thick backing and insulation, and it starts to make sense.
That brought the BMW below 3,000 pounds. Goal reached, but there was still plenty left to remove.
5. Removing Bonded Sound Deadening with Dry Ice
Under the carpet, darker sections of the floor were covered in factory sound deadening. This tar-like material was bonded tightly to the metal.
Removing it wasn’t just about weight. The cage builder needed bare metal at the weld locations, and combustible material needed to be out of the way.
The trick was dry ice. Cooling the material makes it brittle enough to break away in chunks instead of fighting it with a scraper the whole time.
Dry Ice Safety Comes First
Dry ice is solid carbon dioxide. As it turns into gas, carbon dioxide can accumulate and displace breathable air. Never do this inside a closed vehicle or an inadequately ventilated space. I opened all the doors and windows and worked with plenty of airflow.
Use insulated gloves suitable for handling dry ice to protect against cold burns. Thin disposable mechanic’s gloves are not a substitute for proper cold protection.
The Removal Process
- Cover a section completely. Spread a layer of dry ice over the bonded sound deadening.
- Cover the dry ice with aluminum foil. This helps keep the section cold while it sits.
- Wait about 10 to 20 minutes. Around 15 minutes worked for the first section.
- Tap the frozen material with a rubber or plastic mallet. It should crack and separate in chunks.
- Lift out the pieces. Use a scraper where necessary, especially around seams.
- Vacuum the remaining debris and move to the next section.
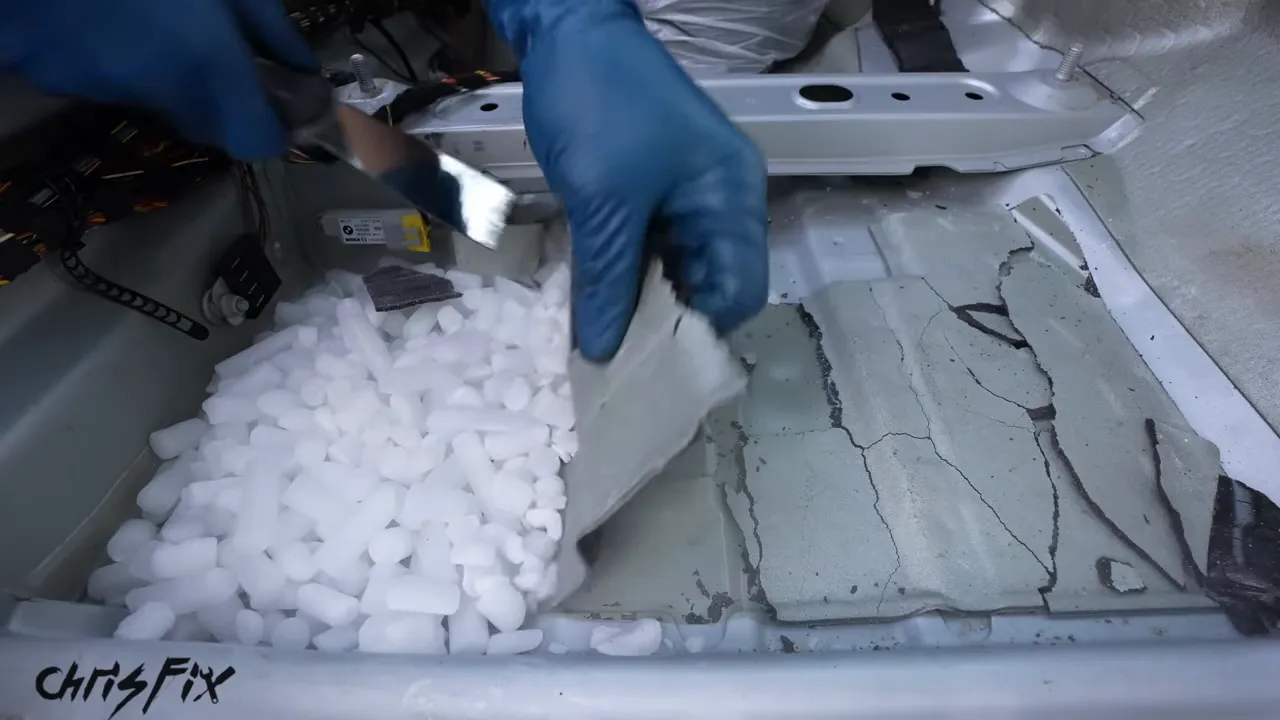
If the material stays flexible and fights the scraper, give it more time to cool. Let the dry ice do the hard work.
The stubborn areas were near the seam sealer, where the material needed more scraping even after freezing.
I started with 30 pounds of dry ice and removed most of the sound deadening throughout the cabin and trunk. I ran out before finishing two remaining areas, but those weren’t in the way of the cage installation, so they could wait.
This stage removed about 25 pounds, bringing the scale reading to 2,973 pounds. Including the material still left, I estimated roughly 30 pounds of bonded sound deadening in total.
6. Removing the Headliner and Sunroof
Weight at the top of the car is particularly worth looking at. Removing it helps lower the center of gravity, and the sunroof combines glass, metal, and a motor right above your head.
Removing the Headliner
I worked from the front toward the rear, removing everything that retained the headliner:
- Sun visors and their electrical connectors.
- Visor clips, including the screws hidden beneath their covers.
- Interior lights and the sunroof-control panel.
- The front headliner retaining screw.
- Grab handles along both sides.
- The third brake-light cover and rear plastic fastener.
- The motion sensor and its connector.
- The trim around the sunroof opening.
Once those parts were free, the headliner could come out through the door. Handle it gently if you want to reuse, recover, or sell it. It’s a large, easily creased panel, not something you can fold up and expect to look right afterward.
Removing the Sunroof Assembly
With the headliner out, the complete sunroof assembly was accessible. On this E46, I removed five front bolts, disconnected the corner drain tubes, and removed four bolts along each side.
Support the assembly before removing the final bolts. A helper is useful here. The sunroof is heavy and cumbersome, and letting it fall can damage the car or injure you.
A useful troubleshooting detail while you’re here: those corner tubes drain rainwater away from the sunroof. If a car has wet carpets or a damp roof area, clogged sunroof drains are worth checking.
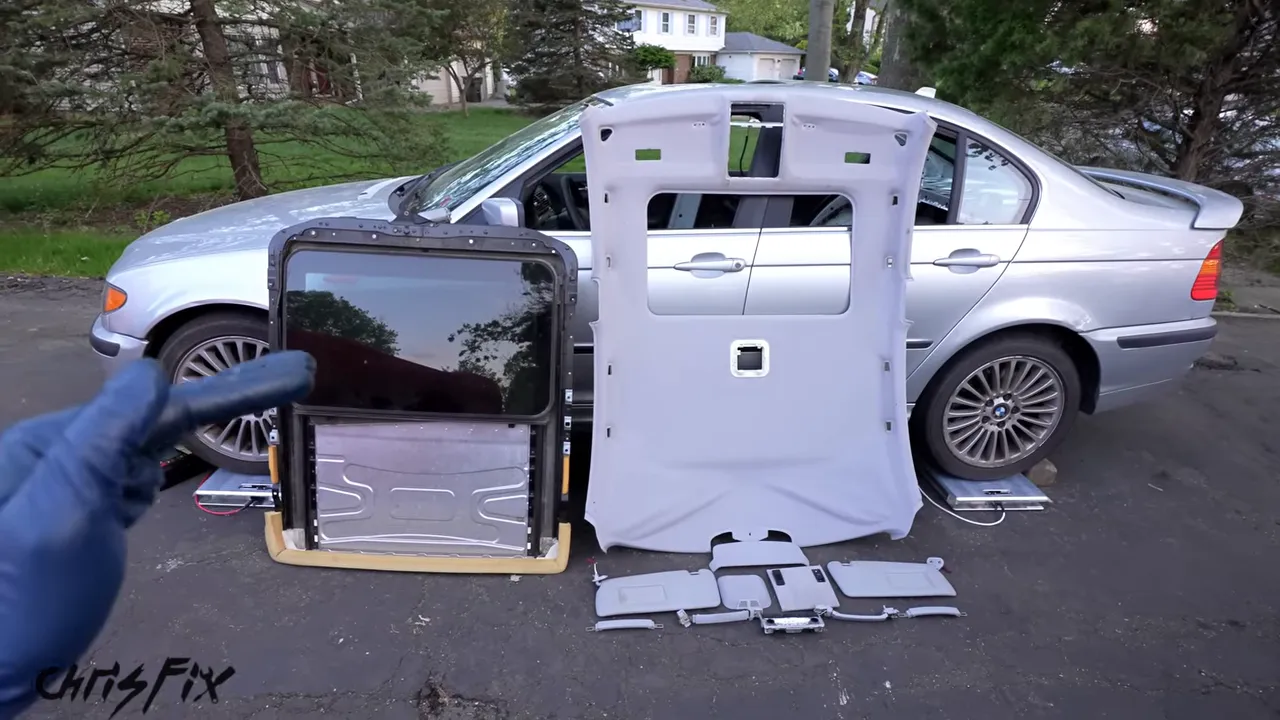
The roof components came to about 40 pounds: roughly 8 pounds for the headliner and related pieces, and 32 pounds for the sunroof assembly.
For this race-car build, removing the glass also eliminated the concern of sunroof glass breaking into the cabin during a rollover. But it left a rather obvious problem: a big hole in the roof.
Installing the Sunroof Delete Panel
I used a lightweight fiberglass sunroof delete panel weighing about two pounds.
- Apply a continuous bead of adhesive sealant around the panel’s perimeter, with no gaps.
- Thoroughly clean the roof’s mating surface with a suitable solvent, such as alcohol, to remove dirt and grease.
- Carefully seat the panel in the opening.
- Secure it using the mounting hardware specified for the kit. This panel reused the factory bolts.
- Use large washers at the fiberglass mounting points to spread the load and help prevent cracking.
The sealant needs to form a continuous water barrier, not just a few isolated blobs around the edge.
After adding the two-pound panel, the net roof weight reduction was about 38 pounds. That’s a substantial amount of weight removed from the highest part of the car.
7. Stripping Major Dashboard Components
The dashboard was the last major area. I didn’t completely remove the dash shell at this stage. Instead, I removed components and prepared it to come out for the cage builder.
Again, airbag work requires the manufacturer’s restraint-system procedures, not just unplugging whatever connector is nearby. For road vehicles, airbags are part of the occupant-protection system, as explained in NHTSA’s airbag safety guidance. This removal was part of a dedicated race-car conversion.
I carefully removed the wood trim because it was another part I could sell. Behind the passenger-side trim, two screws held the vent in place. With the vent and airbag cover out of the way, the passenger airbag’s four mounting bolts were accessible.
Then I worked through the center stack:
- Remove the trim above the radio.
- Remove the radio’s two screws, slide it out, and release the harness locking clip.
- Pull out the climate-control unit and disconnect its rear connectors.
- Remove the storage tray below it.
- Remove the shift knob and shifter surround to access the ashtray fasteners.
- Remove the ashtray assembly.
I put the lightweight shifter bezel back because it still held the window switches neatly.
These dashboard components removed another 15 pounds. I left the glove box temporarily because it held paperwork needed while transporting the car. The factory steering wheel also stayed for testing and loading the car onto the trailer.
At that point, the dashboard was prepared for removal at its four main mounting nuts. Lowering the steering wheel would provide the clearance needed to pull it out for cage work.
The Final Weight and What Stayed in the Car
With the racing seat installed, the final scale reading was 2,940 pounds.
- Starting weight: 3,370 pounds.
- Final weight: 2,940 pounds.
- Measured reduction: 430 pounds, or about 12.8% of the starting weight.
The individual component weights are rounded stage estimates, not a precision accounting ledger. The before-and-after whole-car readings give the overall result.
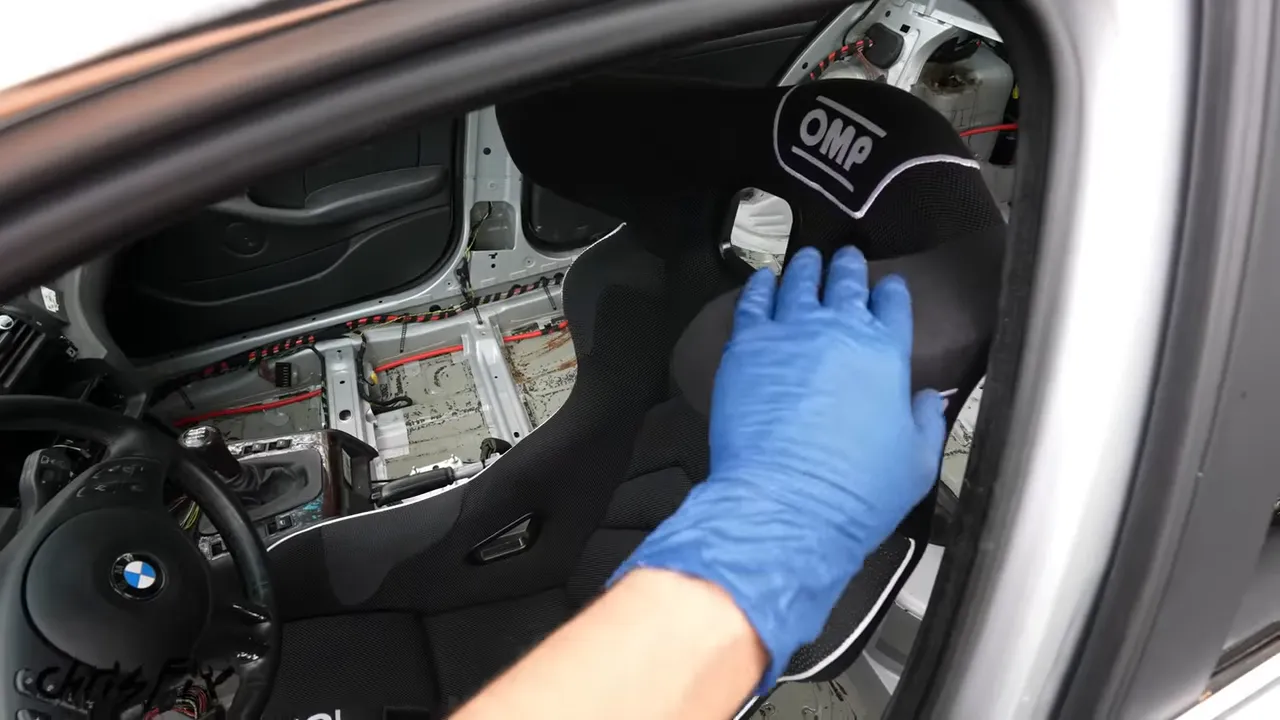
I could still remove more, but there were good reasons not to take everything out immediately:
- Door cards: Our race rules required them with the windows lowered to help contain broken glass and keep it out of the driver’s compartment.
- Door speakers: Still installed, though likely candidates for later removal.
- Remaining curtain airbags: Their removal needed additional dashboard access, so that would happen after the cage work.
- Excess wiring: There was plenty left, but I wanted to identify circuits properly rather than cut a wire and discover the car no longer started.
- Small remaining sound-deadening patches: These could be finished later.
That’s an important part of race-car weight reduction: the rules and the next stage of the build determine what can come out. The 2,940-pound reading was also before the roll cage was installed, not the completed race-ready weight.
Did Removing 430 Pounds Make the BMW Faster?
Back at the track, the car already felt completely different. Lighter, quicker, and much more eager to move.
I repeated the acceleration tests, again launching at 4,500 rpm. Here were the results:
- Run 1: 6.17 seconds from 0 to 60 mph.
- Run 2: 6.09 seconds.
- Run 3: 5.97 seconds.
Below six seconds! That final run was about 0.8 second quicker than the best original run. Across all three runs, the average improved from about 6.83 seconds to 6.08 seconds.

The braking tests improved too. All three stops were around 140 feet from 60 mph, compared with approximately 170 feet before.
There’s a caveat here: I think the original tests also helped bed the worn brakes, which may have contributed to the shorter stopping distances afterward. This wasn’t a laboratory test that isolated every variable, so I wouldn’t attribute the entire braking improvement to weight reduction alone.
Still, the measured improvement was substantial, and the change in how the car felt blew me away. Acceleration was quicker, stopping distances were shorter, and the whole car felt more nimble. I didn’t record a cornering measurement, but the difference from the driver’s seat was obvious.
The Big Lesson: Small Parts Add Up
The seats were the biggest single interior target, but they weren’t the whole story. The carpet weighed 45 pounds. The roof components offered a 38-pound net reduction. A pile of plastic trim became meaningful once it was all out of the car. Even the removed fasteners added up to around five pounds.
That’s how a comfortable road-car interior turns into 430 pounds of removed weight, even with some components still left in place.
For this endurance build, the result was exactly what I needed: a gutted interior ready for the cage builder, a weight comfortably below the original 3,000-pound goal, and a measurable improvement at the track. Same high-mileage BMW, a whole lot less weight to carry around. What a difference.


