A manual shifter should make it easy to tell which gear you are in. If yours feels like a wet noodle, with a ton of side-to-side movement even when it is in gear, it is time to inspect the parts connecting that stick shift to the transmission.
My Honda del Sol had about 3 inches, or just under 8 centimeters, of play in fourth gear. Between worn bushings, a rusted-away support bracket, and badly corroded linkage components, finding the right gear felt way less precise than it should. On top of that, the transmission shift shaft seal was leaking fluid all over the driveway.
The fix involves rebuilding the shifter linkage, installing properly fitting bushings and a short throw shifter, replacing the leaking seal, and treating the rust while everything is accessible. Most of the work uses common hand tools, and you do not need an expensive racing shifter to get a huge improvement.
Vehicle-specific note: This repair covers the rod-operated linkage on my del Sol. Linkage designs, seal installation depths, fluid requirements, and torque specifications vary. Verify the service information for your exact vehicle before using these procedures or specifications.
Table of Contents
- Find What Is Causing the Shifter Play
- Tools and Parts for the Repair
- Support the Car and Remove the Shifter Assembly
- Replace the Leaking Transmission Shift Shaft Seal
- Remove and Encapsulate the Undercarriage Rust
- Rebuild the Shifter Linkage on a Solid Foundation
- Choose a Short Throw Shifter That Actually Fits
- Assemble the Shifter, Seat, and Polyurethane Bushings
- Reinstall the Rebuilt Linkage
- Replace the Torn Shift Boot and Reassemble the Interior
- Check the Results Before the Test Drive
Find What Is Causing the Shifter Play
Start by measuring the problem before taking anything apart. With the car parked securely and the engine off, put the transmission in fourth gear. Gently move the knob from one side of its free play to the other and measure that distance. Use the same gear and measuring position after the repair so the comparison is meaningful.
Underneath this car, two long rods connect the shifter to the transmission. One supports the assembly; the other moves the transmission selector shaft when you change gears.
Follow those rods and inspect each mounting point and joint. On this car, several problems were adding up:
- Old rubber bushings: The rubber had deteriorated and allowed excessive movement.
- A missing section of support bracket: Rust had eaten away the bracket that should hold the rear bushing securely.
- A corroded shifter pivot and mounting shaft: Rust had removed material where a snug fit matters.
- Play in the linkage joints: Small clearances at the transmission end were amplified through the long rods.
- A worn plastic shifter seat: The socket around the shifter ball was another potential source of looseness.
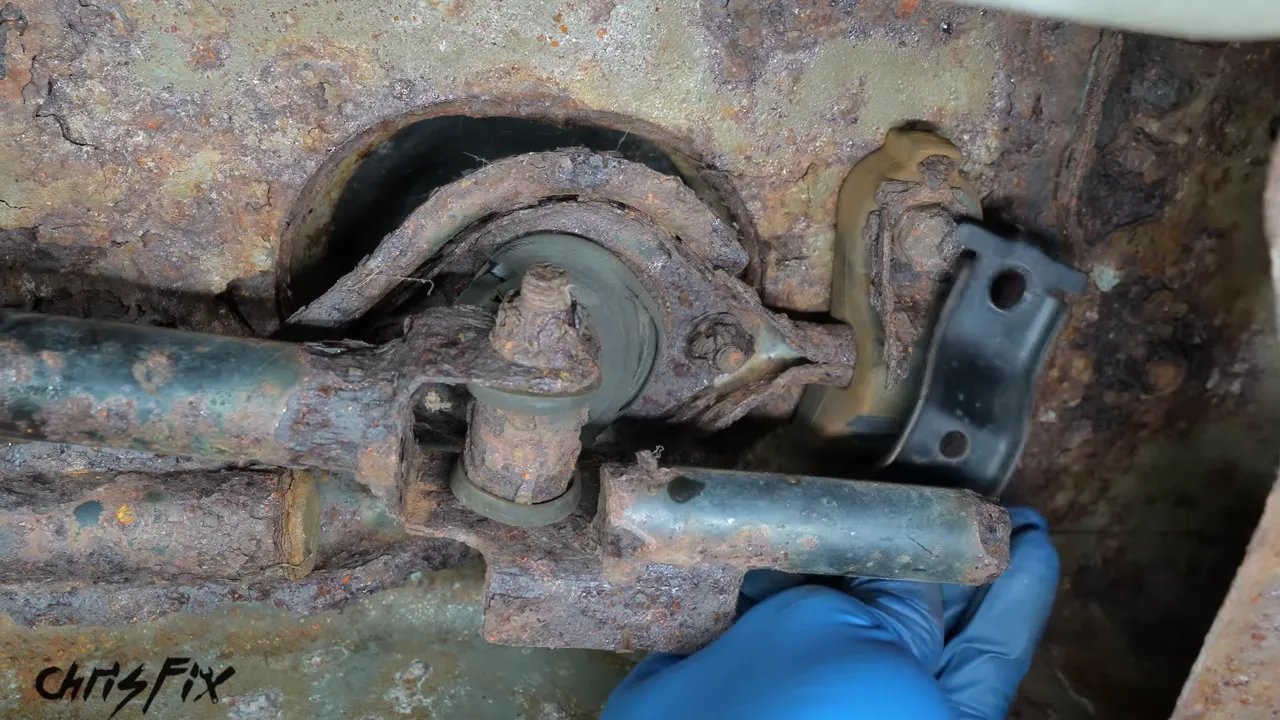
That is why simply installing a short throw shifter is not the whole repair. You need to remove the unwanted movement throughout the assembly.
Tools and Parts for the Repair
Gather everything before starting, including safety glasses and properly rated equipment to support the car.
Tools
- Ratchets, sockets, wrenches, and a Phillips screwdriver
- Torque wrench
- Small pry bar and locking needle-nose pliers
- 7 mm diameter punch and a heavy hammer
- Drain pan and a long, flexible funnel
- Calipers for checking the replacement shifter ball
- 1500-grit sandpaper for light corrosion on the selector shaft
- Scraper, wire brush or grinder-mounted wire wheel, and 180-grit sandpaper for rust preparation
- A solid metal backing surface, such as the anvil area of a vise, for the linkage joints
Replacement Parts and Supplies
- Correct transmission shift shaft seal
- Manufacturer-approved manual transmission fluid
- Polyurethane shifter bushings and a sound support bracket
- New plastic shifter ball seat and its rubber boot
- A correctly sized short throw shifter
- Replacement hardware of the correct size and specification
- Medium-strength thread locker and silicone grease
- Rust encapsulating paint and its recommended surface cleaner
- Replacement interior shift boot, if the original is torn
Polyurethane bushings are firmer than the original rubber pieces. Rubber flexes more easily, while polyurethane holds the linkage more firmly and helps make shifts feel direct. But firmer bushings will not compensate for badly rusted metal or an incorrectly sized shifter.
Support the Car and Remove the Shifter Assembly
I raised the front onto ramps, chocked the wheels, and lifted the rear onto jack stands so the car sat level. Use the approved lifting and support points for your vehicle, work on firm, level ground, and never get underneath a car supported only by a hydraulic jack. Check that the vehicle is stable before going underneath.
Remove the Interior Trim
- Remove the screws securing the center console. Check both sides and around the rear section.
- Carefully lift out the rear console section.
- Unscrew and remove the shift knob.
- Lift the front console section and disconnect any attached wiring before taking it out.
- Remove the upper rubber insulating boot.
- Free the lower rubber boot from the floor opening and tuck it clear so it will not snag during removal.
My console had wiring for an added kill switch, so that needed to be disconnected first. Your car may have different wiring or none at all. The rubber boots underneath the decorative shift boot are important: they help keep road noise, fumes, and hot or cold air out of the cabin.
Disconnect the Linkage Underneath
At the rear of the assembly, remove the two bolts securing the shifter support bracket to the body. Support the assembly as the last bolt comes out because it will drop down.
Next, follow the rods forward to the transmission. Pull the moving linkage outward and slide its rubber dust boot back to expose the retaining clip.
- Rotate the clip until you can reach its ends.
- Carefully pry it off with a small pry bar. Keep control of it because it can spring away.
- Center a 7 mm punch on the outer edge of the spring pin.
- Use the hammer to drive the pin out.
- Slide the linkage off the selector shaft and remove the dust boot.
- Remove the bolt attaching the support rod to the transmission bracket.
- Carefully guide the complete assembly out from underneath the car.
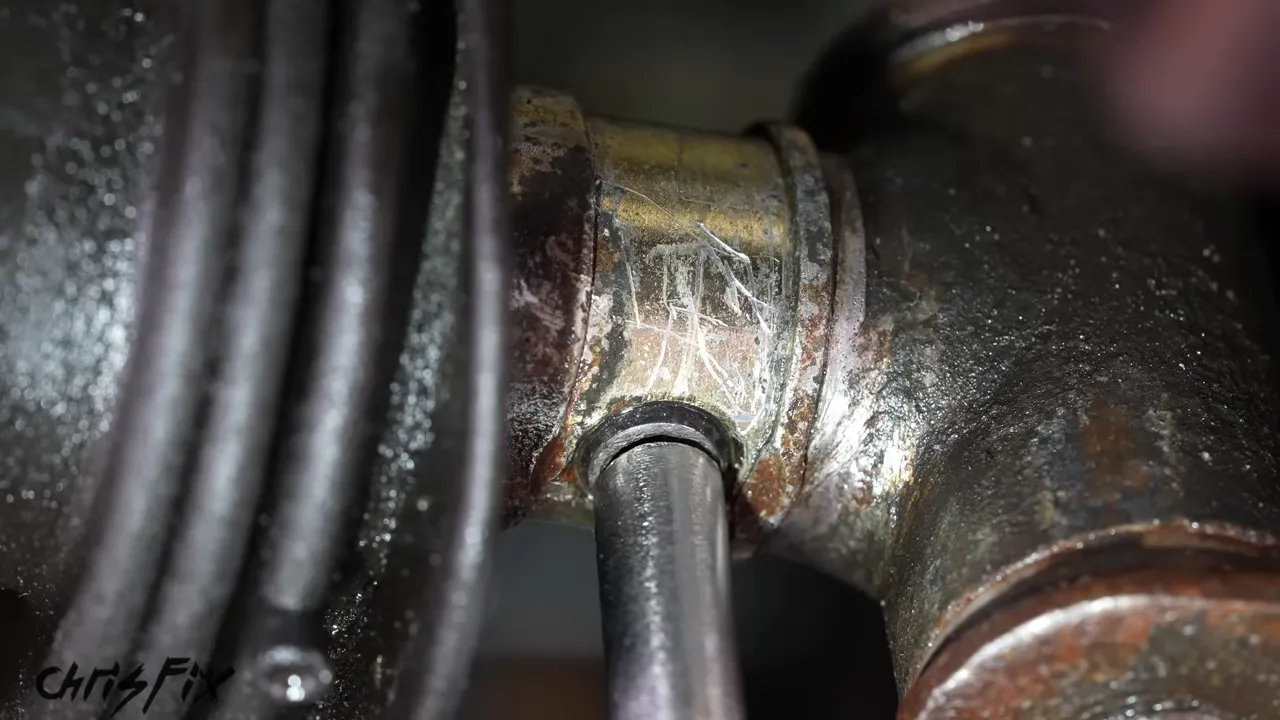
The punch size matters on this linkage. A screwdriver or undersized tool can enter the hollow pin and spread it, making removal harder. The 7 mm punch fits the pin used here.
I also removed the rusty support bracket from the transmission. That is not essential just to disconnect the linkage, but it gives more working room and lets me clean and paint the bracket.
Replace the Leaking Transmission Shift Shaft Seal
With the linkage removed, the selector shaft and its seal are exposed. This shaft moves as you select gears. Mine had corrosion near its base, which was a likely contributor to the damaged seal.
Replacing only the seal while leaving a rough shaft could damage the replacement, so both surfaces need attention.
Drain the Transmission First
Remove the fill plug before the drain plug. You want to know you can refill the transmission before emptying it.
- Loosen and remove the fill plug, keeping track of its sealing washer.
- Position a drain pan underneath the drain plug.
- Remove the drain plug. On this transmission, a 3/8-inch square ratchet drive fits directly into it.
- Allow the fluid to drain completely.
- Reinstall the drain plug and torque it to the vehicle specification.
For this transmission, the drain plug torque is 29 ft-lb. Draining first also prevents fluid from pouring out when the selector shaft seal is removed.
Remove the Old Seal and Smooth the Shaft
The seal is pressed into the housing. A small pry bar can work it out around the edges, or you can carefully work against the seal's edge with a punch. I used locking needle-nose pliers to grip the exposed seal and tapped the pliers to pull it out.
Whichever method you use, avoid scratching the shaft or damaging the seal bore.
To clean the light corrosion from the shaft, cut a narrow strip of 1500-grit sandpaper, wrap it around the shaft, and work it back and forth. The goal is to remove roughness, not reduce the shaft diameter.
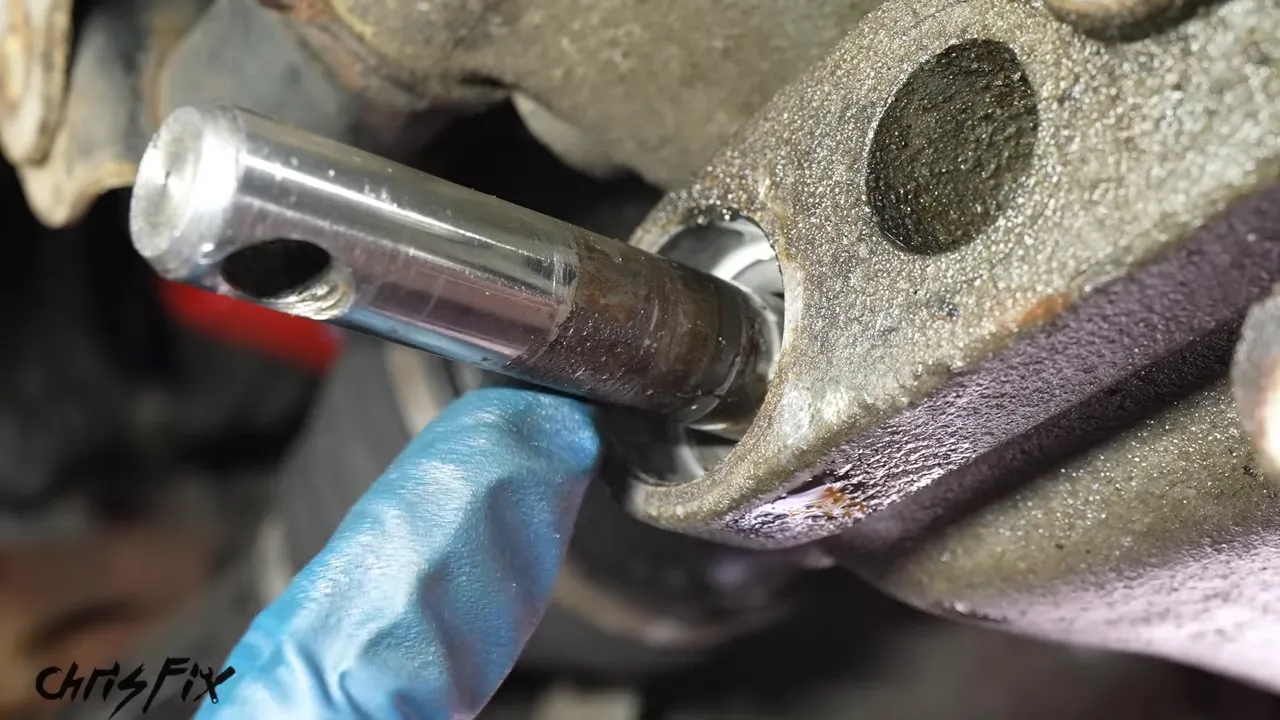
Stop as soon as the surface feels smooth. Remove sanding debris from the area and wipe everything clean before installing the new seal. Do not keep sanding to chase deep pits at the expense of a proper seal fit.
Install the New Seal Straight
For this seal, an 18 mm deep socket fits against its reinforced driving surface. Check that your driver bears on the correct solid portion of the seal rather than a delicate sealing edge.
- Slide the new seal onto the shaft in the correct orientation.
- Start it into the housing by hand, keeping it square.
- Use the socket to tap it evenly into place with light blows.
- Stop at the correct installation depth.
On this assembly, the sound changed as the seal seated. I also compared its position with the old seal's depth. Do not assume every seal should be driven until it bottoms out; use the specified depth for your transmission.
Refill with the Correct Manual Transmission Fluid
The original owner's manual for this car lists 10W-30 or 10W-40 motor oil. I used Honda manual transmission fluid, a later fluid formulated for the transmission's synchronizers, instead. That choice is specific to this Honda application, not a recommendation to put motor oil or Honda fluid into every manual gearbox.
It is easier to reach this fill opening from above. Feed a long flexible funnel down beside the engine and into the transmission's fill hole.
With the car level, add the specified fluid. This transmission takes about 2 US quarts; fluid beginning to drip from the fill opening indicates the correct level for this application.
Remove the funnel, reinstall the fill plug with its washer, and torque it to 33 ft-lb on this transmission. Clean off spilled fluid so any fresh leakage will be easy to spot. The new seal stayed dry during my initial check.
Remove and Encapsulate the Undercarriage Rust
With the linkage out, this is a great opportunity to address rust around the transmission tunnel. But first, determine whether you have surface corrosion or metal that needs an actual repair.
Probe suspicious sheet metal with a screwdriver. If it breaks through, paint is not the fix. The weakened metal needs repair before coating. My rust-hole repair guide covers that separate job.
Protect yourself during preparation and painting. Wire brushing creates substantial dust, and spraying underneath a car can concentrate overspray and vapors. Use eye and face protection, ventilation, and respiratory protection selected for the coating and solvent. P100 filters protect against particles, but do not by themselves protect against organic solvent vapors. Follow the product safety data sheets and OSHA respiratory protection guidance.
Prepare the Surface
- Scrape away loose rust. Remove flaking material and bubbling coatings throughout the affected area.
- Seal openings into the cabin. Tape over the shifter opening to keep dust and overspray out.
- Wire brush the metal. Remove as much remaining corrosion as practical, getting down to sound, shiny metal where possible.
- Scuff with 180-grit sandpaper. Give the coating a suitable surface to grip.
- Clean thoroughly. Remove dust and grease with a cleaner compatible with the paint, such as the acetone used here, and allow it to evaporate.
You will not necessarily remove every trace of rust from every pit and corner. That is why I used a coating specifically designed to encapsulate remaining rust, rather than ordinary spray paint. It forms a protective barrier, but it still needs a clean, solid surface underneath it.
Apply the Rust Encapsulating Paint
Start with a light coat, moving side to side and overlapping each pass by about 50 percent. Spray from different angles to reach seams and recesses.
The product I used called for one hour between coats. For the second coat, I made a light pass over an area and immediately followed it with another pass to build coverage without loading one spot heavily enough to drip.
That coating then required 24 hours of drying time. Follow the directions on your particular product. While the paint dries, you can rebuild the linkage on the bench.
Rebuild the Shifter Linkage on a Solid Foundation
Once the original assembly was out, it became obvious that new bushings alone were not going to save it. The pivot area was crumbling, and the shaft supporting the rear bushing was heavily corroded.
Rust means lost material. Sanding that shaft smooth would remove even more material, leaving extra clearance inside the new bushing. That clearance would turn right back into movement at the knob.
Instead, I picked up a much cleaner linkage assembly from a junkyard del Sol. It had a little surface rust, but its important mounting and pivot surfaces were in much better shape.
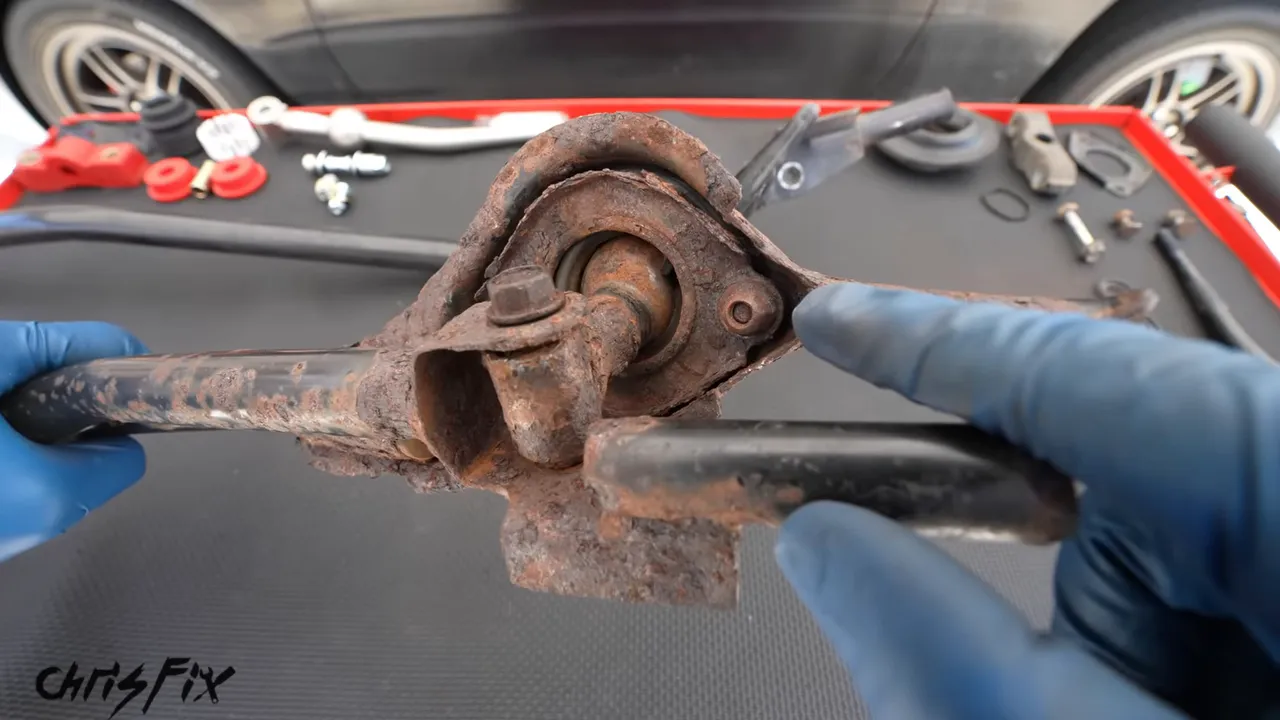
Disassemble the Replacement Assembly
- Remove the old rear rubber bushing.
- Remove the bolt connecting the moving rod to the bottom of the shifter.
- Keep track of the original washers and spacers, then follow the replacement shifter's hardware arrangement during assembly.
- Remove the two fasteners holding the pivot cover plate.
- Lift off the plate and withdraw the shifter.
- Remove the rubber boot and plastic ball seat.
The plastic seat acts as a socket around the shifter ball. As it wears, it adds looseness, so I replaced it rather than reusing it.
Reduce Play in the Riveted Linkage Joints
The joints at the transmission end moved smoothly, but had a little side-to-side clearance. Because the rods are long, even a small amount of movement here can be noticeable at the shifter.
These joints are riveted together. On this assembly, I reduced the clearance by resting one rivet head on a hard, flat metal surface and carefully peening the opposite head with a hammer. That slightly tightened the joint.
Work gradually and check movement frequently. The joint must still articulate smoothly without binding. The goal is less unwanted lateral play, not a locked-up pivot. If a joint is damaged or cannot retain smooth movement, tightening it this way is not a substitute for replacement.
After checking both joints, I cleaned the remaining surface rust and painted the linkage and reusable brackets.
Choose a Short Throw Shifter That Actually Fits
Here is a big trap with replacement shifters: parts that look identical in a listing can fit very differently.
I compared four aftermarket shifters made for this Honda against the original. The original shifter ball measured 35 mm in diameter. Three inexpensive replacements, priced at $15, $15, and $25, measured only 33 mm. The $100 replacement matched the original 35 mm size.
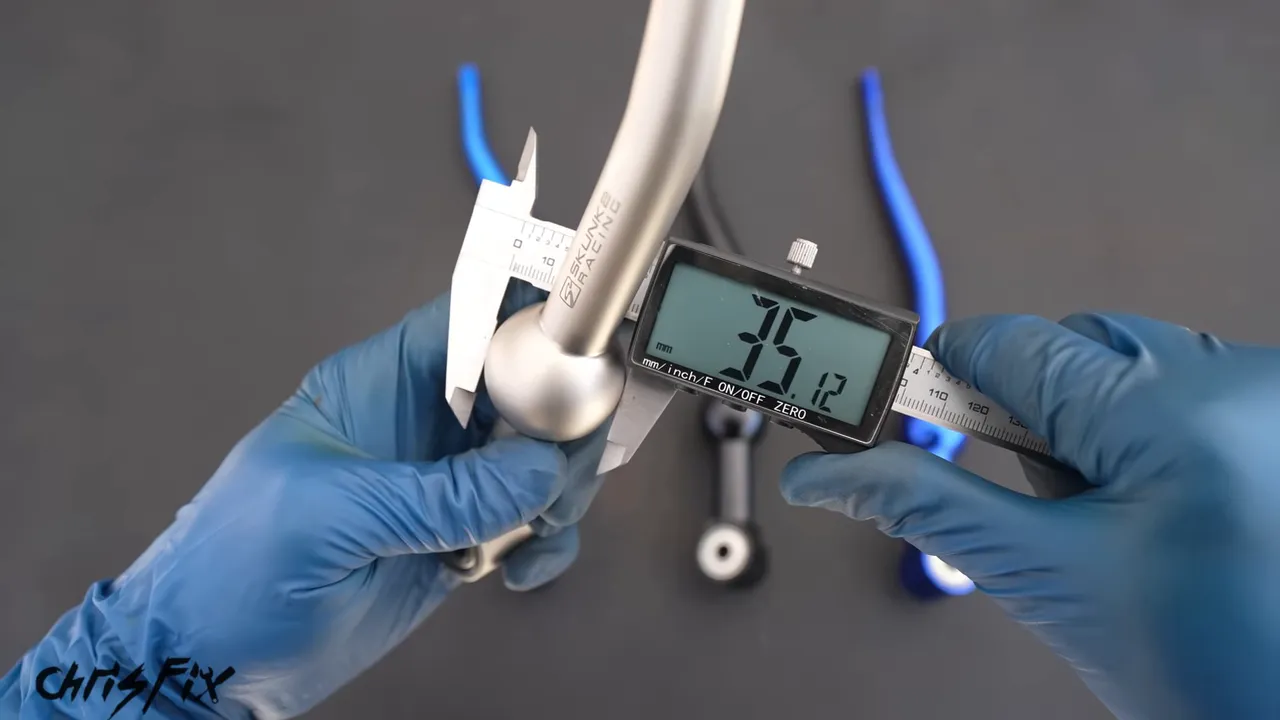
Two millimeters might not sound like much, but inside that plastic socket it created a ton of play. Those undersized shifters would make the assembly feel worse instead of better.
Check the actual pivot fit, not just the advertised vehicle compatibility. The replacement ball should sit snugly in the correct new seat while still moving smoothly. I skipped the expensive fully adjustable spherical-bearing assembly for this budget build, but I did not compromise on the dimensions that make the simpler shifter work.
Assemble the Shifter, Seat, and Polyurethane Bushings
Install the Ball Seat and Boot
- Work the new plastic seat fully into its rubber boot.
- Lubricate the seat with silicone grease compatible with the plastic and rubber.
- Slide the assembly onto the shifter from the bottom.
- Carefully stretch the boot over the ball. A small pry bar can help hold one edge while you work the other side into place.
- Fit the shifter into the linkage housing.
- Reinstall the cover plate with the correct hardware.
I used new zinc-coated hardware, washers, and medium-strength thread locker on the cover plate fasteners. Tighten them securely according to the applicable instructions. Avoid an incompatible petroleum-based grease around the seat and boot.
Install the Rear Bushing and Insulation
Apply silicone grease to the rear bushing's mounting surface, then slide on the polyurethane bushing. The grease helps assembly and prevents squeaks.
I also cleaned and treated the reusable outer rubber piece with a rubber-compatible protectant before refitting it. Protectant can help preserve a serviceable part, but it cannot repair torn or crumbling rubber.
Reconnect the Moving Rod
The new shifter came with two inserts for its lower bearing, one on each side. Install both before attaching the rod. They prevent the bearing from binding when the bolt is tightened.
Fit the linkage over the inserts, slide the bolt through, and install the washer and nylon locking nut supplied for the connection. I did not add thread locker to that nylon locking nut. Tighten according to the shifter manufacturer's instructions and check that the connection moves freely.
Replace the Transmission-End Support Bushing
The original rubber support bushing is a one-piece design. The polyurethane replacement uses two halves and a center metal sleeve.
- Push out the original center sleeve.
- Carefully pry between the rubber bushing and the metal eye, then remove the bushing.
- Apply silicone grease inside the eye.
- Square up one polyurethane half and press it in.
- Install the second half from the opposite side.
- Lubricate and press in the center sleeve.
These bushings fit tightly. Get each half straight before pressing it into place instead of forcing it in crooked.
Reinstall the Rebuilt Linkage
Once the paint has dried as directed, remove the tape covering the cabin opening. Carefully guide the assembly back into the transmission tunnel without scraping the fresh coating.
- Mount the rear support. Slide the sound replacement bracket over the rear polyurethane bushing. Start both bolts by hand before tightening.
- Reinstall the transmission support bracket. Start both bracket bolts, then tighten and torque them.
- Attach the support rod. Apply silicone grease to the bracket's contact surfaces, fit the polyurethane bushing between its ears, and install the through-bolt.
- Refit the selector-shaft dust boot. I applied silicone grease to the exposed shaft to help protect against corrosion, then hooked the boot onto the seal's lip.
- Connect the moving linkage. Slide it onto the selector shaft and align the spring pin holes.
- Install the spring pin and retaining clip. Drive the correct pin flush and rotate the clip so its locating notch engages the pin hole.
- Cover the connection. Stretch the dust boot over the joint.
The service procedure calls for replacing the spring pin. Although I reused the good-condition pin on my car, use a new one when specified for your repair.
For reference, these were the mounting torques on this del Sol:
- Rear shifter support bracket bolts: 16 ft-lb
- Transmission support bracket bolts: 33 ft-lb
- Support linkage through-bolt: 33 ft-lb
I used medium-strength thread locker on the applicable mounting bolts. Confirm both the torque and thread treatment requirements for your vehicle and replacement parts.
Replace the Torn Shift Boot and Reassemble the Interior
Back inside, snap the lower rubber boot around the floor opening, then install the thicker insulating boot over it. Make sure the boots are properly seated before hiding them underneath the console.
With the trim still out, clean the exposed area. A brush helps loosen dirt for the vacuum. Soapy water, gentle agitation, and a microfiber towel take care of the remaining grime.
When the New Boot's Bracket Does Not Fit
The replacement leather boot I bought was listed as fitting, but its mounting bracket was different. Rather than force the wrong bracket into the console, I transferred the new leather onto the original bracket.
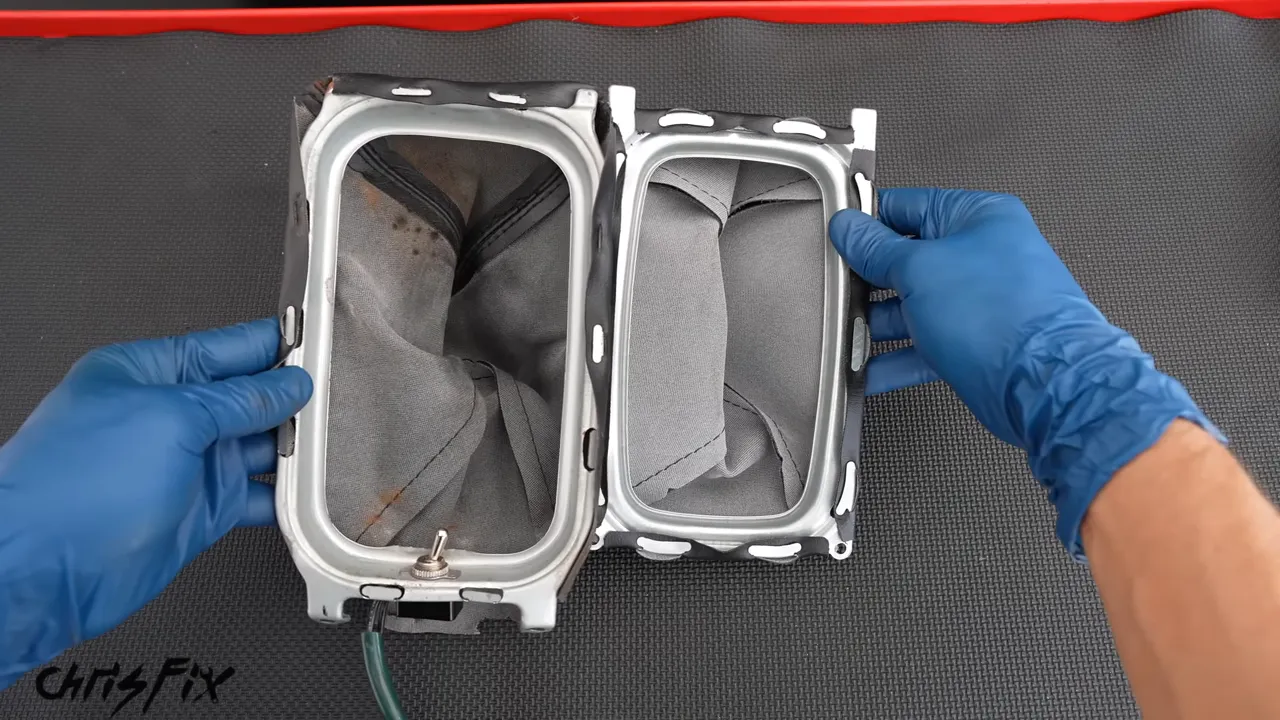
- Remove the two screws holding the old boot assembly to the console.
- Carefully unhook the new leather from its bracket's retaining tabs.
- Remove the worn leather from the original bracket.
- Fit the new leather around the original bracket.
- Hook the matching slots over the tabs.
- Where the slots do not line up, tuck the leather beneath the tabs and gently crimp them to hold it securely.
- Check the perimeter for gaps or exposed metal, then reinstall the assembly with its two screws.
This worked because the leather was close enough in size to fit the original frame without tearing. Check fit as you go.
Reconnect any console wiring and restore its protective sheathing, making sure no wires are pinched. Set the console sections back in place, guide the boot over the shifter, reinstall the shift knob, and secure the trim with its proper fasteners.
Check the Results Before the Test Drive
Before lowering the car, check the linkage connections, retaining clip, dust boots, and fluid plugs. Confirm that the shifter selects the gears without binding and inspect the new seal for leakage.
Lower the vehicle safely, remove the supports and chocks when appropriate, and take a careful test drive.
Holy smokes, what a difference. The shifter went from vague and sloppy to tight, direct, and much easier to place in gear. Using fourth gear for the same before-and-after measurement, the side-to-side movement dropped from about 3 inches, or 8 centimeters, to roughly 2 centimeters, less than an inch.
That improvement came from fixing the whole system: sound linkage metal, tighter joints, new bushings, a new ball seat, and a correctly sized shifter. The new selector shaft seal stopped the initial leak, and the cleaned and coated tunnel looked dramatically better.
A crisp shift starts long before your hand reaches the knob. Get the supporting parts right, and even a budget-friendly rebuild can make the car feel completely different.


