A shattered rear windshield looks like a huge job. There is glass everywhere, pieces are still stuck around the opening, and somehow you need to turn that mess into a clean, leak-free installation. The good news is that the process breaks down into manageable steps: remove the broken glass, prepare the car, prepare the replacement glass, and bond everything together with automotive urethane.
I’m replacing the rear glass on my dad’s car after it suddenly shattered when he closed the door. For this repair, I used a $75 salvage-yard window and common hand tools instead of an expensive powered windshield-removal tool. The savings are great, but surface preparation and a proper adhesive bond are what make this repair successful.
Before starting: bonded automotive glass is a safety-critical installation. Use the vehicle’s service procedures and the adhesive manufacturer’s instructions for your exact application. The primer, bead dimensions, working time, and cure requirements described here apply to this repair, not automatically to every vehicle or product. If you cannot verify those requirements or find damage to the mounting surface, get help from a qualified auto-glass installer. The Auto Glass Safety Council is a useful resource for auto-glass safety information.
What You'll Learn
- Inspect replacement glass and test the defroster before committing to installation.
- Protect the pinch-weld paint and preserve a thin layer of sound existing urethane.
- Dry-fit the glass and apply a continuous triangular bead using the specified adhesive system.
- Respect curing requirements, then verify defroster operation and check the installation for leaks.
Table of Contents
- Understand the Broken Glass and Check the Cabin Vents
- Find Replacement Rear Glass and Test the Defroster
- Gather the Tools and Materials
- Remove the Broken Rear Windshield
- Prepare the Car’s Pinch Weld
- Prepare the Replacement Glass
- Dry-Fit the Window and Mark Its Position
- Apply Primer to the Glass and Exposed Metal
- Cut the Urethane Nozzle for a Triangular Bead
- Apply One Continuous Bead of Urethane
- Install and Seat the Rear Windshield
- Reconnect the Defroster and Check the Installation
- Does the Same Process Work for a Front Windshield?
Understand the Broken Glass and Check the Cabin Vents
A front windshield is typically laminated glass: two layers of glass with a plastic layer between them. That middle layer helps hold the windshield together when the glass cracks.
The rear windshield on this car is tempered glass, as are many side windows. Tempered glass can withstand substantial impacts, but a sharp, concentrated impact can cause it to break into lots of small pieces. Those pieces still present a cutting hazard, so gloves and eye protection are essential.
Because this window broke when the door closed, I checked the cabin pressure-relief vents before installing another one. An impact from a small rock or other debris may have damaged the glass beforehand, but the exact cause was not confirmed.
How to inspect the pressure-relief vents
On this car, the vents are behind the side liners in the trunk. Access is straightforward:
- Remove the clips holding the plastic trunk-opening trim with panel-clip pliers.
- Lift out the plastic trim.
- Carefully pull back each side liner.
- Inspect the vents and check that their flaps move freely.
- Look for nesting material or other debris that could obstruct airflow.
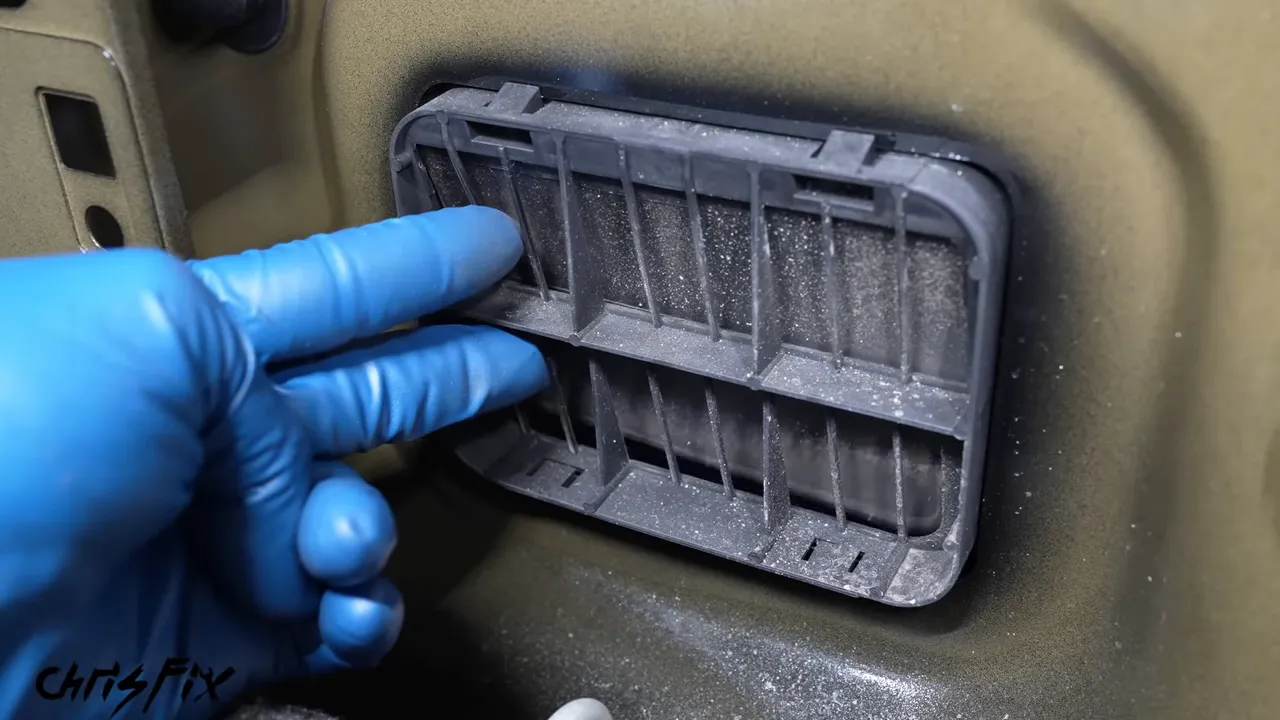
Both vents were clear on this car. That rules out an obvious obstruction, but it does not prove what caused the glass to fail. With that inspection finished, we can move on to the replacement.
Find Replacement Rear Glass and Test the Defroster
You have several options for sourcing replacement automotive glass:
- A dealership: a source for new original-equipment glass.
- A local auto-glass installer: ask whether they will sell the glass separately.
- An online marketplace: used glass may be available for your application.
- A salvage yard: a potentially inexpensive source for an intact replacement.
For this car, the dealership quoted $500 and a wait of more than two weeks. Since the car stays outside, I chose a salvage-yard window for $75. Those were the prices for this particular repair, but they show why it is worth checking more than one source.
Before installing used glass, inspect it carefully for chips, scratches, damaged edges, and problems with the heater-grid connections. My replacement was in good shape, but it needed cleaning and removal of the old urethane.
Check electrical continuity through the defroster grid
The rear defroster uses conductive lines across the glass. Electrical resistance in those lines produces heat, which helps clear the window.
With the replacement glass disconnected from vehicle power, set a multimeter to resistance, or ohms. Touch one lead to the terminal on one side of the glass and the other lead to the opposite terminal.
A resistance reading rather than an open-circuit indication confirms an electrical path through the grid. It does not prove that every individual heater line works. The lines form multiple paths, so some can remain connected even if another is broken.
Next, visually inspect every line from one side to the other. Cardboard behind the glass makes the thin lines easier to see. Look for gaps or scratches that interrupt a line. Repair kits are available for damaged grid lines, but it is much better to identify that work before the window is installed.
Gather the Tools and Materials
The most important material is the urethane. This is not simply a weather seal. It is the adhesive that bonds the glass to the vehicle, so use a quality automotive-glass urethane approved for the application.
I used a 24-hour automotive urethane that can be dispensed with a manual caulking gun, along with a matching windshield primer. Use the primer and urethane as a manufacturer-approved system rather than mixing products based only on availability.
- Replacement glass and any required molding.
- Automotive-glass urethane, compatible primer, and primer daubers.
- A suitable high-thrust manual caulking gun. Mine has a 26:1 thrust ratio.
- Safety glasses and cut-resistant gloves.
- A shop vacuum.
- Packing tape and masking tape.
- Plastic chisels and a weighted plastic hammer.
- A razor scraper and fresh blades.
- Panel-clip pliers, plastic trim tools, and the required sockets.
- Lint-free towels, soapy water, glass cleaner, and isopropyl alcohol for the appropriate cleaning steps.
- Suitable glass-handling suction cups and a helper.
- A sturdy cardboard box for the broken glass.
A basic plastic chisel set worked well for removing the shattered perimeter without immediately resorting to metal tools against the paint. Plastic can still cause damage if used carelessly, so work slowly.
I used camera-mount suction cups during this repair. For your own installation, choose handling equipment rated for the glass and load rather than assuming any suction mount is suitable.
Remove the Broken Rear Windshield
Vacuum the entire interior
Start by vacuuming the loose glass from the rear deck and window opening. A shop vacuum lets you collect the fragments without picking them up by hand.
Do not stop at the obvious pile. Glass can travel throughout the cabin and collect in surprisingly small spaces. Inspect and vacuum:
- Front and rear seats.
- Carpets and seat crevices.
- Armrests and door pockets.
- Window-switch recesses.
- The rear deck and surrounding trim.
Expect to vacuum again as more fragments become accessible.
Tape the glass still attached to the frame
Here is a simple trick that makes a big difference: cover the remaining broken glass around the perimeter with packing tape before you start removing it. Overlap the tape enough to catch the fragments.
The tape will not contain absolutely everything, but it helps the shattered sections come away together instead of falling back into the car.
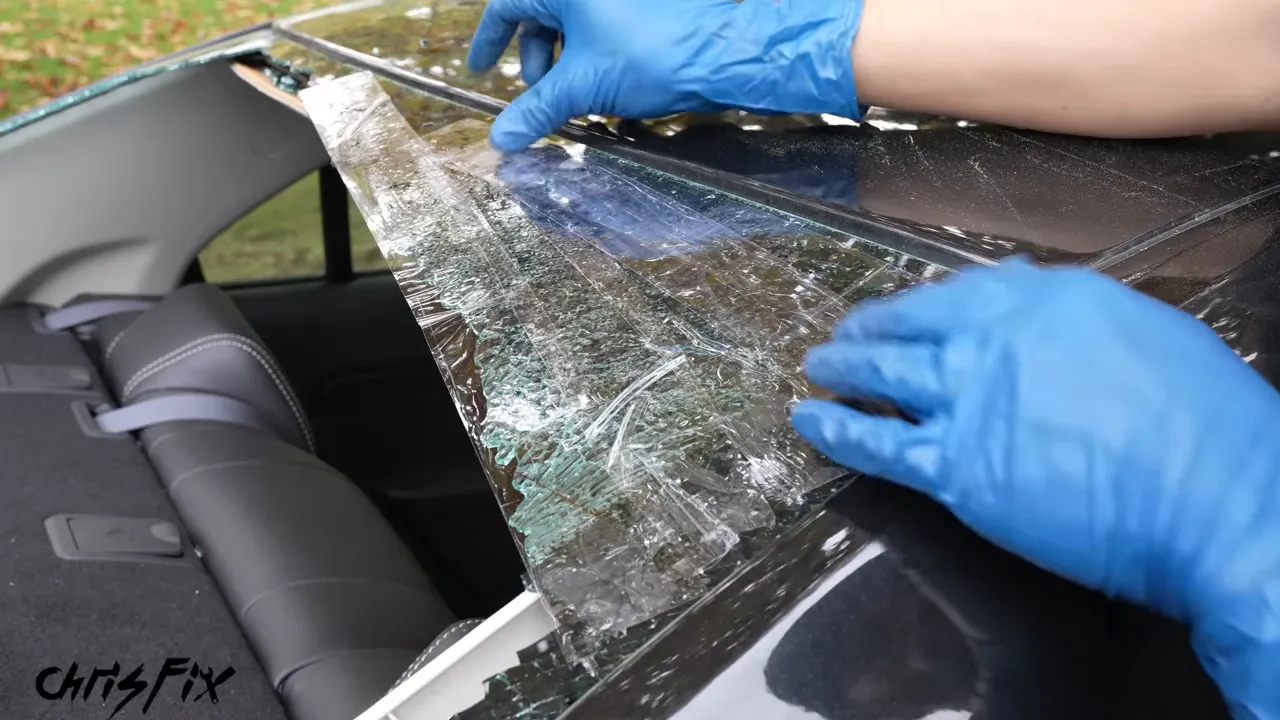
Separate the glass from the urethane
Choose a corner where you can get a plastic chisel underneath the broken glass. Using a weighted plastic hammer, carefully work the chisel through the urethane and peel the glass away from the mounting flange.
That flange is called the pinch weld. Protect its paint as much as possible. A scratch can become a corrosion problem underneath the new bond.
At this stage, you are removing glass, not trying to remove every bit of adhesive. Work around the top and sides, then open the trunk if needed to reach the lower edge.
Disconnect the defroster wiring on both sides as you reach it. Do not pull the glass away while a connector is still attached.
Once the opening is clear, vacuum again. Put the broken glass into a sturdy box rather than a thin bag that fragments can cut through. Seal the box and follow your local disposal requirements.
Prepare the Car’s Pinch Weld
This is one of the most important distinctions in the whole job: on this car, we leave a thin layer of sound, existing urethane on the pinch weld. We do not scrape the entire opening down to bare metal.
Clean before exposing fresh urethane
First, remove the dirt and debris around the opening. I used soapy water and a lint-free towel to clean the surrounding pinch-weld area before trimming the old adhesive.
The order matters. You do not want years of dirt falling onto the freshly cut bonding surface. Let the area dry and follow the adhesive system’s cleaning requirements.
Remove trim that will block the defroster connections
Before installing the glass, remove interior trim that will make the defroster wiring difficult to reach later.
On this car, each rear pillar trim panel has a cap concealing an 8 mm bolt. Open the cap with a plastic trim tool, remove the bolt, and carefully release the panel. Check behind it for trapped glass as it comes out.
Trim the old urethane to approximately 1 to 2 mm
Use a sharp blade to shave the remaining urethane into a flat layer approximately 1 to 2 mm thick for this installation. Keep the blade as flat as practical, almost like filleting a fish.
Fresh razor blades may have a protective oil coating. I cleaned both sides with isopropyl alcohol before cutting so that oil would not contaminate the adhesive surface. I also covered the blade’s corners with small pieces of tape to reduce the chance of scratching the paint.
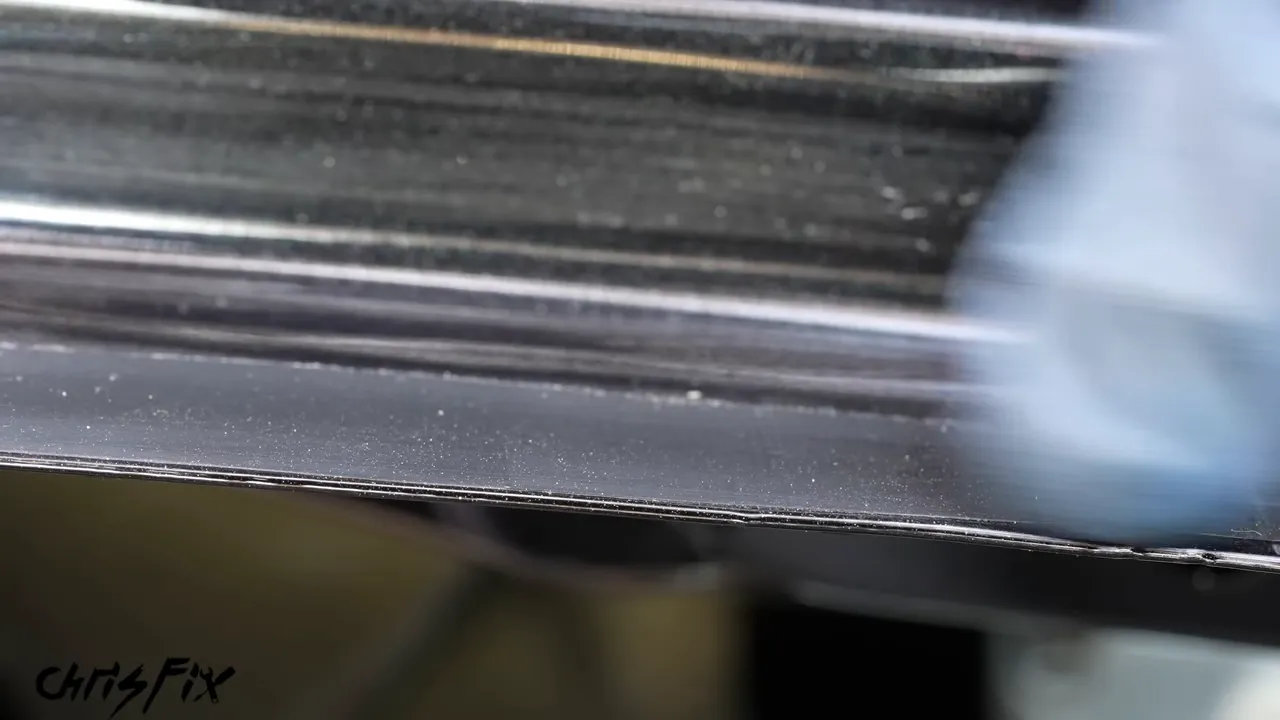
Work around the entire opening. If cold weather makes the old urethane difficult to cut, gentle heat can soften it. Keep the heat gun moving and avoid overheating the paint or surrounding materials.
Inspect the surface as you go. On this car, I found sound-deadening material underneath part of the original adhesive path. That material and its residue had to come off so the new bond would be made to the proper mounting surface.
Do not bridge the bonding path over carpeting, sound deadening, or loose residue. Also, do not treat existing rust or loose paint as a minor scratch that primer alone will fix. The mounting surface must be sound before installation continues.
Prepare the Replacement Glass
New glass generally requires less preparation. Used glass needs extra work because the previous adhesive is still attached.
First, remove any leftover donor-car wires if you will be using the wiring already installed in your vehicle.
Remove the old urethane from the used glass
For this replacement glass, I removed the old urethane completely from the bonding perimeter. This differs from the thin layer retained on the car.
A long-handled razor scraper gives useful leverage. Work carefully beneath the adhesive, then make additional light passes to remove the small remnants until the bonding area feels smooth.
Do not scrape indiscriminately across heater lines, terminals, coatings, or other features. The goal is to remove adhesive from the intended bonding area without damaging the glass assembly. Follow the glass supplier’s preparation requirements.
The dark stain left by the previous primer remained on my glass. I did not try to sand it away.
Clean along the heater lines
Clean the glass using the cleaner specified by the primer system. When wiping the inside surface, move the towel along the defroster lines, not across them. Those conductive lines need to survive both the preparation and the installation.
Once the bonding area is clean, avoid touching it and transferring oils back onto it.
Dry-Fit the Window and Mark Its Position
Do a complete practice installation before applying primer and urethane. This is your chance to confirm the fit, plan your hand positions, and figure out how you and a helper will lower the window into place.
This replacement has two alignment pegs that fit into holes near the top of the opening. Not every vehicle has them, but they make positioning much easier.
- Secure the handling suction cups to clean glass.
- Orient the window correctly.
- With a helper, lower it into the opening without adhesive.
- Confirm that the pegs engage and the gaps look even.
- Place a strip of tape across the roof-to-glass joint on each side.
- Cut each strip at the joint so the matching halves become alignment marks.
- Lift the glass back onto its supports.
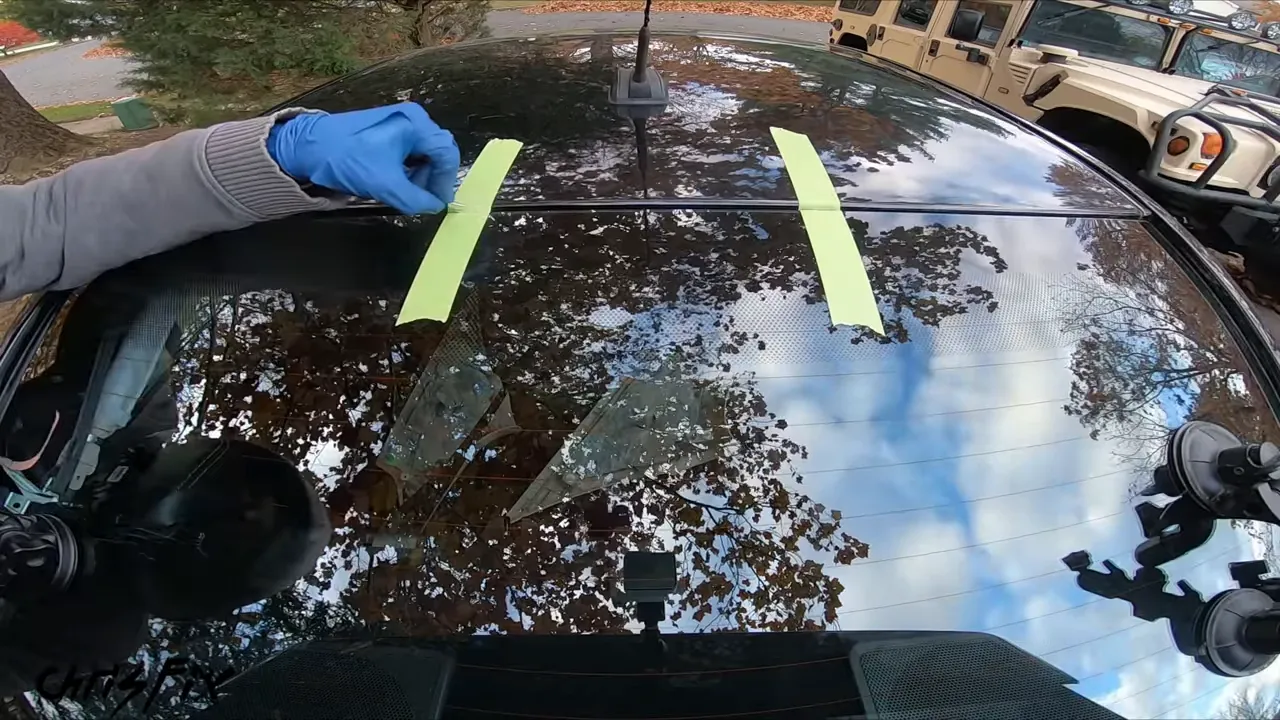
If the glass uses a rubber edge molding that must be installed first, fit it now. My original molding was in good condition, so I slid it onto the glass, centered it, and pressed its adhesive strip into place.
Apply Primer to the Glass and Exposed Metal
Primer preparation is not a place to guess. Check the expiration date, shake it for the specified time, and follow the product instructions exactly.
For the single-step primer used here, I shook the bottle for one minute and applied it with a dauber. Work with appropriate ventilation and follow the product’s safety instructions for protective equipment.
Prime the glass bonding perimeter
Apply an even, continuous band around the intended bonding area. On this used window, the previous primer stain provided a useful guide.
Keep the application consistent rather than letting the dauber run dry halfway through a section. The primer used here required at least 10 minutes of drying before installation. Your product may specify different drying and application windows.
Prime the exposed spots on the car
The car gets a different treatment. For this adhesive system, do not coat the freshly trimmed urethane with primer. That fresh urethane is the intended bonding surface for the new adhesive.
Instead, inspect the pinch weld for exposed metal, nicks, and scratches. Treat those areas according to the primer system’s instructions, including small scratches and exposed areas around the alignment holes.
Keep primer within the area that the glass will cover. Black primer is particularly noticeable if it gets onto light-colored paint. Let these treated areas dry for the required time before applying urethane.
Cut the Urethane Nozzle for a Triangular Bead
We want a tall, triangular bead, not simply a round rope of adhesive. As the glass is seated, that raised bead compresses into a broader contact area between the glass and the mounting surface.
For this installation, I prepared the nozzle as follows:
- Measure the nozzle where its opening will be approximately 1/4 inch wide.
- Cut straight across at that point.
- Place the nozzle down into the pinch-weld channel.
- Use the surrounding glass seating level as a reference to mark the required height.
- Mark and cut a V-shaped notch that will form the triangular bead.
- Remove loose plastic shavings so they cannot contaminate the urethane.
Use the required bead dimensions for your vehicle and adhesive. The 1/4-inch measurement here is not a universal specification.
Open the cartridge seal fully, attach the nozzle, remove any rear shipping cap as directed, and load the cartridge into the caulking gun.
Practice before applying adhesive to the car
Dispense a practice bead onto scrap cardboard. Hold the nozzle approximately perpendicular to the surface so you are pushing the adhesive into contact, rather than dragging it loosely across the top.
The triangle should stand upright instead of leaning over. My first attempt leaned, so I tried again until I had a feel for the gun pressure and travel speed. That little practice run is worth it.
Apply One Continuous Bead of Urethane
With the glass prepared and your helper ready, start in a lower corner and apply the bead around the opening. Center it over the prepared adhesive path and keep the height consistent.
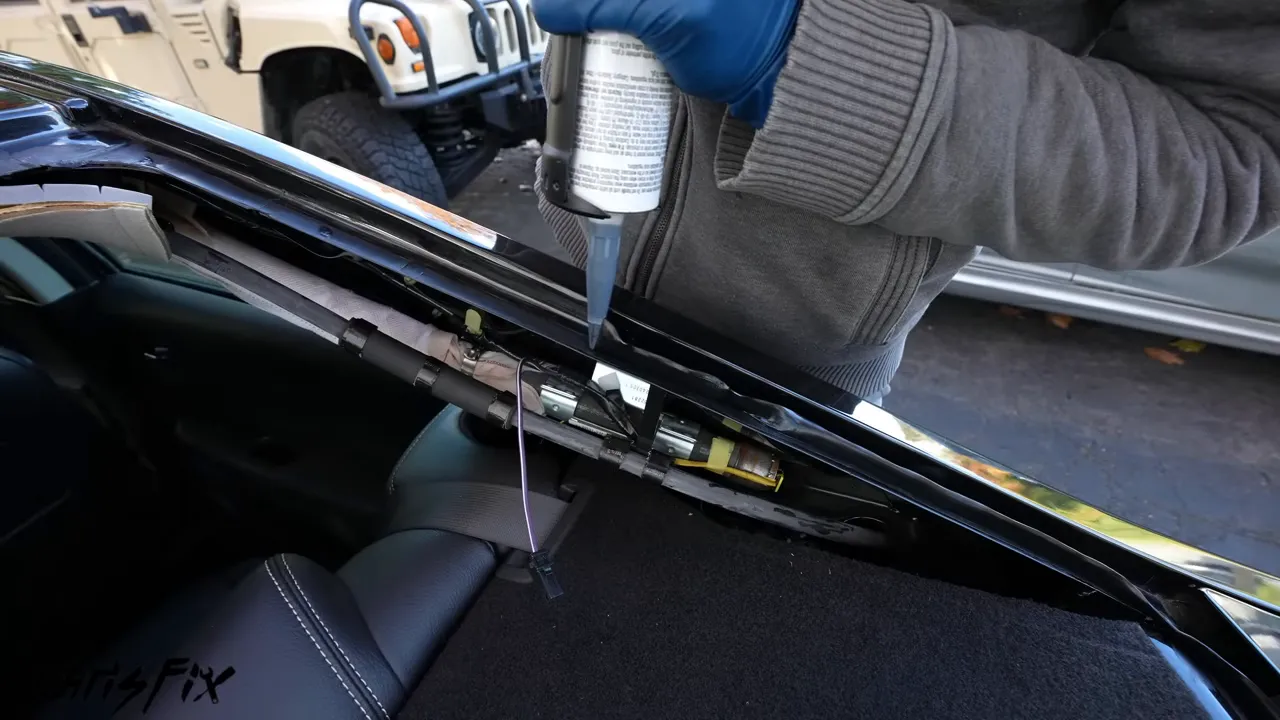
Slow down around the corners. They take more control than the straight sections, and rushing can make the bead fold over.
When you return to the starting point, overlap the ends slightly. Use a clean, flat, nonporous plastic tool to join them together, a process called paddling. Repair any interruptions so the bead is continuous before the glass goes down.
Do not rely on the glass to close a gap in the adhesive. A missed joint can become a leak path.
The urethane used here had about 15 minutes before it began to skin over. Follow your product’s working time and environmental limits. This is why the dry fit, molding installation, and handling plan all happen beforehand.
Install and Seat the Rear Windshield
With a helper, bring the glass over the opening and line up the pegs and tape marks. Keep it above the adhesive until both sides are aligned, then lower it carefully into place.
Once the glass touches the urethane, do not lift it back up casually. That can disturb the continuous bond you just created.
Check the gaps before pressing down
Before fully seating the glass, inspect the gaps between its edges and the surrounding bodywork. They should be even.
Only very small positioning corrections were possible here, roughly a millimeter or two. A gentle sideways push with an open hand can make that small correction, but this is not the time for a large adjustment.
Once the alignment is correct, use open-hand pressure around the perimeter to seat the window evenly into the adhesive. Follow the vehicle procedure for its final seating position.
Support the glass while the urethane cures
Apply tape across the top edge to help prevent the glass from sagging while the adhesive cures. I also left the suction cups attached until the next day so removing them would not accidentally pull on the fresh installation.
Inspect for visible primer marks outside the covered area. Clean them only with an appropriate method that will not disturb or contaminate the new bond.
During curing:
- Close the trunk gently rather than slamming it.
- Avoid slamming the doors.
- If conditions allow, leave a side window slightly open to relieve cabin pressure.
- Leave the glass undisturbed for the adhesive’s specified period.
- Follow the manufacturer’s safe drive-away time and curing requirements.
I waited 24 hours for the urethane used in this repair. Do not assume that 24 hours is correct for every adhesive or every temperature and humidity condition.
Reconnect the Defroster and Check the Installation
After the required curing period, remove the support tape and release the suction cups without pulling on the glass. Clean off the suction marks and remaining dirt.
I also inspected the practice bead, which had become solid and was no longer sticky. That is a useful observation, but it is not a substitute for the adhesive manufacturer’s cure and safe drive-away instructions.
The salvage-yard markings on my window came off with careful scraping on the exterior glass. Avoid using a blade on any surface or coating that the glass supplier says can be damaged.
Reconnect and test the rear defroster
- Reconnect the defroster terminal on each side, making sure each connector is fully seated.
- Reinstall the pillar trim and its fasteners.
- Run the engine outdoors and switch on the rear defroster.
- Allow approximately 5 to 10 minutes for the glass to warm.
- Check for warmth across the window.
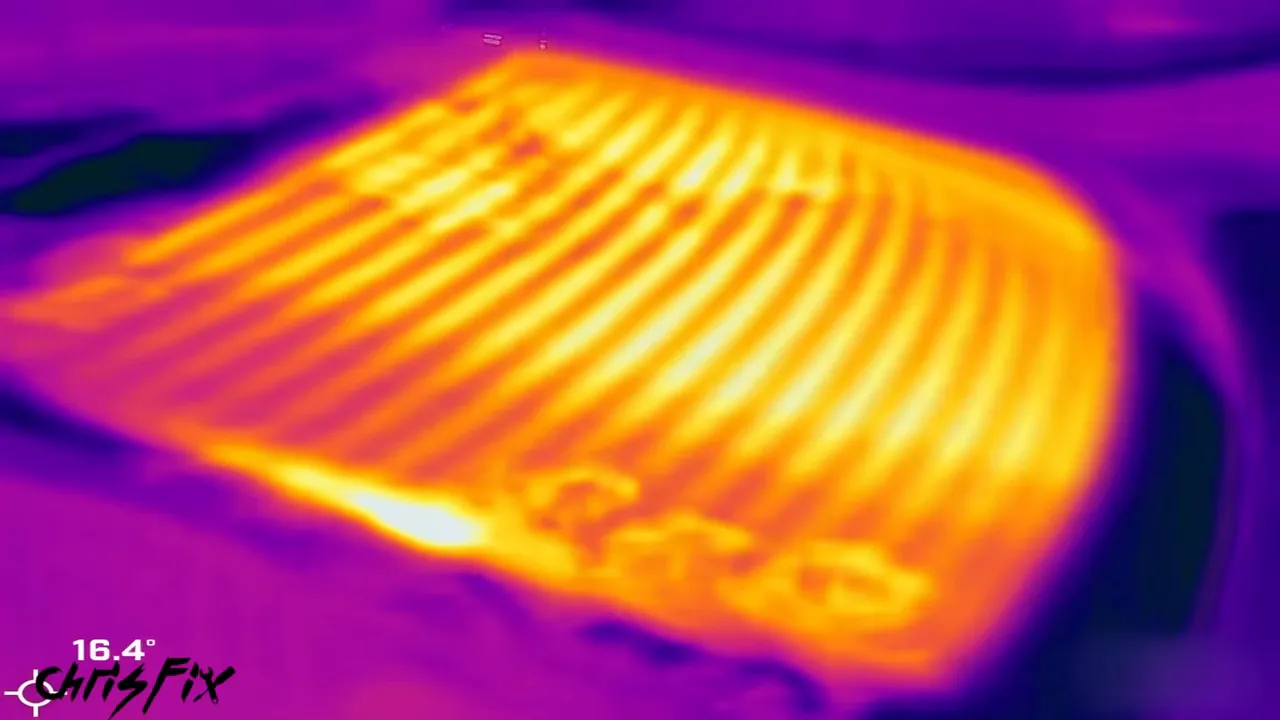
A thermal camera makes the result especially clear. It is not required for this job, but it showed each grid line heating the replacement glass.
Check for water leaks
Once the adhesive system permits water testing, simulate rainfall over the rear window and inspect the perimeter from inside the car. Look for droplets, damp trim, or water tracking into the cabin.
This installation stayed dry during the test, and the defroster warmed across the window. Beautiful. That is the result we want: properly seated glass, a continuous seal, and a working heater grid.
Does the Same Process Work for a Front Windshield?
The basic workflow is similar for many bonded front windshields: remove the old glass, prepare the mounting flange and replacement glass, apply the specified primer and urethane, position the glass, and allow the bond to cure.
The obvious difference is removal. Laminated front glass generally stays together as a large assembly, unlike the shattered tempered rear glass in this repair. However, that does not make every front windshield installation identical. Follow the vehicle-specific requirements for removal, trim, attached equipment, and any additional procedures.
The biggest lesson from this rear windshield replacement is simple: the installation depends on preparation, not expensive tools. Protect the pinch-weld paint, keep the bonding surfaces clean, use a compatible adhesive system, practice the placement, and give the urethane the time it needs. That is how a pile of broken glass becomes a clean, finished repair.


