Replacing trailer wheel bearings is a job you can do at home with common hand tools. The important part is doing the entire job correctly: matching the replacement parts, changing the races, packing the bearings with grease, installing the seal, and adjusting the axle nut so the bearings can spin freely.
I’m rebuilding the hubs on a small boat trailer, but the same basic process applies to many utility trailers, car trailers, campers, and enclosed trailers that use serviceable tapered roller bearings. Always check your axle manufacturer’s instructions for the specifications that apply to your setup.
This trailer also needs tires. The old rubber has dry rot, tread separation, and exposed, rusty belts. Fresh bearings won’t make those tires safe, so I’m covering that part of the repair too, including how to use a manual tire changer at home.
What You'll Learn
- Match replacement bearings and races using the identification numbers on the old parts.
- Pack grease through every bearing section before installing the bearings and new seals.
- Seat the bearings, then adjust spindle nut clearance to your axle manufacturer’s specification.
- Replace damaged tires, renew valve stems, and clean bead seats before mounting new rubber.
Table of Contents
- Tools and Parts You’ll Need
- 1. Lift and Support the Trailer Safely
- 2. Remove the Hub, Bearings, and Seal
- 3. Remove Both Bearing Races
- 4. Find the Correct Bearings, Races, and Seal
- 5. Clean the Hub and Install the New Races
- 6. Pack the Bearings With Trailer Bearing Grease
- 7. Install the Inner Bearing and Grease Seal
- 8. Inspect the Spindle and Reinstall the Hub
- 9. Adjust the Axle Nut Correctly
- 10. Install a Dust Cap or Bearing Buddy
- 11. Choose the Correct Trailer Tires
- 12. Remove the Old Tire With a Manual Tire Changer
- 13. Replace the Valve Stem and Clean the Wheel
- 14. Mount and Inflate the New Tire
- 15. Balance the Tires and Reinstall the Wheels
- Keep the Repair in Good Shape
Tools and Parts You’ll Need
You don’t need a shop full of expensive equipment to rebuild a trailer hub. Here’s the basic setup:
- Jack, properly rated jack stands, and wheel chocks
- Ratchet, sockets, and torque wrench
- Rubber mallet and a hammer
- Pliers and a flat-ended punch
- Small pry bars or a seal puller
- Safety glasses and clean gloves
- Paper towels, a clean work tray, and brake cleaner
- Plastic-bristle brush and a scouring pad or 800-grit sandpaper
- Bearing race and seal driver set, or a correctly sized socket
- Trailer wheel bearing grease and a grease gun
For each hub, plan on replacing two bearings, two races, one grease seal, and the cotter pin. Use quality bearings from a manufacturer you trust. This is not the place to save a few dollars on questionable parts.
A bearing packing tool is optional because you can pack bearings by hand. A race and seal driver set is helpful, and some auto parts stores offer loaner tools if you don’t want to buy one.
For the tire work, I’m using a manual tire changer with a separate duck head attachment, a tire iron, a valve core tool, new valve stems, a valve stem puller, tire mounting lubricant, and an air compressor with a tire inflation gauge.
1. Lift and Support the Trailer Safely
If possible, leave the trailer connected to the tow vehicle. That connection gives you another point of stability. Chock both sides of the opposite wheel so the trailer cannot roll.
- With the tire still on the ground, loosen the lug nuts without removing them.
- Position the jack at an approved lifting point on the trailer frame. On this trailer, I’m lifting ahead of the wheel, closer to the middle of the trailer.
- Raise the tire clear of the ground.
- Place jack stands under suitable frame locations ahead of and behind the wheel.
- Lower the frame onto the stands. I leave the jack lightly touching the frame as backup, not as the primary support.
- Remove the lug nuts and wheel.
Never rely on a hydraulic jack alone while working on the trailer. Use a firm, level surface and follow the trailer manufacturer’s lifting instructions.
A useful trick for tandem-axle trailers
On some tandem- or triple-axle trailers, driving one tire onto a suitable ramp raises the adjacent wheel enough to remove it. In my example, roughly 4 to 5 inches of lift did the job. This can be handy during a roadside tire change, but whether it works depends on the suspension. Use a stable, load-rated ramp and confirm that the trailer manufacturer permits this method.
2. Remove the Hub, Bearings, and Seal
Remove the plastic cap if fitted, then tap the metal dust cap off with a rubber mallet. The softer mallet helps avoid damaging a cap you intend to reuse.
Straighten the cotter pin with pliers and pull it out. Throw it away. Always install a new cotter pin during reassembly. It keeps the castle nut from turning loose, so it is an essential part of retaining the hub.
Remove the axle nut, then the washer directly behind it. Keep that washer somewhere safe. With the hardware removed, slide the hub off the spindle, catching the outer bearing so it doesn’t fall onto the ground.
Put the hub on a clean work surface. Sand, grit, and dirt have no place around new bearings. Have plenty of paper towels ready because the old grease makes this a messy job.
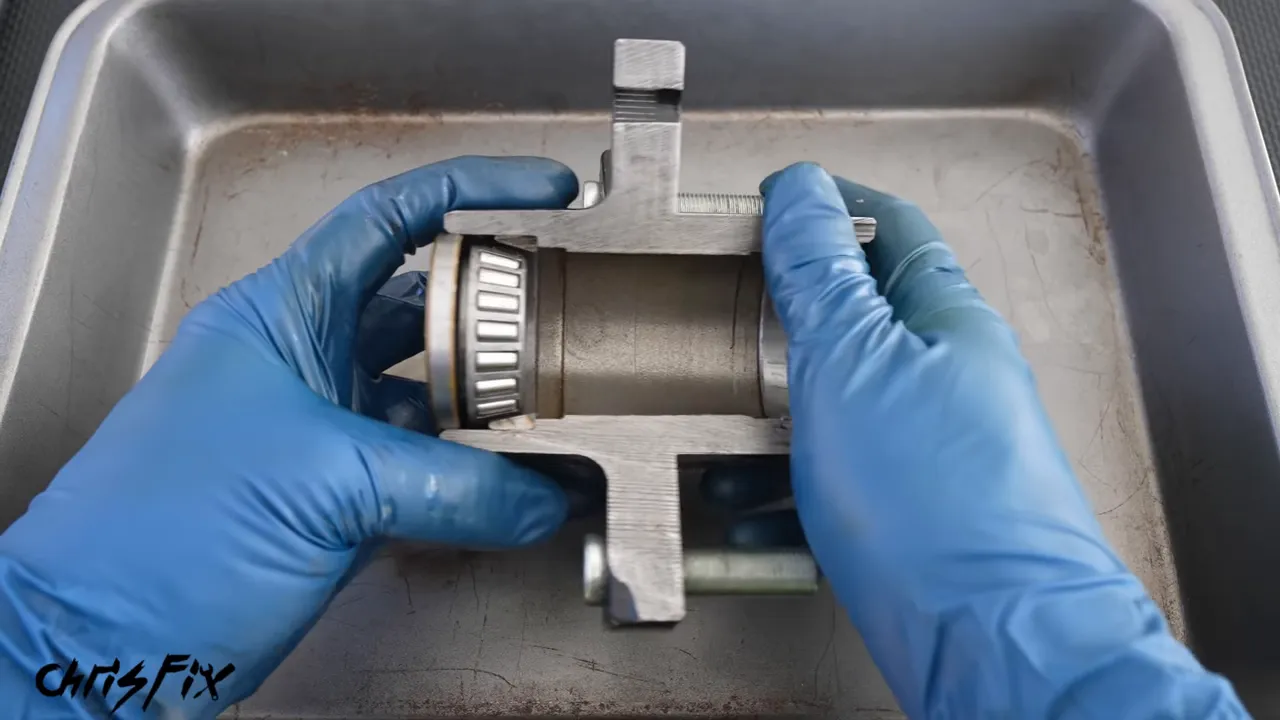
Three ways to remove the inner seal
The outer bearing lifts out easily. The inner bearing stays behind the rear grease seal, which is pressed into the hub. Here are three ways to remove it:
- Use the spindle nut as a stop: With the outer bearing and washer removed, slide the hub back onto the spindle. Thread the axle nut on far enough to engage its threads fully. Pull the hub firmly outward so the inner bearing catches against the nut and pulls the seal free. Remove the nut, bearing, and old seal afterward.
- Use a seal puller: Hook the tool behind the seal and lever it out, taking care not to damage the hub.
- Use a self-tapping screw: Drive a screw into the old seal’s metal shell, leaving enough exposed to grip with pliers. Pull the seal out and carefully remove any metal shavings.
The screw method can be useful where a conventional puller will not fit. Regardless of the method, keep the spindle, hub bore, and sealing surfaces free of damage.
3. Remove Both Bearing Races
Each tapered roller bearing runs against a hardened steel cup pressed into the hub. That cup is the bearing race.
Replace the races along with the bearings. Installing new bearings against worn races leaves old wear surfaces in the assembly and can shorten the life of the new parts.
Wipe the old grease out of the hub, then rinse it with brake cleaner so you can clearly see both races and their exposed edges.
- Support the hub securely in a vise or on two blocks of wood, leaving room below for the race to come out.
- Reach through the hub with a flat-ended punch and position it against the back edge of the opposite race.
- Strike the punch firmly, moving around the circumference to walk the race out evenly.
- Flip the hub and repeat for the other race.
Use a flat punch, not a pointed one. You need enough force to move the press-fit race, but you also need control so the punch doesn’t gouge the hub.
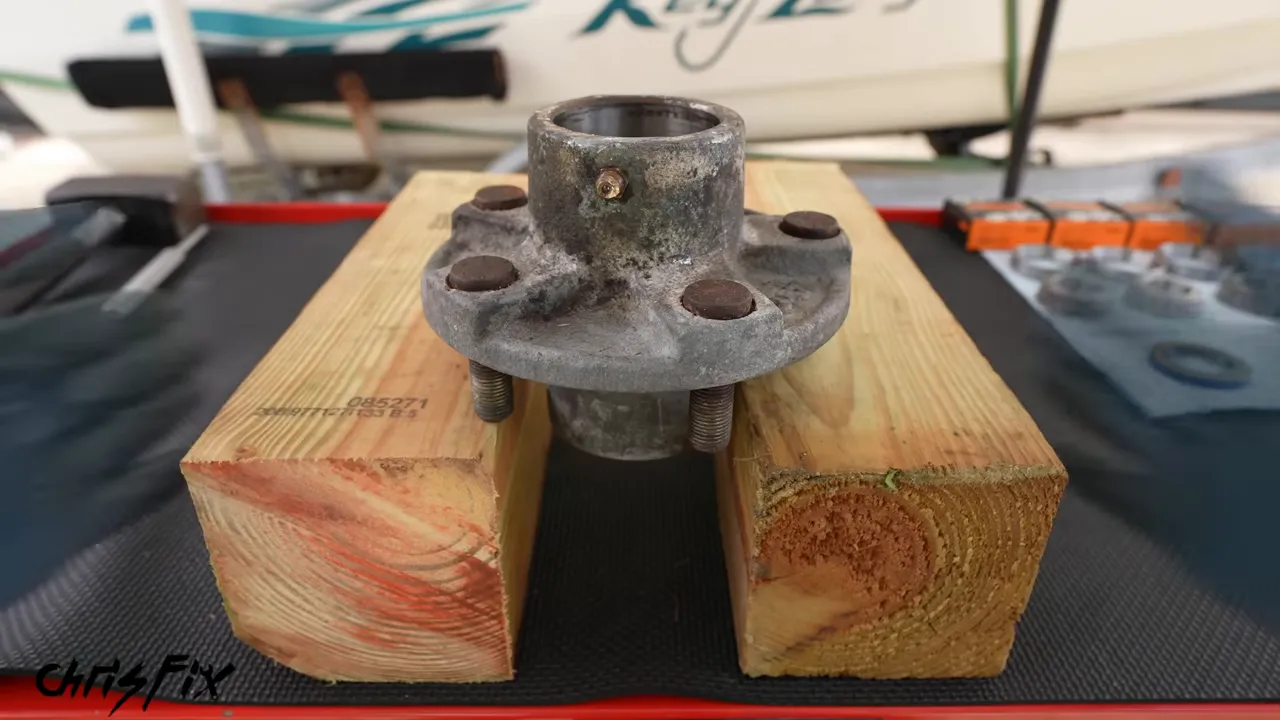
4. Find the Correct Bearings, Races, and Seal
Ordering trailer bearings isn’t always as simple as entering a year, make, and model. The same trailer model may have different axle configurations. A reliable starting point is to clean the old parts and read their identification numbers.
On this trailer:
- The inner and outer bearings are both L44649.
- The inner and outer races are both L44610.
Those are examples for this hub, not universal trailer part numbers. Check both bearings because the inner and outer bearings can be different sizes. Match the races as well.
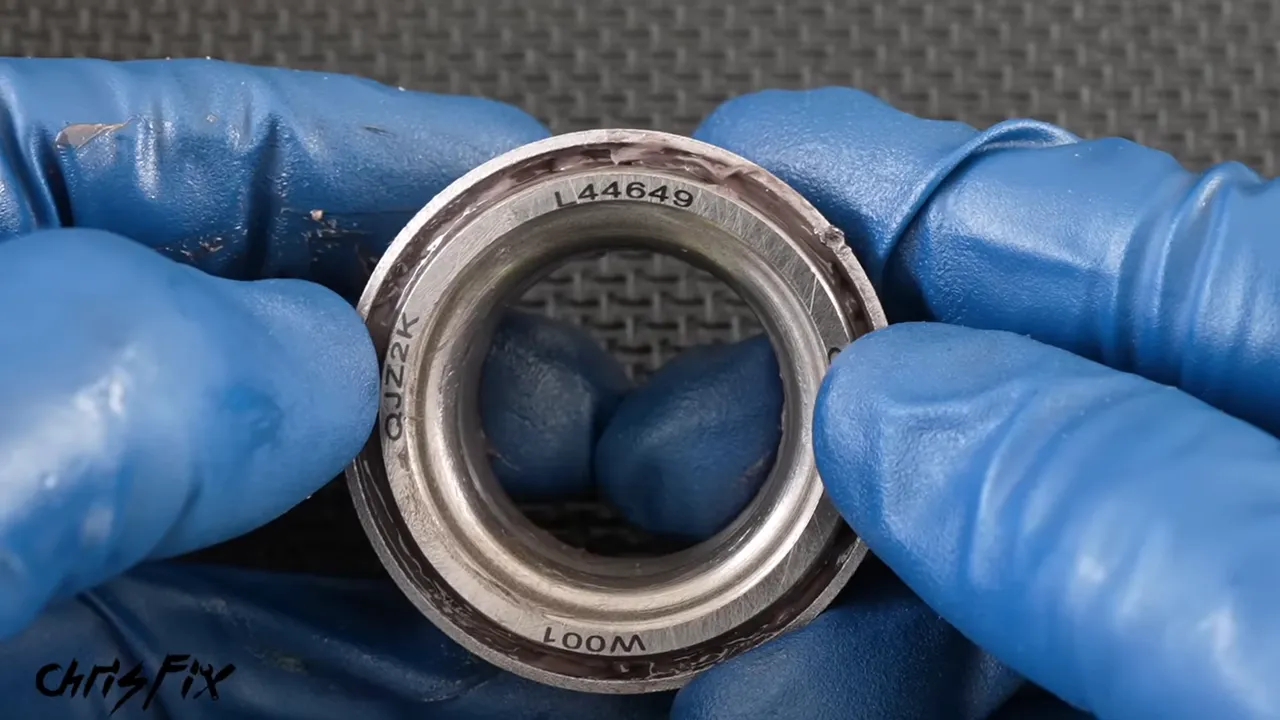
How to identify the grease seal
Seal markings can be harder to read because the old seal may be rusty, damaged, or covered in deteriorated rubber. If the identification is unreadable, use calipers to establish its dimensions:
- Outside diameter
- Inside diameter at the sealing lip
- Overall width
My old seal measures approximately 1.98 inches outside, 1.2 inches inside, and 0.25 inch wide. Use those measurements to help identify the correct replacement, then verify the fit for your hub and spindle.
For this boat trailer, I prefer a coated, double-lip seal. The coating helps seal the outside of the seal against the hub bore. With a double-lip design, one lip helps retain grease while the other helps keep water and dirt out.
5. Clean the Hub and Install the New Races
Before pressing anything back in, inspect the hub bores. Removing the old races can leave small raised burrs. Lightly smooth those with a scouring pad or 800-grit sandpaper.
The goal is to remove raised material, not to enlarge the bore or sand every stain away. Light corrosion staining can remain as long as the surface is smooth and suitable for the new part.
Clean the hub with brake cleaner and a plastic-bristle brush, then give it a final rinse to remove grit and debris. Let it dry before adding grease.
Install the race in the correct direction
The race has a wide edge on one side and a narrow edge on the other. For the installation shown here, the wide edge goes into the hub first and the narrow edge faces outward. That leaves the cup opening accessible for the bearing.
Apply a very thin coat of grease to the hub bore to help prevent galling during installation.
Select a driver that rests squarely on the race’s narrow outer edge. It must be small enough to enter the hub, but not so small that it applies installation force to the polished bearing-running surface.
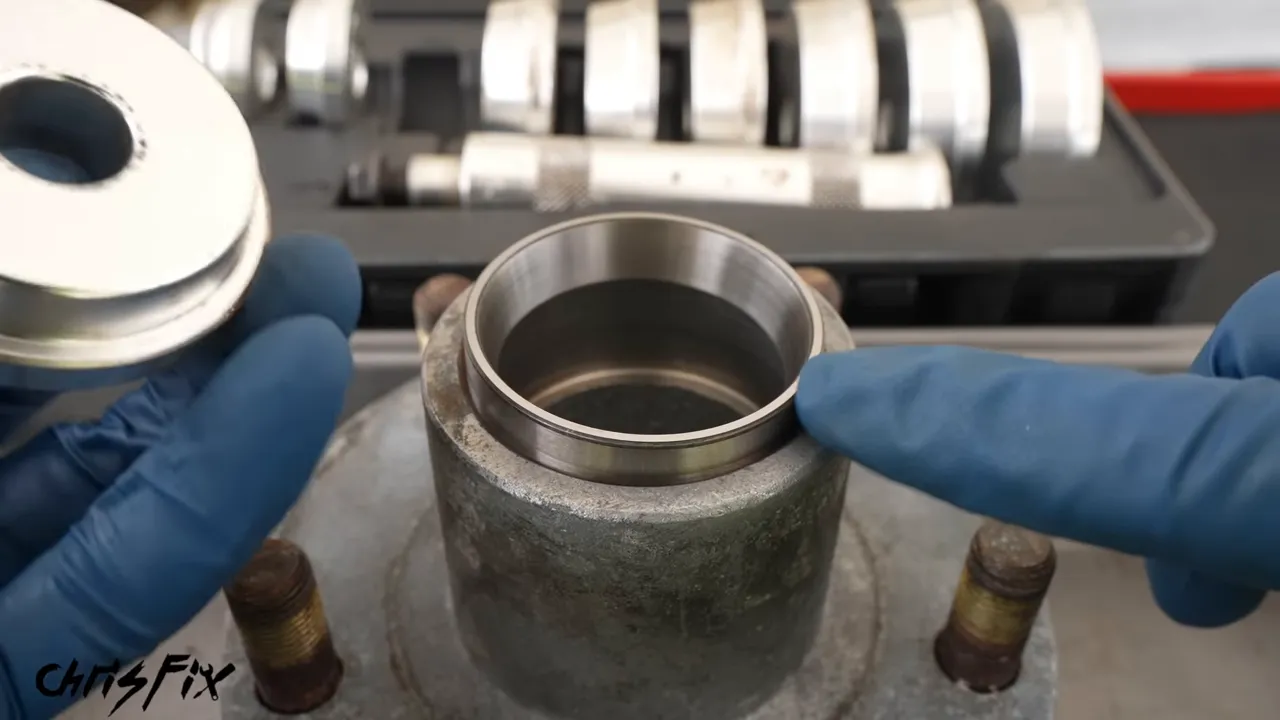
- Start the race squarely in the bore.
- Use light taps until it has entered evenly.
- Once it is straight, use firmer blows to drive it fully home.
- Confirm that it sits against the internal shoulder all the way around.
You’ll usually notice a change in sound and feel when the race bottoms out. Still, inspect the seating rather than relying on sound alone.
Using a socket instead of a driver
A large socket can work if it contacts the race’s outer edge evenly and fits inside the hub deeply enough to seat the race completely. I use that method for the second race.
Don’t use a punch to install a new race. One slip onto the polished track can nick the surface the rollers run against and ruin the new part.
6. Pack the Bearings With Trailer Bearing Grease
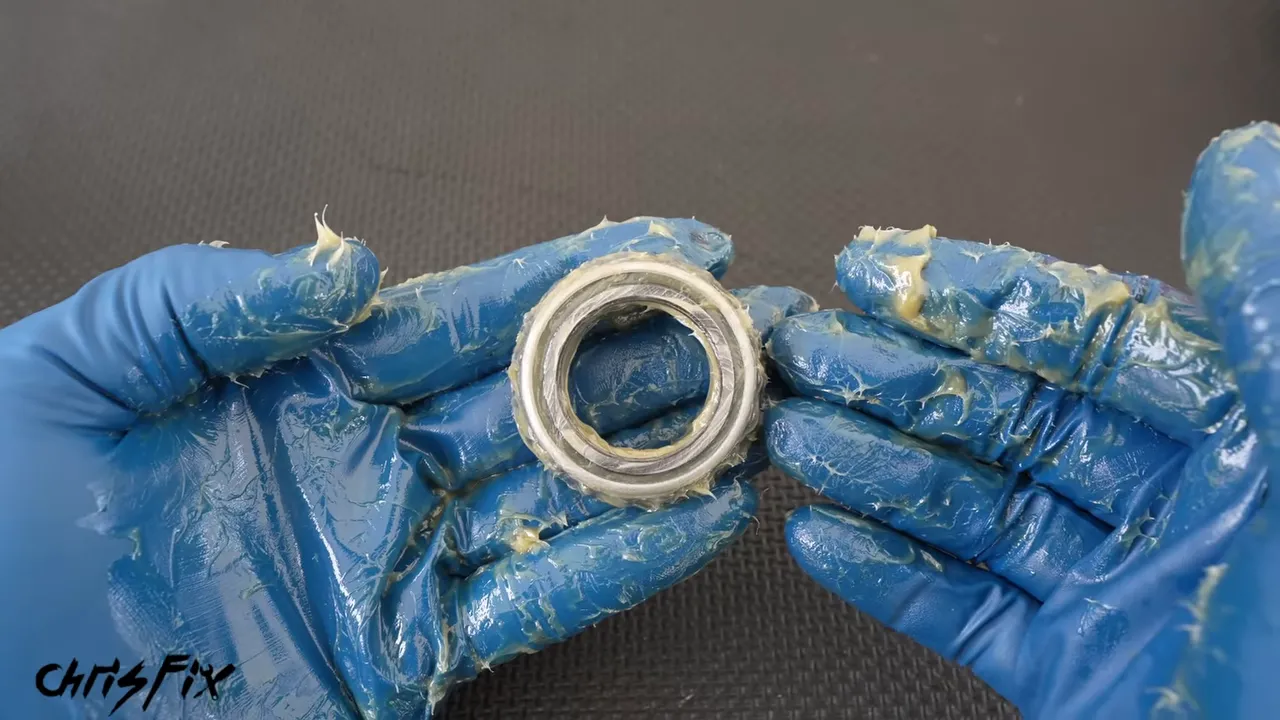
These replacement bearings arrive ungreased. They cannot be installed dry, and simply smearing grease over the outside is not enough. You need to force grease through the spaces between the rollers and cage.
Use grease intended for trailer wheel bearings, with suitable water resistance for your application. Start with clean gloves and a clean workspace.
Hand-packing method
- Place a golf-ball-sized amount of grease in your palm.
- Hold the bearing with its larger cage opening toward the grease.
- Press the edge of that opening into the grease, dragging it firmly across your palm.
- Repeat until fresh grease emerges through the opposite side of that section.
- Rotate the bearing slightly and repeat until you have worked around its entire circumference.
- Spread grease over the outside of the rollers so no running surfaces remain dry.
The key is seeing grease come through the bearing, not just building up around it. Take your time and work all the way around.
Using a bearing packer
A bearing packer does the same job more quickly. Place the bearing in the tool, install its centering plunger, and press down to force grease through the cage. It can take substantial pressure, but you can see the grease emerge around the bearing at once.
Remove the bearing and coat the outside of the rollers afterward. Even with a packing tool, those surfaces should not be left dry.
A useful maintenance baseline for this type of trailer bearing is repacking annually or every 12,000 miles, whichever comes first. Follow your axle manufacturer’s schedule and any additional requirements for boat-trailer use.
7. Install the Inner Bearing and Grease Seal
Coat the inner race with grease, then place the packed inner bearing into it with the tapered end facing into the cup.
Next comes the seal. Its cupped side faces the bearing and grease; its flat side faces outward.
A factory-coated seal can be installed as specified by its manufacturer. If the correct seal has an uncoated metal outside diameter, the method I use here is a very thin skim coat of RTV around that outside surface. Keep it off the sealing lips and bearing, and follow the sealant manufacturer’s directions.
Start the seal straight and tap it evenly around its perimeter until it sits flush in the position required for the hub. A suitable seal driver helps distribute the force without distorting it.
Grease the accessible space inside the seal and lubricate between the lips of a double-lip seal.
Grease the hub bore and outer bearing
Flip the hub over and coat the center bore with grease to protect the bare metal from corrosion. I use roughly a quarter-inch coating around the bore in this assembly, rather than leaving it completely dry. Follow the lubrication requirements for your particular hub design.
Grease the outer race, then insert the packed outer bearing with its tapered end into the cup.
8. Inspect the Spindle and Reinstall the Hub
Wipe all old grease and dirt from the spindle, especially the shoulder where the rear seal rides.
Inspect the seal-running surface and bearing journals. Light staining is different from deep pitting or a worn groove. On this spindle, I cannot catch the marks with a fingernail, so I lightly clean the surface with a scouring pad and wipe away the residue.
A deeply grooved or corroded sealing surface needs attention before reassembly. A new seal cannot compensate for a badly damaged spindle. Severe damage may require axle replacement or another manufacturer-approved repair.
This is also a good opportunity to inspect the suspension. My trailer’s leaf springs were badly corroded and coming apart, so I replaced them before returning the trailer to service.
- Apply a coat of grease to the clean spindle.
- Hold the outer bearing in place with your thumbs.
- Slide the hub onto the spindle carefully so the rear seal is not damaged.
- Inspect the washer for grooves or distortion. Its contact surfaces should be smooth and flat.
- Grease both sides of the washer and reinstall it.
- Thread the axle nut on finger-tight.
9. Adjust the Axle Nut Correctly
This is one of the most important parts of the job. Tapered trailer bearings need the correct adjustment. Too tight can damage them. Too loose can damage them too.
The figures below are for the assembly demonstrated here. Confirm the seating torque, adjustment procedure, and endplay specification for your axle before using them.
- Seat the bearings: Rotate the hub while progressively tightening the axle nut to 25 ft-lb. Turning the hub helps the rollers settle into position.
- Back off the nut: Loosen it approximately one-eighth turn, or 45 degrees.
- Align the cotter pin hole: If the castle nut blocks the hole, loosen it only enough to align the next slot. Do not force it tighter simply to line up the pin.
- Check the adjustment: The hub should turn freely and have the specified amount of endplay.
The endplay specification used here is 0.001 to 0.005 inch. With a dial indicator, my hub measures approximately 0.003 to 0.004 inch, which is within that range.
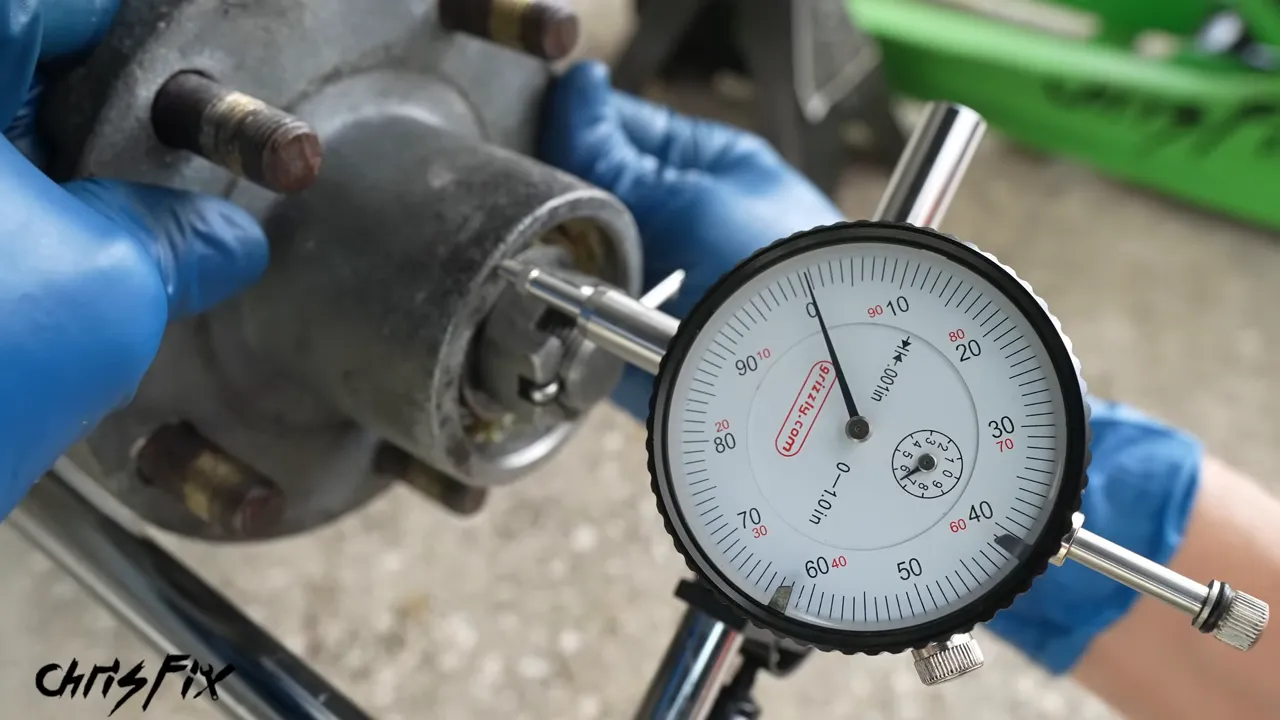
The nut may feel surprisingly loose compared with a typical fastener. It is not being left at the initial seating torque. That initial torque seats the bearings; the backing-off step establishes running clearance.
Insert a new cotter pin fully, then bend and secure it around the end of the spindle so it retains the nut and clears the cap. In this installation, I bend the leg over and flatten it carefully against the spindle end.
10. Install a Dust Cap or Bearing Buddy
With the bearings adjusted and the cotter pin secured, a conventional dust cap can finish the assembly. I add grease inside the cap and a light coating around its mating edge, then tap it squarely into the hub with a rubber mallet.
For this boat trailer, I’m fitting Bearing Buddy protectors instead. Their spring-loaded piston maintains positive grease pressure to help resist water and dirt entry.
- Lightly grease the protector’s mating edge.
- Tap it into the hub evenly, keeping it square.
- Attach the grease gun to the zerk fitting.
- Add grease slowly, observing the spring-loaded plate and following the protector’s filling instructions.
- Install the protective cover.
Don’t keep pumping after the protector reaches its proper filled position. More grease is not automatically better.
This hub also has a rear grease fitting. Mine was leaking grease back through the fitting, so I removed it with a 10 mm wrench and installed a replacement. I chose an angled fitting to make access easier with the wheel installed.
These protectors are useful, but they do not replace properly packed bearings, a good rear seal, or routine maintenance.
11. Choose the Correct Trailer Tires
The bearings are finished, but the old tires are not going back on. Tread separation, dry rot, and exposed belts make them unsafe regardless of how much tread remains.
Start with the trailer’s certification or tire-information label, often near the tongue or on the frame. It can provide the specified tire size, cold inflation pressure, and axle weight ratings.
If the label is missing, the old tire markings are a starting point, not proof that the previous tires were correct. Verify the required size and capacity for the trailer.
Reading the size and service description
My old tire is marked 175/80R13 with a service description of 92/88M.
- 175/80R13: Identifies the tire’s width, aspect ratio, radial construction, and wheel diameter.
- 92/88: Gives the load indexes for single and dual tire fitments. Dual means paired tires at one end of an axle, not simply a trailer with multiple axles.
- M: Indicates a speed rating of 81 mph.
Load index 92 corresponds to 1,389 pounds per tire in single fitment, or 2,778 pounds for two tires. That tire capacity does not increase the rating of the axle, wheels, frame, or trailer.
I selected Trans Eagle replacements in the same size with higher load and speed ratings, and I ordered three so the spare would be fresh too. Priority Tire recommended the tires and supported this project.
For more background on tire markings, inflation, and inspection, the NHTSA tire safety guide is a useful reference.
12. Remove the Old Tire With a Manual Tire Changer
I mounted my manual tire changer to a pallet so I can move it around without drilling into the driveway. Whatever mounting arrangement you use, it must be secure enough to handle the leverage involved.
Deflate and break both beads
- Remove the valve cap.
- Use a valve core tool to remove the core and let all the air escape.
- Confirm that the tire is fully deflated before using the bead breaker.
- Position the bead-breaking shoe against the tire beside the rim, not on the rim itself.
- Press the lever down to separate the bead.
- Rotate the wheel and repeat as needed, then flip it over and release the other bead.
The old valve core on this wheel was heavily corroded, which may have contributed to the air leak.
Remove the tire from the wheel
Mount the wheel on the changer, engage its anti-rotation pin through a lug hole, and tighten the hold-down.
I recommend the separate duck head attachment because it helps guide the bead over the rim while reducing the chance of wheel damage.
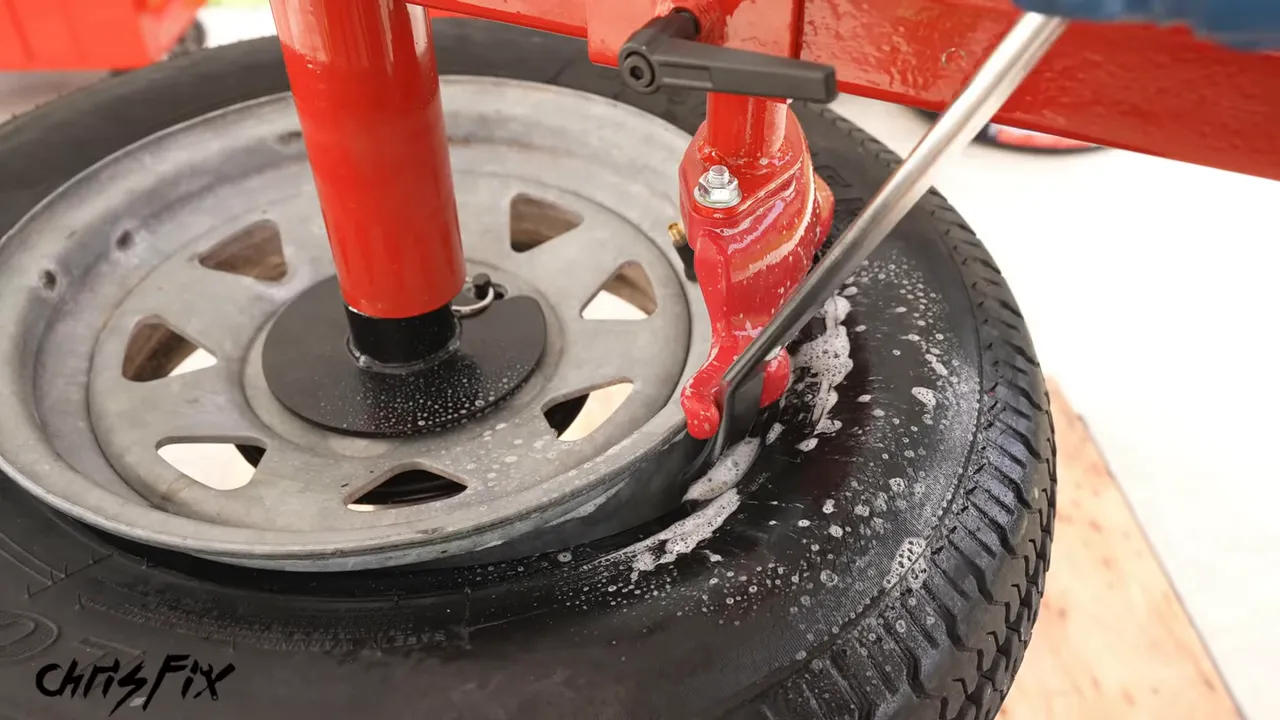
Lubricate the bead and duck head. I use soapy water during removal. Lift the upper bead over the duck head with the tire iron, then rotate the attachment around the wheel to lift that bead off.
Reach down to the lower bead, lift it over the duck head, lubricate again, and repeat. The tire can then come off the wheel.
Lubrication makes a huge difference. If the bead is fighting you, stop and check the setup rather than simply applying more force.
13. Replace the Valve Stem and Clean the Wheel
With the tire removed, replace the old rubber valve stem. Cut its base and remove it, taking care not to damage the wheel.
Insert the correct replacement stem through the hole from inside the wheel. Thread the valve stem puller fully onto it, then pull until the stem seats securely.
Next, clean both bead seats. On this steel trailer wheel, I use soapy water and a wire brush to remove loose corrosion, old rubber, and dirt. Wipe the entire wheel clean afterward.
A new tire can still leak if its bead is sealing against corrosion or debris. Give both sides a clean, smooth surface before mounting.
14. Mount and Inflate the New Tire
Apply tire mounting lubricant around the first bead. Dedicated mounting lubricant is my preference for the new tire; dish soap is a commonly used substitute when you’re in a pinch.
- Position the tire over the wheel and push the first bead on as far as it will go.
- If needed, use the duck head to guide the remaining portion over the rim.
- Position the second bead under the duck head.
- Lubricate it all the way around.
- Rotate the attachment to guide the second bead onto the wheel without pinching or damaging it.
If the tire has a yellow balance dot, it identifies the light point on tires using that marking convention. Matching it to the valve stem can help with initial balance. These trailer tires do not have that dot.
Seat the beads carefully
Connect the inflation equipment and add air while monitoring the pressure. If air escapes around an unseated bead, gently repositioning the deflated tire can help the bead contact the rim so inflation can begin.
Follow the tire and wheel manufacturers’ bead-seating procedures and pressure limits. Don’t keep increasing pressure to force a stubborn bead into place, and don’t confuse compressor supply pressure with tire pressure. Stop and correct the mounting problem if the bead will not seat within the permitted limit.
My new tires use 65 psi for this application. That is not a universal trailer tire setting. Confirm the correct cold operating pressure for your tires, wheels, and trailer, then install the valve caps.
15. Balance the Tires and Reinstall the Wheels
There are a few approaches to balancing small trailer tires:
- Run them without balancing: Some small trailer setups are used this way, though imbalance can leave vibration.
- Use compatible balancing beads: These move inside the tire to help balance the assembly. The product considered here uses glass beads, with roughly 3 ounces suggested for this tire size. Follow the product’s application guidance.
- Have a shop balance them: This is the option I chose after mounting the tires myself.
At the shop, the machine found that one wheel needed a three-quarter-ounce weight. The technician installed it at the indicated location and spun the assembly again to confirm the balance.
Back at home, install the fresh spare on its carrier, then reinstall the road wheels:
- Start every lug nut by hand.
- Raise the trailer enough to remove the jack stands safely.
- Lower it until the tire just contacts the ground and cannot turn.
- Torque the lug nuts to the correct wheel and trailer specification in a crisscross pattern.
- Lower the trailer fully.
The lug nut torque is separate from the spindle nut adjustment. Do not use the bearing seating torque as a wheel lug nut specification.
Keep the Repair in Good Shape
If the trailer lives outdoors, tire covers are an inexpensive way to reduce UV exposure. I use them during storage to help protect the rubber rather than letting the new tires sit uncovered in the sun.
Keep up with bearing service, tire pressure checks, and inspections of the seals, caps, tires, and suspension. On a boat trailer, the hubs get submerged at the ramp, which makes good sealing and water-resistant lubrication especially important.
With new races, fully packed bearings, properly installed seals, correct endplay, and fresh tires, this trailer now rides smoothly. The satisfying part is knowing the small details were handled before heading down the road.
|


