A deep scratch across your car’s paint looks terrible, but fixing it does not always require repainting the entire panel. With a color-matched automotive touch-up pen, careful preparation, and some sanding and polishing, you can make that damage much harder to notice.
The scratch I’m repairing runs across an entire fender after somebody keyed the car. A body shop quoted me $775 to repair that panel properly. The touch-up pen costs around $15 to $20. That is the price of the pen, not every supply needed, but it gives you an idea of why this repair is worth considering.
Now, keep your expectations realistic. This will not produce the same result as a professional repair with the panel refinished and the paint blended into adjacent panels. You may still find the repair up close or at a certain angle. The goal is a good-looking, inexpensive repair that does not jump out at you from a few feet away.
The process has four main steps:
- Clean the panel so dirt, wax, and oils do not contaminate the repair.
- Prepare the scratch by removing rust and smoothing its jagged edges.
- Paint the scratch, level the touch-up paint, and add clear coat.
- Blend the repair with fine wet sanding and polish.
What You'll Learn
- Match the touch-up paint to the vehicle’s paint code and check for fading before starting.
- Remove rust and smooth jagged scratch edges before applying thin layers of touch-up paint.
- Level the color and clear coats separately, then use fine wet sanding and polish to blend.
- Wait for the touch-up paint to cure before applying wax or ceramic coating.
Table of Contents
- First, Make Sure You Have a Deep Scratch
- Tools and Supplies You Need
- Choose the Correct Touch-Up Paint
- Step 1: Clean the Entire Panel
- Step 2: Remove Rust and Smooth the Scratch
- Step 3: Fill the Scratch With Touch-Up Paint
- Level the Color Coat Before Adding Clear Coat
- Add Clear Coat and Sand It Level
- Step 4: Blend the Repair With Fine Wet Sanding and Polish
- What Results Can You Expect?
- Let the Paint Cure Before Waxing or Ceramic Coating
First, Make Sure You Have a Deep Scratch
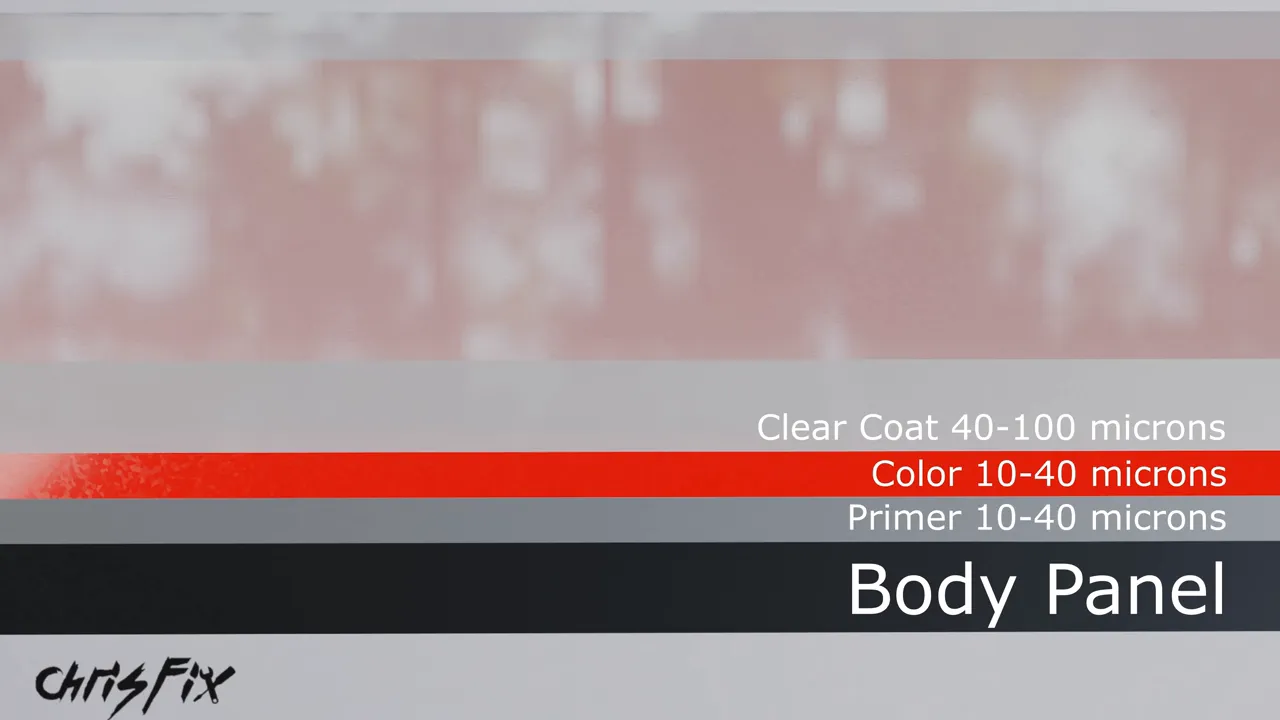
Before adding paint, it helps to understand what you are repairing. Automotive paint is a thin stack of layers over a metal or plastic body panel:
- Primer: the first coating over the panel, often gray, approximately 10 to 40 microns thick.
- Base coat: the layer that gives the car its color, approximately 10 to 40 microns thick.
- Clear coat: the transparent protective layer that provides gloss, approximately 40 to 100 microns thick.
Those are approximate ranges, and thickness varies between manufacturers. For perspective, a sheet of ordinary printer paper is about 100 microns thick. There is not much material here to work with, which is why controlled sanding matters so much.
The fender scratch goes through the color coat into the primer. That missing color needs to be replaced. A scratch confined to the clear coat is a different repair.
One useful check is to dampen a towel with isopropyl alcohol and wipe the scratch. If the mark temporarily disappears while wet, then returns as the alcohol evaporates, that is an indication of a clear coat scratch. For that type of damage, use the separate clear coat scratch repair method rather than immediately filling it with paint.
The larger the deep scratch, the more work this takes. A small scratch or chip uses the same basic approach, but there is much less preparation, painting, and leveling to do.
Tools and Supplies You Need
You do not need a spray gun or a powered polisher for this repair. Here is the complete supply list, including the extra sandpaper grades used during preparation and leveling:
- Color-matched automotive touch-up paint with compatible clear coat.
- An abrasive preparation tip, such as the one built into the paint pen.
- Isopropyl alcohol, 70% or greater, for cleaning.
- A spray bottle of warm water with a squirt of dish soap.
- Clean microfiber towels.
- Masking tape.
- A razor blade or straight edge for carefully lifting stubborn tape corners.
- 400-grit sandpaper if rust needs to be removed.
- 800- or 1000-grit sandpaper for preparing the scratch.
- 800-grit sandpaper for localized paint leveling.
- 1500-, 2000-, 3000-, and 5000-grit wet-sanding paper.
- A small, flat sanding support, such as a domino.
- A clean kitchen sponge for supporting the fine sandpaper.
- Automotive polish and a hand-polishing pad.
The paint pen I used combines primer and color in one product and includes a separate clear coat reservoir. Check your own product carefully rather than assuming every touch-up pen works the same way. The manufacturer’s touch-up paint information is a useful place to check product features and application directions.
Follow the paint manufacturer’s instructions for application, drying, sanding, and curing. The waiting times below describe this particular repair, not a guaranteed schedule for every paint product or working condition. Sanding can also damage surrounding factory paint, so work carefully and stop as soon as each area is level.
Choose the Correct Touch-Up Paint
Match the paint code, not just the color name
Two paints described as white can look noticeably different. Find your vehicle’s paint code and match that code to the touch-up product.
On this Chrysler, the code is on the driver’s door jamb label: PW7. If you cannot locate your paint code, record the vehicle identification number, or VIN, and contact the vehicle manufacturer or dealer for help identifying it.
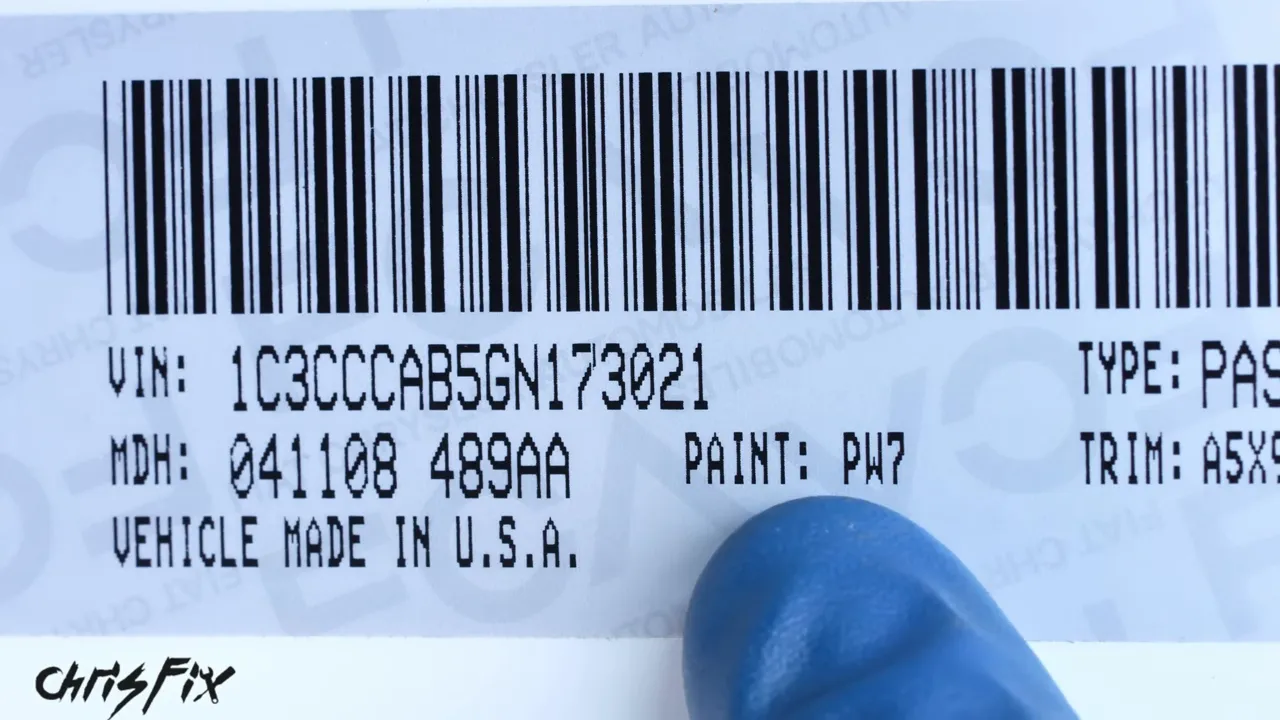
Also make sure you have automotive clear coat. The color fills the damage, but the clear coat is a key part of protecting and blending the finished repair. An abrasive tip is another handy feature because it lets you work directly inside a narrow scratch.
The OEM and aftermarket pens I compared had matching designs and came from the same underlying supplier. For those equivalent products, I would choose whichever costs less. The important checks are the correct paint code, the product’s features, and compatibility with the repair.
Check whether the original paint has faded
Even the correct factory paint code may look different against faded paint. Before starting, compare an exposed painted surface with an area that has been protected from sunlight.
- Behind a license plate that has covered the same area for years.
- Inside the fuel filler door, compared with the paint beside it.
- A protected section of a painted trim piece.
On my older Mustang, the paint behind the license plate makes the difference easy to see. The taillight bezels show an even more dramatic change compared with the surrounding paint.
Touch-up paint can still look much better than a contrasting gouge, but faded paint makes a color mismatch more likely. That is something to know before spending time on the repair.
Step 1: Clean the Entire Panel
Start by spraying the panel with the dish-soap-and-water mixture and wiping it clean with a microfiber towel. You want to remove dirt, oils, wax, and debris before working inside the scratch.
Clean the whole panel, not just the damaged line. Otherwise, it is easy to drag contamination from the surrounding surface into the area you are repairing.
Once the panel is clean, you are ready for the part that makes the biggest difference to the finished appearance: preparing the scratch.
Step 2: Remove Rust and Smooth the Scratch
Remove every trace of rust
Do not paint over rust. Rust left underneath the repair can cause the new paint to bubble.
This scratch has no rust, but if yours does, use a small piece of folded 400-grit sandpaper or the paint pen’s abrasive tip to remove it. Keep the work concentrated inside the damaged area.
Turn the sharp edges into a smooth transition
A deep scratch usually has steep, jagged edges. Think of those edges as a cliff. We want to turn that cliff into a rounded hill so the touch-up paint can blend into the original finish instead of outlining the damage.
Start with the abrasive tip, concentrating on the sharp edges. Wipe away the sanding dust with alcohol so you can see your progress.
Next, use 800- or 1000-grit sandpaper to smooth the transition into the paint immediately beside the scratch. Here is a helpful trick: do not press a sharply creased fold into the damage. That narrow edge can dig into the paint.
Instead, loosely fold the paper again to form a small rounded loop. That rounded surface fits into the scratch and helps soften its edges.
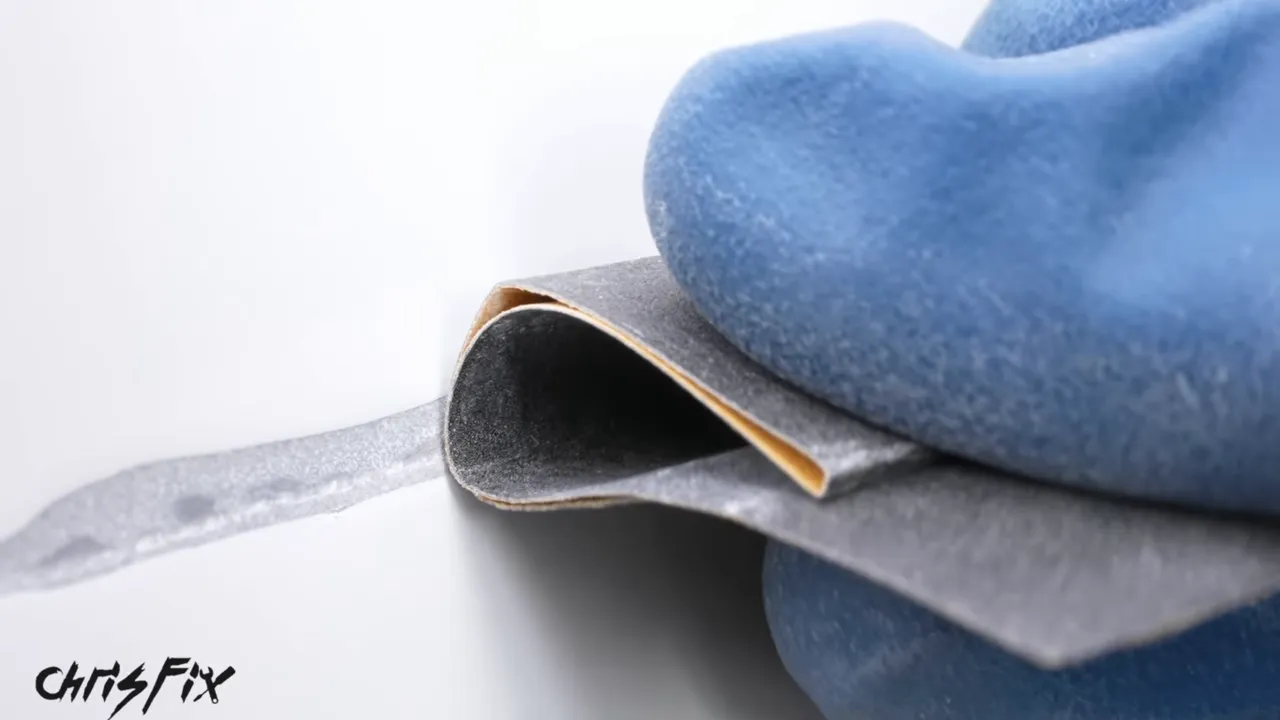
Check your progress with a fingernail. If it catches on a sharp lip, that edge still needs attention. Stop once the transition feels smooth. You are softening the edges, not trying to sand the surrounding panel down to the bottom of the scratch.
Keep narrow scratches narrow
A narrow key scratch needs the same smooth transition, but you do not want to make it unnecessarily wide.
Keep the abrasive tip centered over the scratch so it works on both edges together. Roll the sandpaper into a tighter rounded shape, and keep the sanding close to the damaged line.
Work along the entire scratch, then inspect it again. A sharp lip left anywhere can remain visible once the new paint goes on. This is one place where taking your time really pays off.
Step 3: Fill the Scratch With Touch-Up Paint
Clean again and mask the repair
Wipe the scratch, its edges, and the surrounding area with isopropyl alcohol on a clean towel. Remove the sanding dust and any oils before applying paint.
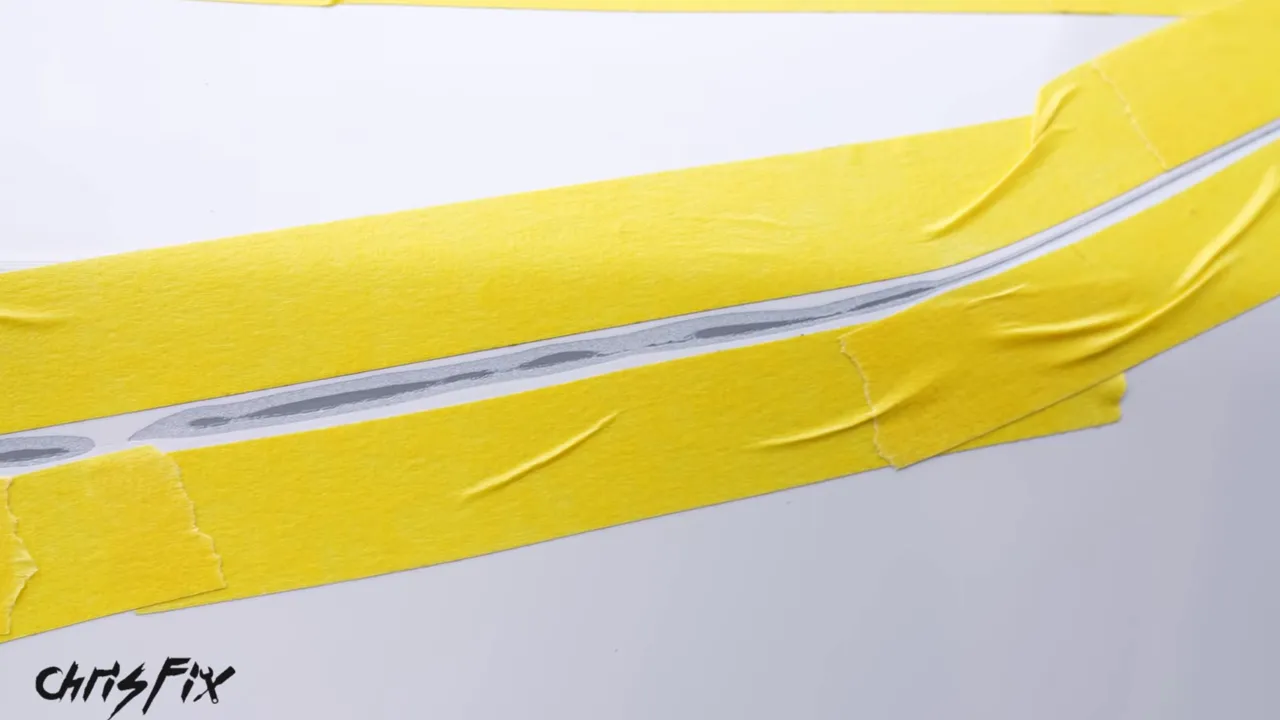
Then mask both sides of the scratch, leaving about 1 to 2 millimeters between the tape and the scratch edge. Do not cover the damage itself.
The tape contains excess paint and makes cleanup much easier. It will leave raised paint edges, but those will be leveled later.
Build up thin coats above the original paint
Shake the touch-up paint thoroughly. This particular product contains primer and color together, so it does not require a separate primer application for the demonstrated repair.
Remove excess paint from the brush by wiping it against the container opening. You want a controlled amount, not a big blob hanging from the brush.
- Apply a thin coat along the upper part of the scratch, allowing for gravity to pull some paint downward.
- Work steadily from one end to the other.
- Do not return to an area that has started drying.
- Allow the coat to dry for the product’s specified interval, then repeat.
The paint can begin forming a surface skin within roughly 10 to 15 seconds. Going back over it at that point can pull up the skin and leave a rough texture. Leave it alone and correct the coverage with the next coat. The paint also levels somewhat as it dries.
For this repair, I waited about five minutes between coats and applied four coats. Your scratch might need three, five, or six. The target is a filled scratch that sits slightly higher than the surrounding factory paint. That extra height gives you material to sand level.
Build that height gradually. Overfilling through several thin coats is different from dumping one thick blob into the damage.
Remove the masking tape carefully
After about 10 minutes of drying on this repair, I removed the tape slowly. Pull it back over itself, with the edge angled approximately 45 degrees away from the fresh touch-up paint.
If a small tape corner is difficult to lift, carefully raise the corner with a straight edge rather than digging into the fresh repair with a finger.
At this stage, the scratch should look much better, but the raised paint lines will still be visible. That is expected.
Level the Color Coat Before Adding Clear Coat
Let the touch-up paint dry enough for sanding according to its instructions. The paint on this repair sat for more than an hour before the initial leveling.
Cut a small square of 800-grit paper and wrap it around a small, flat support. A domino works beautifully here because it is narrow enough to stay close to the repaired line.
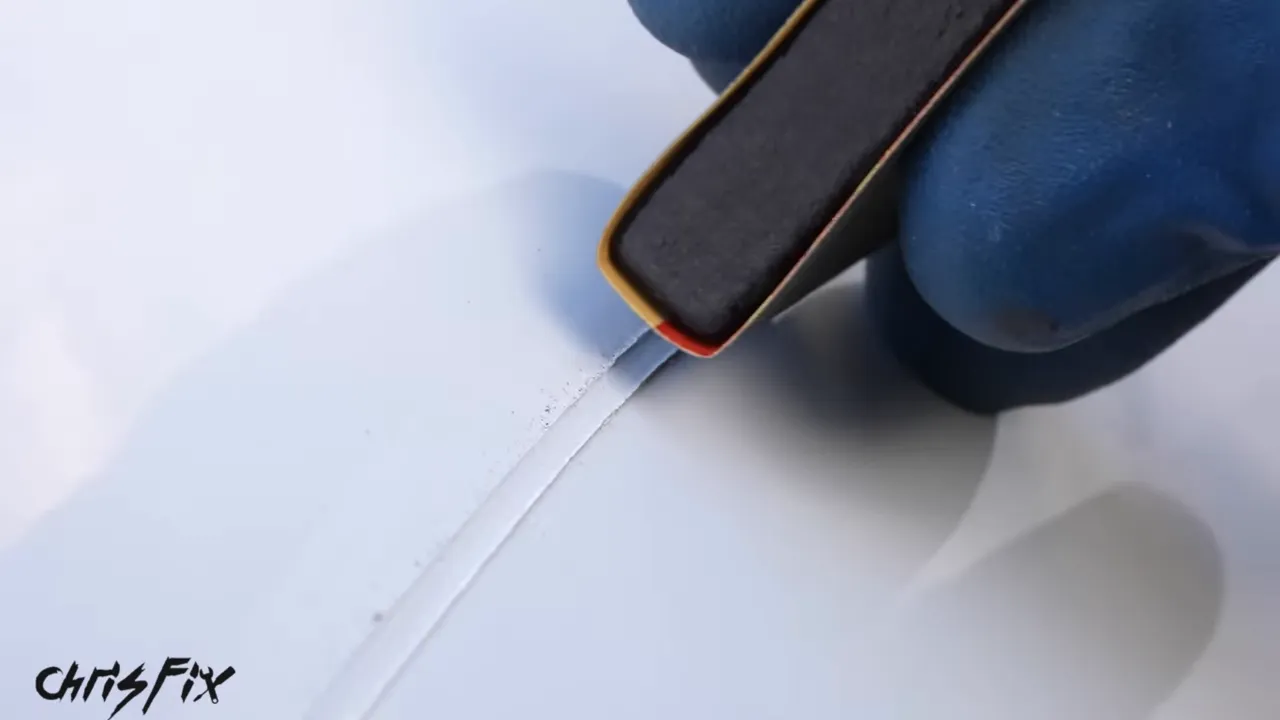
Sand back and forth along the scratch. Keep the paper on the raised touch-up paint as much as possible, and avoid unnecessarily sanding the surrounding factory finish. Soapy water helps prevent the paper from clogging with paint during a long repair.
Stop as soon as the touch-up paint is level. Run a finger across it. The raised line should be gone, and the surface should feel smooth.
Fix low spots now
Inspect the full repair before adding clear coat. Look for small indentations, gaps, or areas where the new paint has chipped during leveling.
I found one low spot along this scratch. The fix was simple: add a little more color, let it dry sufficiently, and wet sand it level again.
This is the time to make those corrections. Once the clear coat is on, getting back to the color layer becomes much more work.
Add Clear Coat and Sand It Level
Once you are happy with the color repair, wipe away the remaining sanding dust with alcohol on a towel, provided that cleaning method is compatible with your touch-up product.
Apply a thin layer of clear coat over all the touch-up paint, slightly overlapping the surrounding factory finish. Work from one end of the repair to the other.
Brush-applied clear coat can look uneven. Do not keep disturbing it in an attempt to make it perfect. The immediate goal is complete coverage; the ridges will be leveled afterward.
For this repair, I let the first coat dry for about 10 minutes, then applied a second thin coat. After roughly another hour, the clear was ready for the next sanding stage under these conditions.
Use the following progression:
- 800 grit: wet sand the raised clear coat carefully until its ridges are level with the surrounding finish.
- 1500 grit: refine the sanding marks and begin feathering slightly into the adjacent clear coat.
- 2000 grit: further refine the repaired area and its immediate surroundings.
Keep the surface lubricated with soapy water, wipe it clean for inspection, and check it by feel.
A useful test is to close your eyes and run your fingers across the repair. You should not feel ridges, bumps, or valleys. It should feel like one smooth panel.
The surface will look hazy from sanding. That does not mean the repair has failed. The next step removes those fine sanding marks and restores the gloss.
Step 4: Blend the Repair With Fine Wet Sanding and Polish
Support the sandpaper with a sponge
For the fine blending stage, wrap the sandpaper around a clean kitchen sponge. Using your bare fingertips behind the paper can create concentrated pressure points and uneven sanding.
The sponge spreads that pressure more evenly and helps the paper follow the panel.
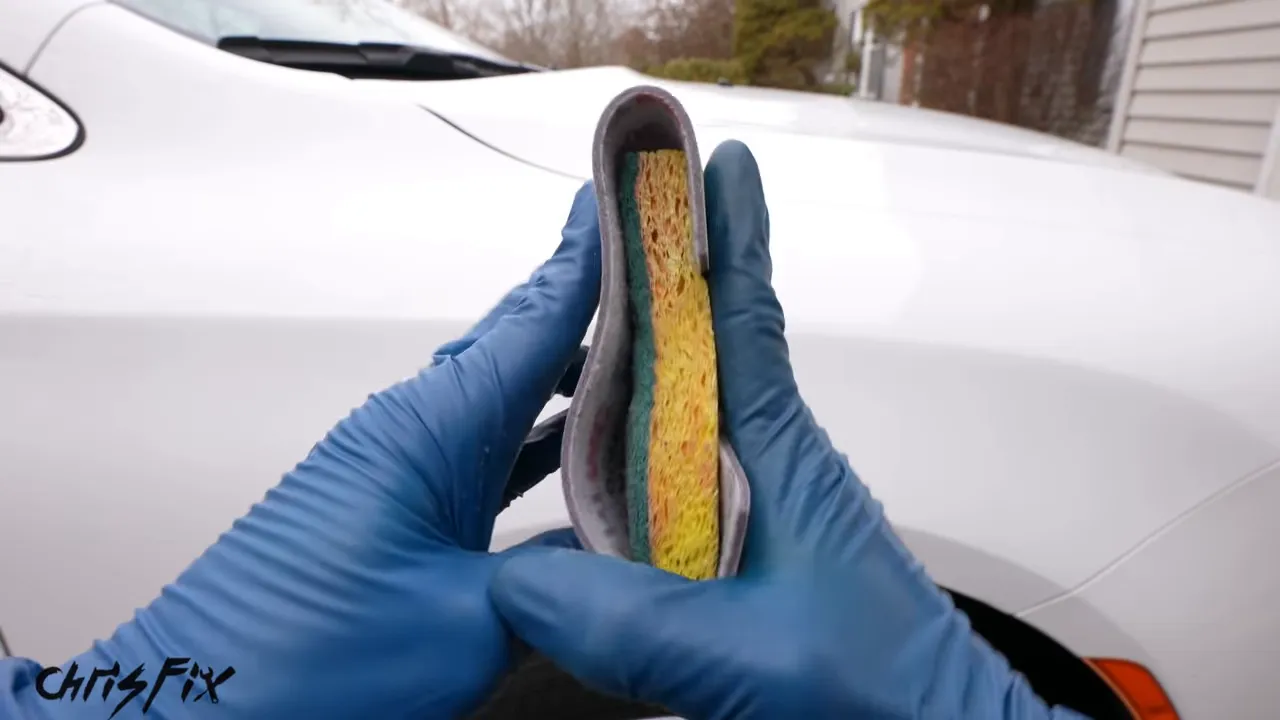
Refine the finish with 3000 and 5000 grit
Spray soapy water onto the panel and the 3000-grit paper. Sand in straight, back-and-forth motions rather than circles. Circular sanding marks are more difficult to remove.
Because this scratch extends across most of the fender, I used the fine sanding stages across the entire panel for a uniform finish. That does not mean aggressively sanding the whole panel with the coarse grades used for localized leveling.
Wipe away the sanding residue, then repeat with 5000-grit paper. Keep the surface wet and cover the blending area evenly.
Polish the gloss back into the clear coat
Put automotive polish on a hand-polishing pad, then spread it over the panel. Work it in with firm pressure and circular motions.
Unlike the sandpaper stage, the circular motion is useful here. Polish is a much finer abrasive, and working it in different directions helps refine the remaining scratches.
Finally, buff off the polish with a fresh microfiber towel. Beautiful! The gloss comes back, and the repair blends into the rest of the panel.
What Results Can You Expect?
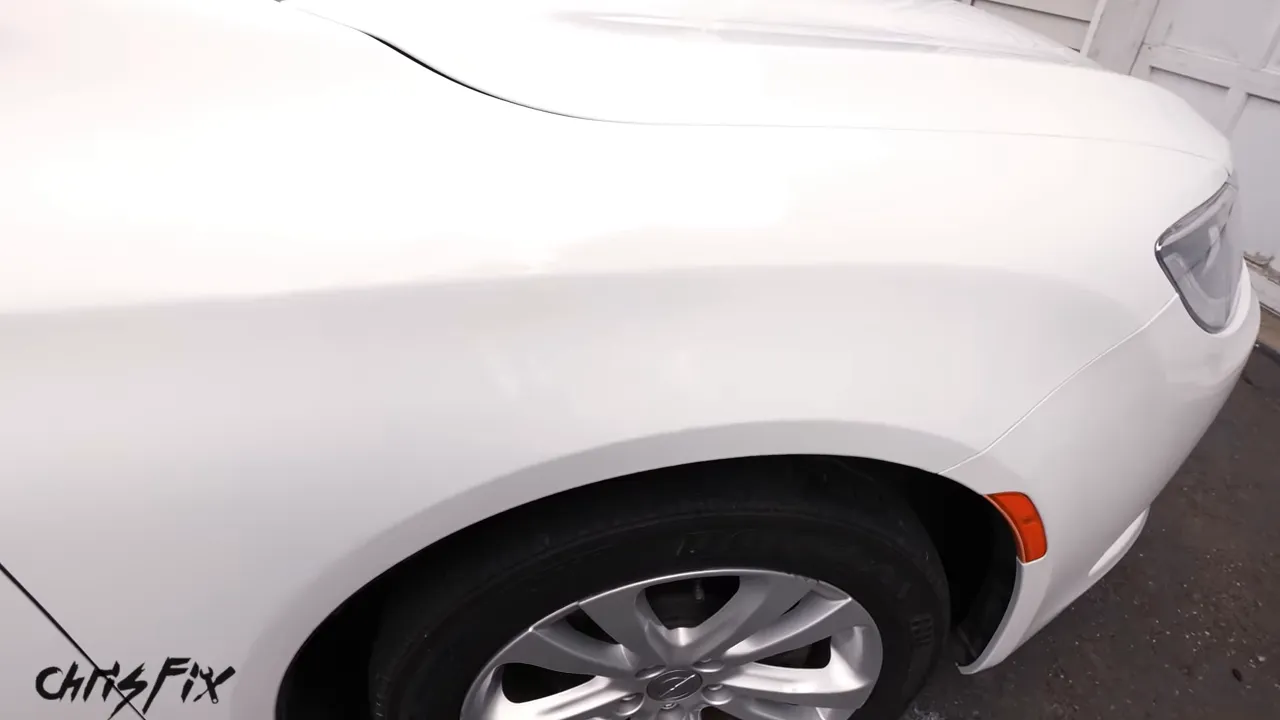
The improvement on this fender is huge. Before the repair, the long scratch was obvious. After filling, leveling, clear coating, and polishing, it no longer stands out from a normal distance.
But it is still a touch-up repair. Up close, at just the right angle, I can find parts of the repaired line. Step back a little, and it becomes much harder to see.
That is the trade-off. A touch-up pen does not replace professional refinishing when you need a flawless result, but careful preparation and blending can make an inexpensive repair look surprisingly good.
Let the Paint Cure Before Waxing or Ceramic Coating
You might be tempted to protect that shiny panel immediately, but do not apply wax or ceramic coating yet.
Touch-up paint can take up to 30 days to fully cure and harden. Follow your product’s curing instructions before sealing it.
During the curing period described for this repair, the car can still be driven, get wet in the rain, and be washed. The key is not sealing the fresh paint prematurely.
The same basic process also works for small rock chips, including chips on a front bumper: clean the damage, prepare its edges, add matching paint, level it, clear coat it, and blend the finish. A smaller repair simply gives you less area to work through.
The biggest lesson is simple: the pen supplies the paint, but the preparation and leveling make the repair blend in. Take your time on those stages, and a deep scratch can become a whole lot less noticeable without repainting the entire panel.


