A bad wheel bearing does not mean you need a shop full of expensive equipment. With a bolt-on wheel bearing hub assembly, the job comes down to removing the axle nut, moving the brakes out of the way, unbolting the old hub, and installing the replacement.
I’m doing this repair on the front of a truck using hand tools and a slide hammer. The same basic approach applies to other front or rear bolt-on hub assemblies, but the hardware, brake arrangement, ABS wiring, and torque specifications depend on your vehicle.
This procedure is for a complete bolt-on hub assembly, not a bearing that must be pressed into the knuckle. Before starting, get the service information for your exact vehicle, including torque specifications, axle nut requirements, and any fasteners that must be replaced rather than reused.
What You'll Learn
- This method replaces a complete bolt-on wheel bearing hub assembly, not a press-fit bearing.
- A slide hammer can remove a seized hub, including a housing left behind after separation.
- Clean mounting surfaces and secure ABS wiring are essential parts of the installation.
- Use vehicle-specific torque procedures and replace hardware wherever the service instructions require it.
Table of Contents
- Tools and Supplies
- 1. Secure the Vehicle and Remove the Wheel
- 2. Remove the Axle Nut and Free the Axle Splines
- 3. Move the Brake Caliper and Rotor Out of the Way
- 4. Remove the Hub Bolts, Dust Shield, and ABS Sensor
- 5. Pull the Old Wheel Bearing Hub Assembly
- 6. Clean the Knuckle Before Installing the New Hub
- 7. Fit and Secure the New Wheel Bearing Hub
- 8. Reinstall the ABS Sensor and Route the Wiring
- 9. Reinstall the Dust Shield and Brakes
- 10. Install and Torque the Axle Nut
- 11. Refit the Wheel and Check the Repair
Tools and Supplies
Get everything organized before taking the vehicle apart. A divided parts tray makes it easy to keep the lug nuts, brake hardware, and hub bolts separated as they come off.
- A replacement wheel bearing hub assembly that matches your vehicle
- A floor jack, correctly rated jack stands, and wheel chocks
- A lug wrench, sockets, ratchets, extensions, and a breaker bar
- The correct large socket for the axle nut
- A torque wrench with the range needed for the specified fasteners
- A slide hammer and hub puller kit, including a jaw attachment if needed
- Hex keys or other tools required for the ABS sensor and dust shield
- Penetrating oil, brake cleaner, shop towels, and a wire brush
- Threadlocker and anti-seize, only where permitted by the vehicle and replacement-part instructions
- Gloves and safety glasses
A slide hammer is the specialty tool here. Check with your local auto parts store about a loaner program before buying one for a single repair.
1. Secure the Vehicle and Remove the Wheel
Start on a firm, level surface. Secure the vehicle against rolling, chock the wheels that remain on the ground, and follow the manufacturer’s lifting instructions.
Loosen the wheel fasteners before lifting if needed. Raise the vehicle at an approved lifting point, then support it on jack stands at the specified support points. Never rely on the hydraulic jack alone. The HSE’s vehicle lifting guidance provides additional context on safe support practices.
With the vehicle securely supported, remove the lug nuts and lift the wheel off the studs. Put the lug nuts in their own section of the parts tray and move the wheel out of the work area.
2. Remove the Axle Nut and Free the Axle Splines
On this driven front hub, the axle nut is in the center of the assembly. Apply penetrating oil around the nut and exposed threads, keeping it away from the brake friction surfaces.
Seat the correct axle nut socket completely, then use a breaker bar to loosen the nut. Use the vehicle’s specified method to keep the hub from turning. Some vehicles require the initial loosening to be done before lifting, so check that procedure first.
Once the nut is loose, make sure the axle can move inward through the hub. In this repair, the loosened nut is left on briefly while the axle is freed, then the nut and washer are removed.
Do not hammer directly on the exposed axle threads. If the splines are stuck, use the approved axle-pushing method or tool for your vehicle rather than damaging the end of the shaft.
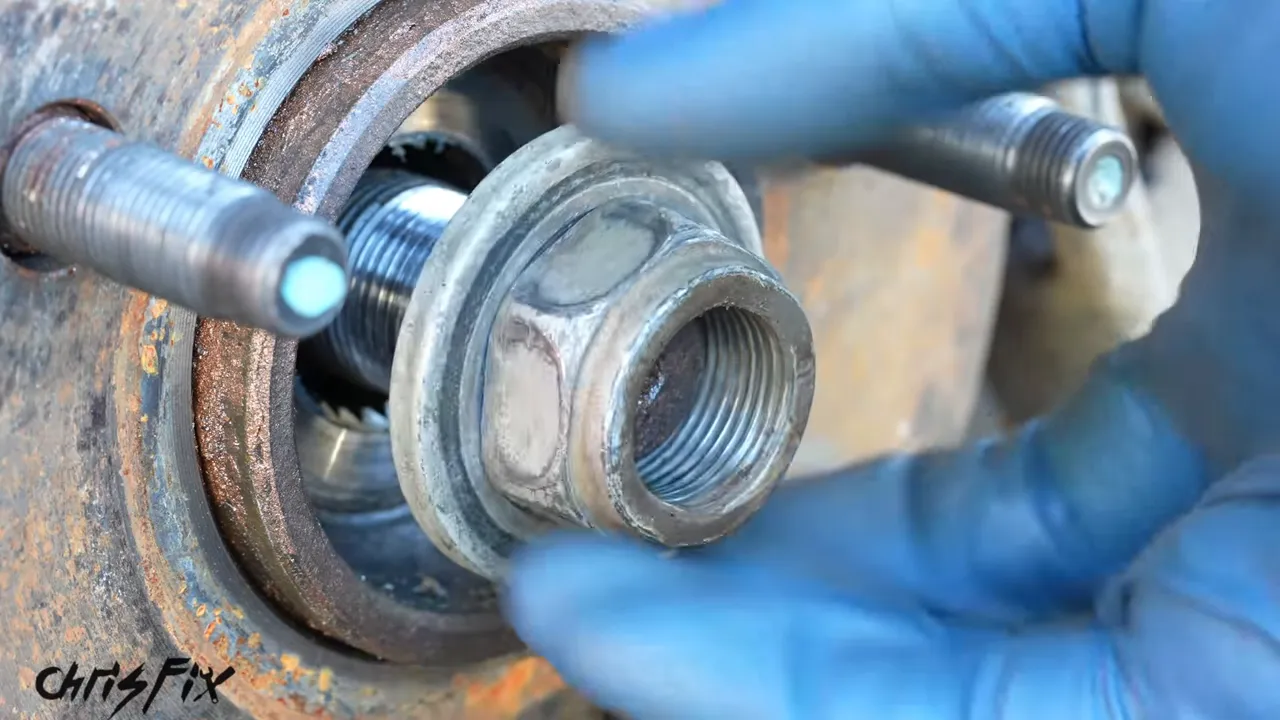
Keep the washer and nut together, but do not assume the old nut can go back on. Follow the service instructions if a new axle nut is required.
3. Move the Brake Caliper and Rotor Out of the Way
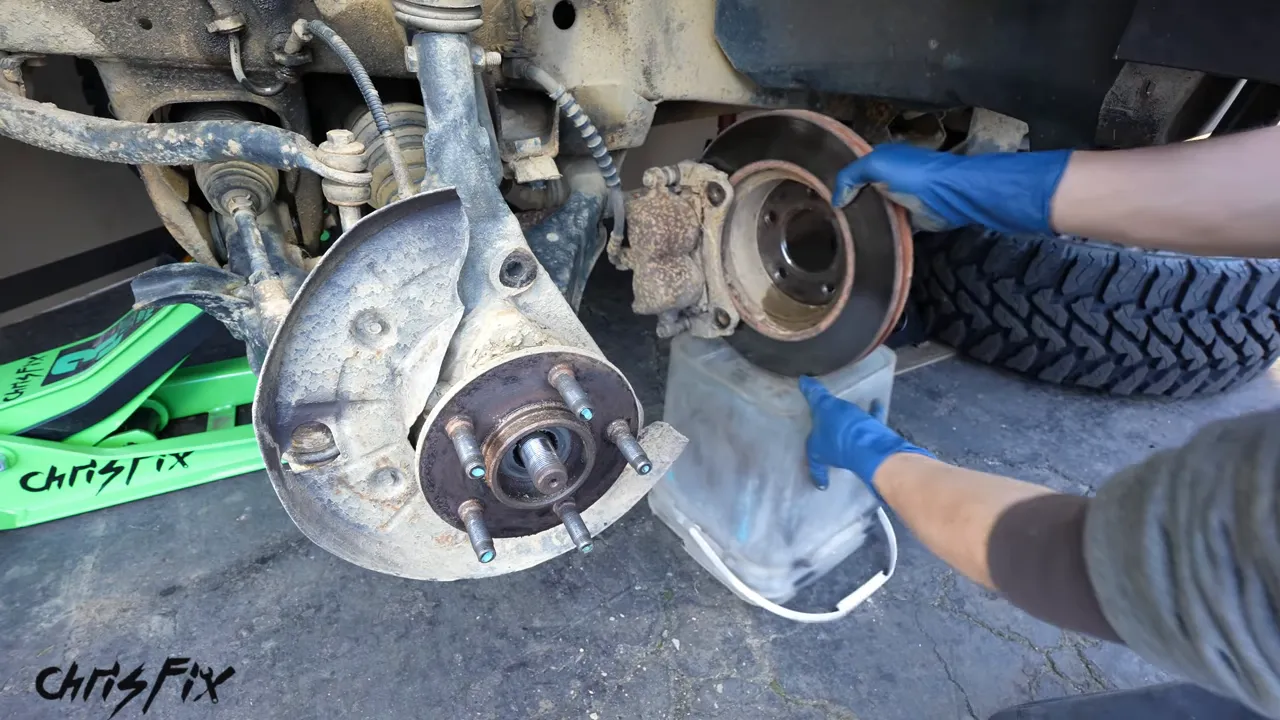
The hub is behind the brake rotor, so the brake assembly needs to move out of the way first. Turn the steering as needed to reach the mounting bolts behind the caliper.
On this truck, the caliper and bracket are moved aside with the rotor. Other vehicles may require removing the caliper, bracket, and rotor separately. Keep track of which bolts belong to which component.
- Remove the brake assembly mounting bolts.
- Carefully move the caliper and rotor away from the hub.
- Support the caliper securely without stretching or twisting the brake hose.
- Keep the brake hose connected unless the vehicle’s procedure requires otherwise.
I use a support beside the knuckle to hold the removed assembly. The important part is that the brake hose carries no weight. Do not let the caliper hang from it.
4. Remove the Hub Bolts, Dust Shield, and ABS Sensor
With the brakes out of the way, locate the hub mounting bolts behind the steering knuckle. This assembly has three. Access is tight around the CV axle boot, so an extension and a flexible ratchet help get the socket onto the bolt heads.
Loosen and remove each mounting bolt without pinching or scraping the rubber CV boot. Turn the steering again if it gives you a better angle.
The dust shield on this truck also comes off to improve access. Remove its small fasteners and set the shield aside without bending it.
Next, remove the ABS wheel speed sensor retaining screw and carefully withdraw the sensor from its mounting location. Keep the sensor and wiring clear of the hub removal area. If the replacement assembly includes new wiring, the old lead will also need to be released from its clips and disconnected.
At this point, check that every retaining bolt is out and no sensor or wire is still attached where it could be damaged during removal.
5. Pull the Old Wheel Bearing Hub Assembly
Even with the bolts removed, corrosion can hold the hub tightly inside the knuckle. Try moving it by hand first. If it will not release, this is where the slide hammer comes in.
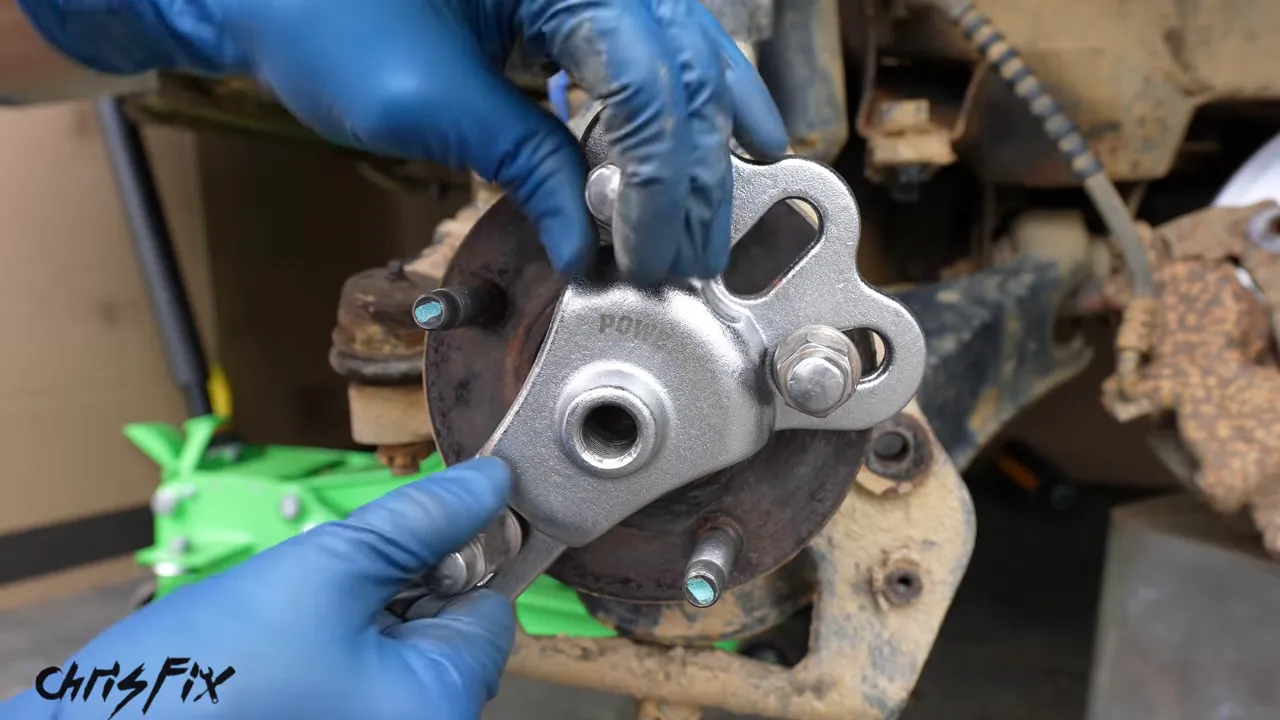
Attach the slide hammer to the wheel studs
Fit the hub puller plate over the wheel studs and secure it evenly with the appropriate nuts, following the tool instructions. Thread the slide hammer into the center of the plate.
Keep the tool aligned with the hub. Slide the weight outward against the stop to pull the assembly away from the knuckle. Use controlled pulls and keep your hands clear of the sliding weight.
If the hub separates, remove the remaining housing
On this repair, the wheel flange pulls away first, leaving the rest of the bearing housing stuck in the knuckle. That is an important possibility to plan for: getting the studded flange off does not necessarily mean the entire assembly is out.
I change the slide hammer over to a jaw attachment, position the jaws behind the remaining housing, and pull that section free.
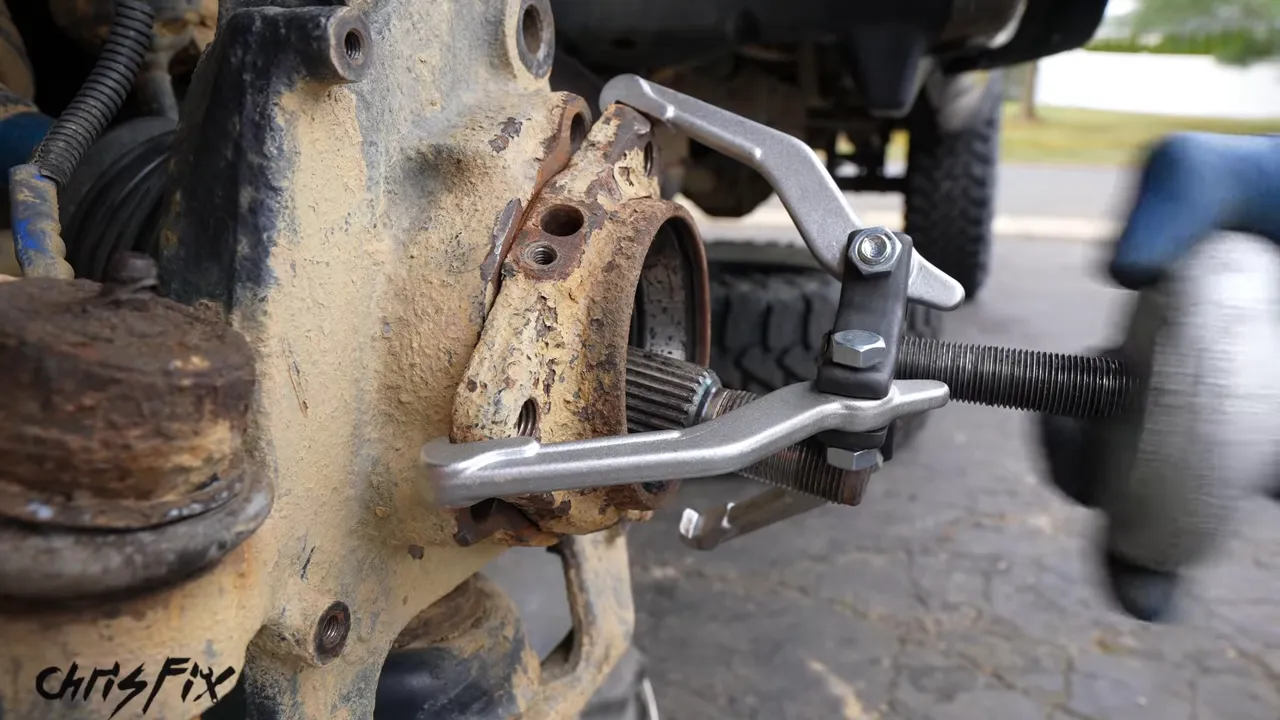
Once the old assembly is removed, inspect the opening. Make sure no part of the old hub remains in the seat before preparing it for the replacement.
6. Clean the Knuckle Before Installing the New Hub
Do not put the new hub straight into a rusty opening. The replacement needs to sit squarely and fully against its mounting surface.
Place a catch tray underneath. Remove loose debris, clean the exposed area with a suitable cleaner, and wipe it down. Use a wire brush to remove corrosion from the hub seat and mounting face without gouging the metal.
Work carefully around the axle splines and the seal visible inside the opening. Avoid dragging dirt into the seal or damaging its lip with a pick or brush.
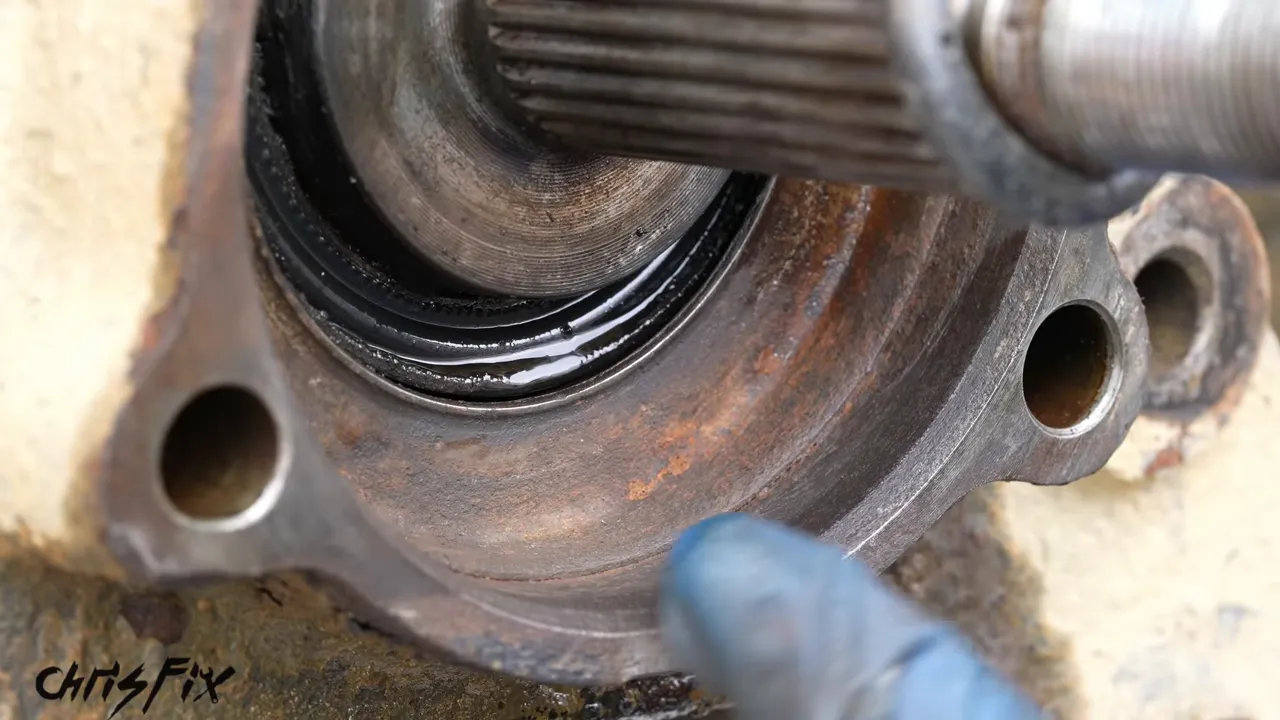
In this repair, anti-seize is applied around the cleaned hub seat and axle splines before installation. Only use it where the vehicle or hub manufacturer allows it. Keep it off brake friction surfaces and do not coat fastener threads unless the torque procedure specifically calls for that treatment.
7. Fit and Secure the New Wheel Bearing Hub
Compare the old and new assemblies before installation. Check the mounting flange, bolt pattern, wheel studs, splined opening, and ABS sensor arrangement. The replacement needs to match the vehicle, not just look similar from the front.
Align the new hub with the axle splines and mounting holes. Guide it into the knuckle carefully so it enters straight.
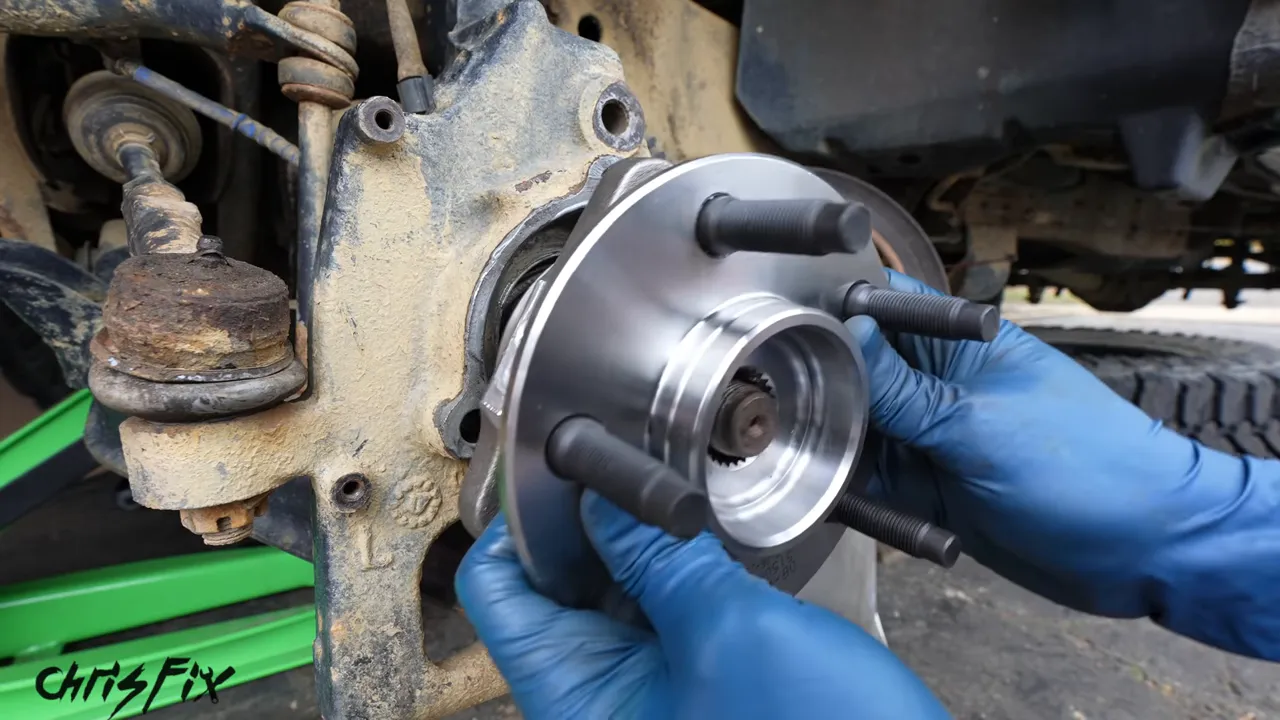
Inspect the hub mounting bolts. The reusable bolts in this repair are cleaned before threadlocker is applied. Replace any damaged hardware, and use new bolts wherever the service information requires them.
- Apply the specified threadlocker if required.
- Start all mounting bolts by hand to avoid cross-threading.
- Tighten them progressively, keeping the hub seated evenly.
- Torque every mounting bolt to the specification for your vehicle.
There is no universal wheel bearing bolt torque. Use the correct specification rather than a number from another car or truck.
8. Reinstall the ABS Sensor and Route the Wiring
Fit the ABS sensor in its mounting location and secure its retaining screw. If the replacement has a new sensor lead, follow the original wiring route.
On this truck, that means releasing the old wire from its brackets and frame clips, installing the new lead in those same locations, and reconnecting the electrical connector.
Take your time here. Keep the wire away from the rotating axle, brake rotor, and any sharp edges. Make sure it has enough movement for steering and suspension travel without being pulled tight.
9. Reinstall the Dust Shield and Brakes
Reinstall the dust shield and tighten its fasteners. Check that it is not bent into a position where it will contact the rotor.
I also clean the shield with soapy water, scrub it, and wipe it down. A protective coating is applied to the shield during this repair. That cleanup is separate from replacing the bearing, and any coating must stay off the hub mounting face, wheel studs, sensor, and brake friction surfaces.
Move the rotor and caliper assembly back into position. If your vehicle required separate brake disassembly, reinstall those parts in the specified order.
Clean and inspect the brake mounting hardware, apply threadlocker only if required, and torque the mounting bolts to specification. Finish by cleaning any fingerprints or residue from the rotor friction surfaces with brake cleaner and a clean towel.
10. Install and Torque the Axle Nut
Reinstall the axle washer and the correct axle nut. Follow the vehicle-specific procedure for thread preparation, tightening, and any locking or staking requirements.
Threadlocker is used on the axle threads in this repair, but that is not a universal instruction. Some assemblies require different preparation or a new locking nut.
Use a torque wrench for the final tightening. Follow the specified sequence and vehicle loading condition. The axle nut is not a fastener to tighten by feel or finish with an impact wrench.
A paint witness mark is added after tightening here. It provides a visible reference, but it does not replace correct torque or a required mechanical locking feature.
11. Refit the Wheel and Check the Repair
Put the wheel back over the studs and start every lug nut by hand. Snug the nuts evenly in a star pattern, then complete the final tightening to the vehicle’s wheel torque specification at the appropriate stage of lowering.
Lift the vehicle enough to safely remove the jack stands, lower it fully, and remove the jack. Leave the wheel chocks in place until the vehicle is securely back on the ground.
Before driving, check your work:
- The hub, brake mounting bolts, and axle nut have been torqued correctly.
- The ABS connector is fully connected and the wiring is secured.
- The brake hose is not twisted or stretched.
- The dust shield clears the rotor.
- The wheel fasteners are torqued to specification.
- The brake pedal feels firm before moving the vehicle.
Take a careful test drive and check for the original wheel bearing noise, any new scraping or vibration, and ABS warning lights. The final check on this truck compares the bearing noise before and after the replacement.
The basic job is straightforward. The details that deserve the most attention are freeing a corroded hub without damaging nearby parts, cleaning the mounting seat, protecting the ABS wiring, and using the correct torque procedure. Get those right, and a bolt-on wheel bearing replacement is a repair you can approach methodically at home.


