An oil change on a Tesla sounds pretty straightforward. Get the car up on ramps, drain the old oil, replace the filter, and pour in five quarts of fresh 10W-30. Easy, right?
There is just one small detail: a standard Tesla does not have a gasoline engine and does not need conventional engine oil changes. This Model S has a combustion engine under the hood. The engine noise, sequential shifter, exhaust headers, and roadside gasoline refill are not normal Tesla features!
So this is a tongue-in-cheek Tesla maintenance project with a real engine oil change underneath the joke. The special EV oil, electronic oil filter, and conductivity test are part of the gag, not service instructions for a factory Tesla. But the aluminum foil trick, cup trick, clean filter mounting surface, and proper oil disposal are useful ideas for an actual engine oil change.
Table of Contents
- The Setup: A Tesla With a Lot of Maintenance to Catch Up On
- The Tools, the Oil, and the Electronic Filter Joke
- Three Shops, Three Very Reasonable Answers
- The Actual Oil Change on This Engine-Equipped Model S
- Recycle the Used Oil Properly
- One Week Later: The Oil Analysis Results
The Setup: A Tesla With a Lot of Maintenance to Catch Up On
I picked up this 2013 Tesla Model S from a friend who was tired of all the maintenance it needed. Naturally, the first job on my list was an oil change.
That should already sound suspicious. Then there is the driving experience: plenty of torque, a very noticeable engine soundtrack, and a snappy sequential transmission. This is not your typical electric sedan.
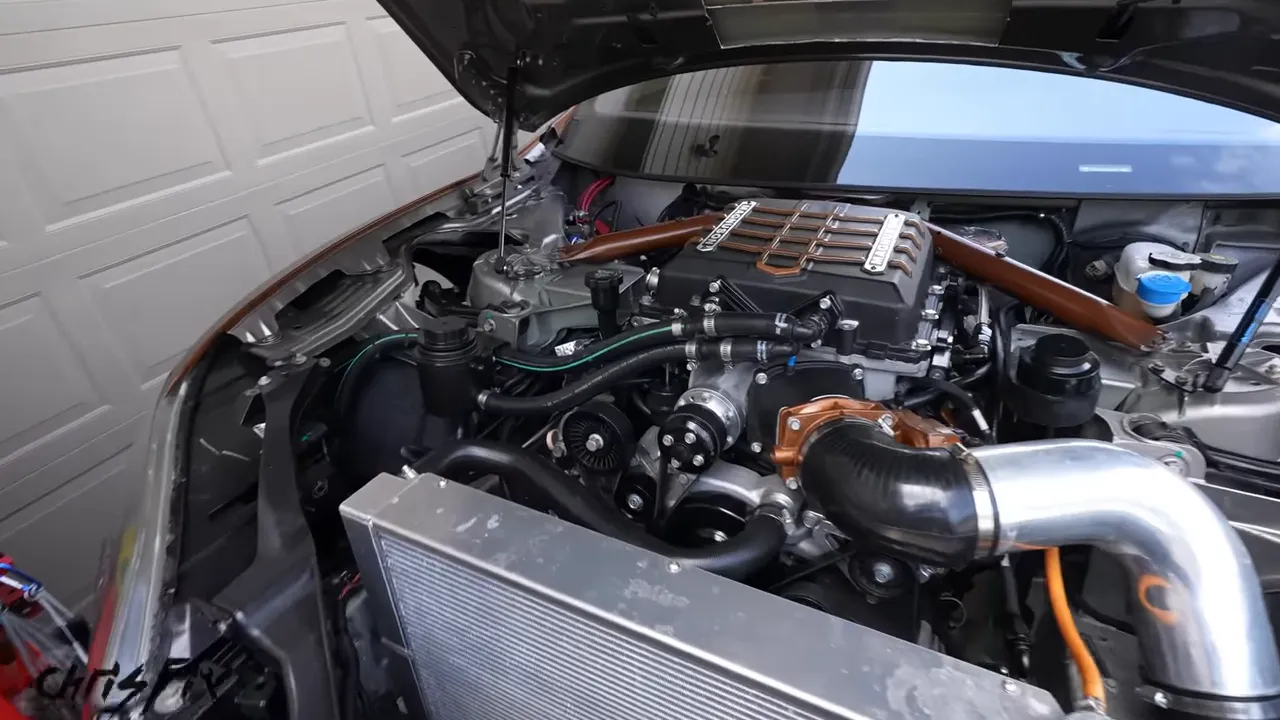
For an unmodified Tesla, use the maintenance guidance for the exact model and year rather than a gasoline-engine service schedule. Tesla’s vehicle maintenance information is the place to start.
The Tools, the Oil, and the Electronic Filter Joke
I like to keep jobs approachable with common hand tools. For the actual oil change on this engine-equipped car, the equipment includes:
- Safety glasses and protective gloves.
- Suitable ramps or jack stands, plus wheel chocks.
- A ratchet, the correct sockets, and a torque wrench.
- An oil drain pan and an absorbent spill mat.
- A funnel, shop towels, and a sealed container for used oil.
- The correct oil and replacement filter for the installed engine.
- Aluminum foil and a disposable cup to help control the mess.
The demonstration also includes a multimeter, an oil sample bottle, a crush washer assortment, and an oil filter cutter. The sample bottle has a real purpose. The multimeter has a much less serious assignment.
What Is Inside the “OEM Tesla Oil Filter”?
First, I open a conventional spin-on oil filter to show its filter element, spring, and silicone anti-drainback valve. Then I use a filter cutter to open the Tesla-branded filter.
Inside that one is a filter element, an anti-drainback valve, some wires, a circuit board, and a 30-amp fuse. Apparently, filtering oil now requires electronics.
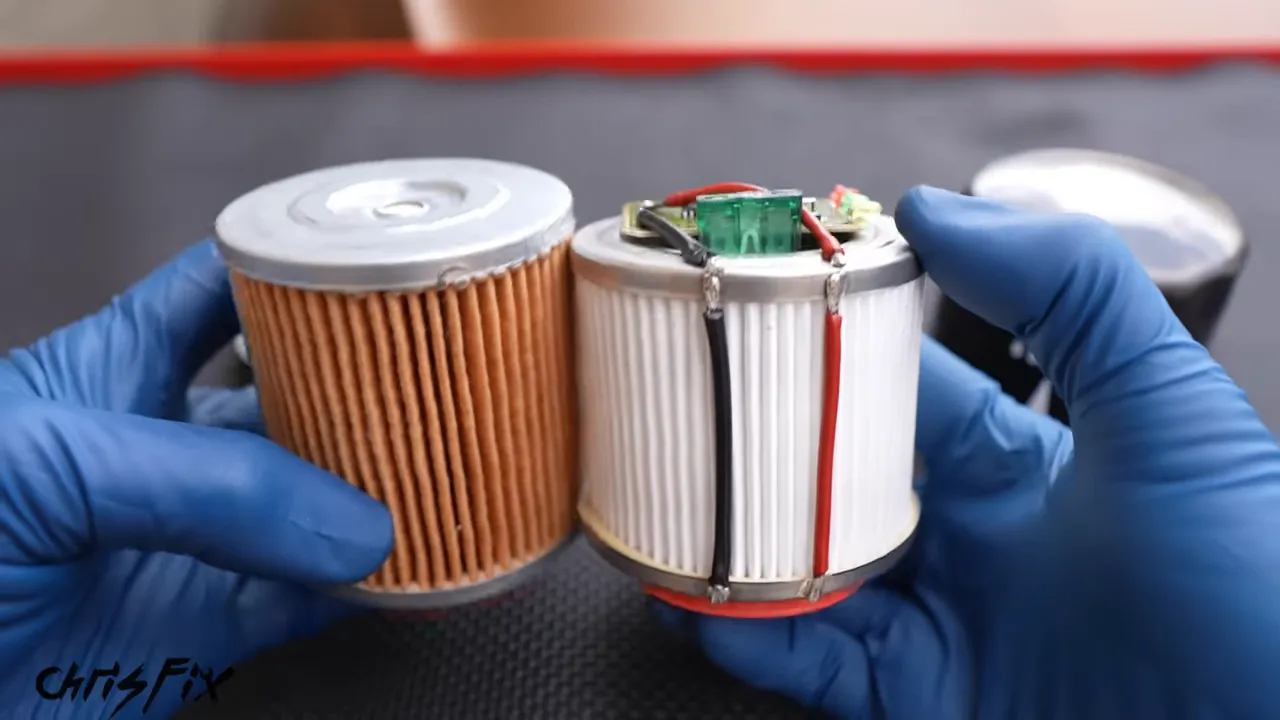
The explanation is that the board monitors current in the oil, figures out electron transfer, and tells the car when to illuminate an oil-change warning. That is the joke, not a feature to look for when buying a Tesla service part.
For a real repair, choose the filter specified for the engine or component being serviced. A logo on a can is not a substitute for verifying fitment.
Finding “Extended Range” Tesla Motor Oil
The oil gets the same treatment. The yellow bottles carry green labels marked Tesla, electric vehicles, SAE 10W-30, and extended range. There is even a fictional American Supercapacitor Institute certification to contrast with the American Petroleum Institute marking on conventional motor oil.
The shopping advice is delivered with complete confidence: find the green label, check for a leaf, and ask an employee if you need help finding Tesla oil. Since this is my first EV, I go with the extended-range version. Anything to help with range anxiety!
To be clear, those labels are part of the comedy. They do not establish a legitimate Tesla engine-oil specification, and the extended-range wording is not a real promise of extra driving range. The oil used in a modified car must match its installed engine’s requirements.
Three Shops, Three Very Reasonable Answers
My friend warned me that finding a shop willing to change Tesla oil would be difficult. Rather than accept that, I put on glasses with a small camera and visited three shops.
At each counter, I asked for an oil change on a 2013 Tesla Model S.
- The first shop explained that Teslas typically do not need oil changes. They offered other services and suggested checking with Tesla about the request.
- The second shop gave essentially the same answer: they could work on other Tesla service items, but there was no conventional oil change to perform.
- The third shop also declined the Tesla oil change and explained that they serviced several other makes, including Mercedes, BMW, Audi, Porsche, and Volkswagen.
The funny part is that their answers are appropriate for a normal Model S. Asking only by the original year, make, and model leaves out the most important information about this particular car: what is now under the hood.
A Coolant Stop and a Gasoline Stop
The trip was not exactly trouble-free. On the way to the second shop, the car overheated and coolant started coming out. I pulled into a gas station and shut it down. After addressing the low coolant, the indicated temperatures held steady and the trip continued.
Do not treat that short roadside sequence as a complete overheating repair procedure. Never open a hot, pressurized cooling system. Coolant loss and overheating need proper diagnosis, not just an assumption that topping up has fixed everything.
Then, on the way to the final shop, the car ran out of gasoline. A passing driver stopped to offer help and understandably had questions about a Tesla being out of gas. After a fuel-can refill and plenty of puzzled looks from people nearby, we were back on the road.
Three shops later, it was time to head home and do the oil change myself.
The Actual Oil Change on This Engine-Equipped Model S
The mechanical work follows a familiar engine oil-change sequence. The socket sizes, five-quart fill, and oil grade below describe this particular setup, not a factory Tesla service procedure. Always verify the specifications for the engine you are working on.
1. Support the Car and Prepare for Spills
At home, I drive the front wheels onto ramps and chock the rear wheels. If using jack stands instead, use appropriate support points and equipment. Never get underneath a car supported only by a jack.
Next, I open the hood through the center screen, release the latch, and remove the engine oil fill cap. I slide an absorbent mat beneath the work area and position the drain pan.
Before loosening anything, identify the oil pan, drain plug, and filter. Also look at where the oil is going to travel. Catching a spill is much easier when you plan for it before pulling the plug.
2. Protect the Exhaust Wrap With Aluminum Foil
On this car, the drain plug sits close to a wrapped exhaust header. I do not want oil soaking into that wrap. It would be difficult to clean and could create a fire hazard when the exhaust gets hot.
The simple trick is aluminum foil. It bends around the nearby component and provides a temporary barrier to help keep draining oil off the wrap.
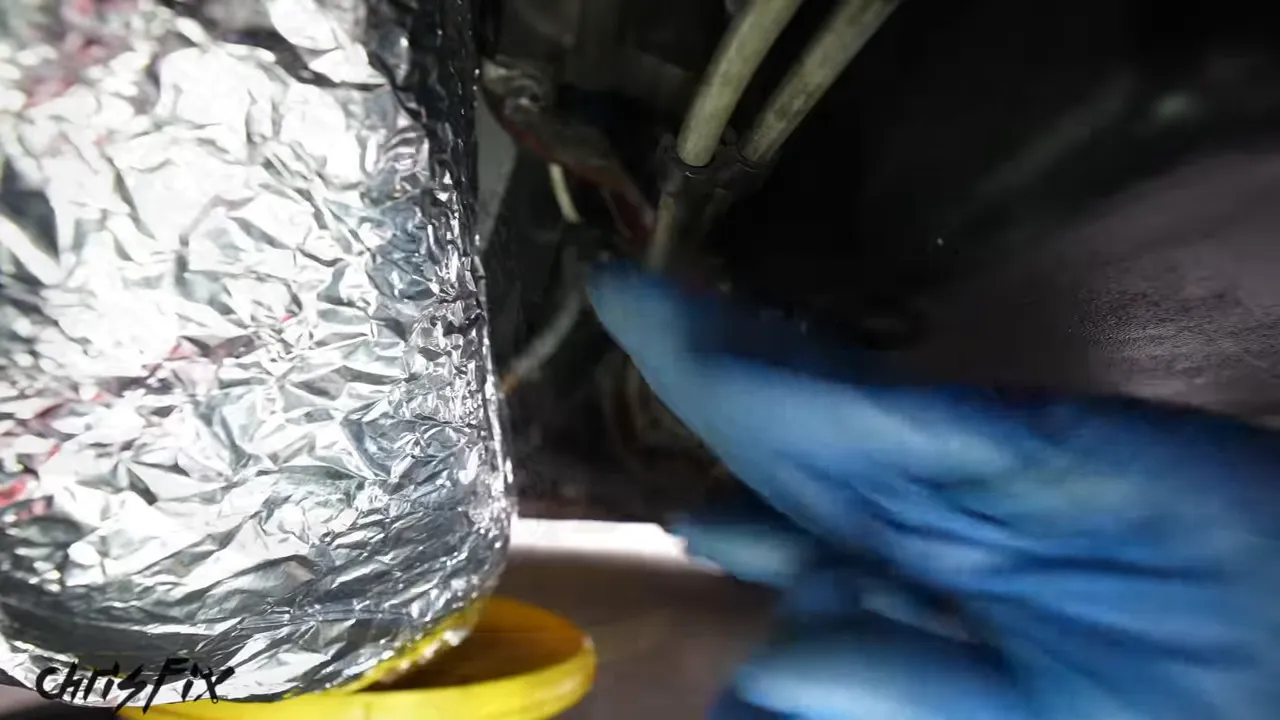
With the catch pan positioned, I use a 15 mm socket to break the drain plug loose. Then I finish unthreading it by hand and pull it away quickly as the oil begins flowing. While it drains, I collect a sample for analysis.
3. The Multimeter Test Is Not an Oil-Condition Test
Here is where the electrical theme returns. I set a multimeter to continuity mode and demonstrate that touching the probes together produces a beep. Then I place the separated probes into the used oil.
No beep. The supposed conclusion is that the oil has run out of useful electron flow and can no longer deliver extended range.
Fresh “EV oil” gets the comparison test, complete with the desired response from the meter. It fits perfectly with the electronic filter story.
Do not use this as a real pass-or-fail test for motor oil. A continuity beep does not validate the oil’s condition, its suitability for an engine, or a claim about vehicle range. The old sample gets capped and sent away, but the conductivity storyline remains part of the gag.
4. Reinstall the Drain Plug
Once the oil has nearly finished draining, I reinstall the plug by hand and tighten it with a torque wrench to the appropriate specification.
This particular plug does not need a separate crush washer. That is not a universal rule. Use the seal, washer, or replacement plug required for your application, and do not guess the torque value.
5. Remove the Oil Filter With a Cup
The installed filter has a 25 mm hex on its end, which makes loosening it convenient. Once loose, I slide a disposable cup around the filter and continue unscrewing it.
As the filter comes away, the cup catches much of the escaping oil instead of letting it run down my hand and arm. It is a simple trick that works well when the filter’s size, position, and access allow it.
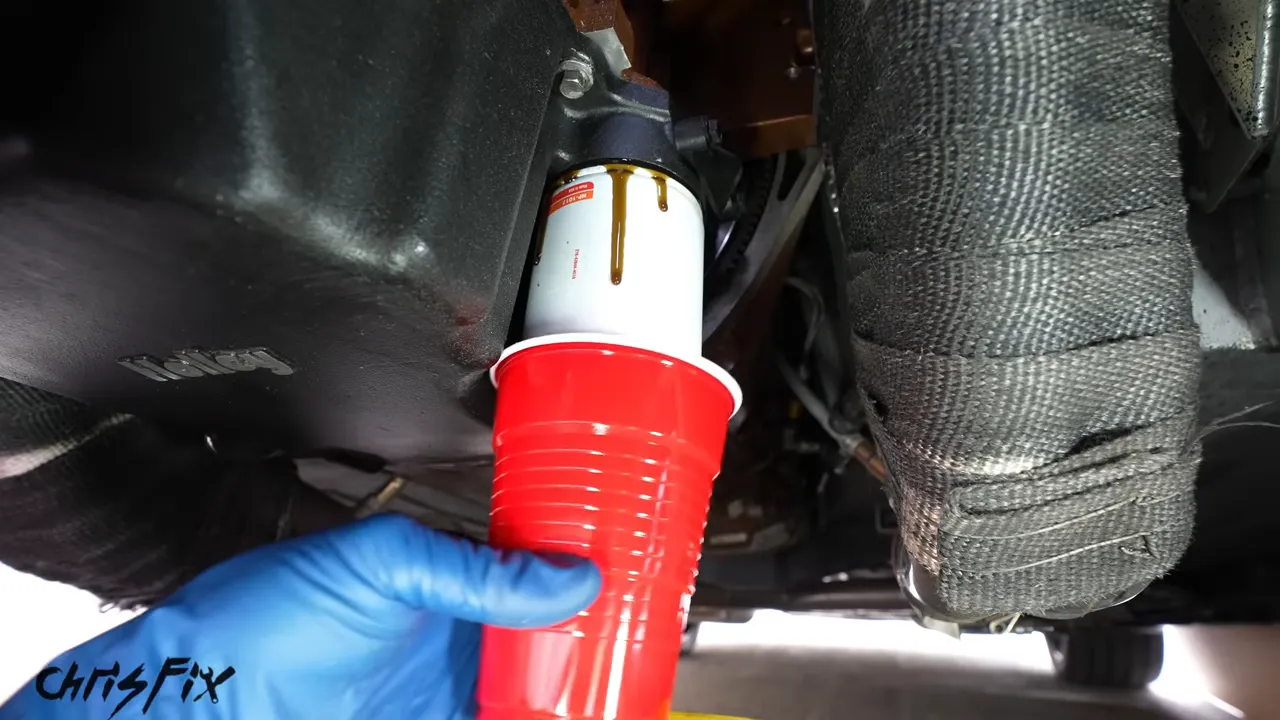
I empty the cup into the catch pan and let the old filter drain there as well.
6. Prepare and Install the Replacement Filter
Because this filter mounts vertically with its opening upward, I prefill it with fresh oil before installation. The intention is to reduce the time needed to fill the filter after startup. Follow the applicable service guidance, since prefilling is not suitable for every filter arrangement.
I also put fresh oil on the sealing gasket. Under the car, I inspect and wipe the mounting surface, making sure the old filter gasket has not stayed behind.
Do not install a new filter on top of an old gasket. Start the filter carefully by hand and tighten it according to its installation instructions. On this setup, I install it by hand rather than using a tool to crank it down.
7. Refill, Circulate, and Check the Level
With the drain plug and filter installed, I add the demonstrated five quarts of full-synthetic 10W-30 through a funnel and reinstall the fill cap. Again, that is the quantity and grade used for this engine setup, not a recommendation for an ordinary Tesla.
I start the engine and let it run for about a minute so the oil can circulate, then back the car off the ramps onto level ground. After shutting it off and allowing the oil to drain back into the pan, I check the dipstick:
- Pull the dipstick out and wipe it clean.
- Reinsert it fully.
- Pull it out again and read the level against the marked area.
Here, the oil reaches the upper end of the crosshatched area. Good. The level is full.
Recycle the Used Oil Properly
While the oil settles before that final level check, I transfer the used oil into a sealed container. This part is not a joke: do not dump motor oil onto the ground or into a drain.
A local parts store, repair shop, or recycling center may accept it. Check the location’s rules before taking it in. The EPA’s used-oil recycling guidance provides additional information on proper handling and recycling.
One Week Later: The Oil Analysis Results
A week later, the car is running well and the oil report has arrived. The presented results show no antifreeze, no fuel contamination, low insolubles, and acceptable wear metals. Those are the reassuring parts of the oil-analysis discussion.
Then comes the final electrical punch line: conductivity is highlighted at 11%, compared with a claimed target above 75%. It ties the report back to the multimeter test and the circuit board in the filter.
Those conductivity percentages should not be treated as genuine Tesla maintenance limits. They belong to the same joke as extended-range motor oil, blinker fluid, muffler bearings, and piston return springs.
The useful distinction is simple: a stock Tesla does not need this engine oil change, but the combustion engine in this particular car does. Match the service procedure to the hardware actually installed, keep the work clean, verify the correct specifications, and recycle the old oil. The foil and cup can help with the mess. The electron-counting oil filter can stay in the comedy department.


