A seat can look reasonably clean and still hold a surprising amount of dirt. Cloth upholstery collects skin oils, dust, and spills, while the foam underneath can hold contamination you cannot reach with a quick wipe. Leather seats have their own trouble spots, especially the seams and the bolsters you rub against every time you get in and out.
The good news is that the cleaning process is straightforward. With a vacuum, a few brushes, microfiber towels, and the right cleaners, you can make a huge difference. The trick is to clean the whole seat, not just the part you sit on, and to treat cloth and coated leather differently.
What You'll Learn
- Brush seat seams while vacuuming to remove debris that suction alone leaves behind.
- Extract cloth upholstery slowly and let the cushions dry completely before reinstalling them.
- Use finish-compatible products on coated leather, and distinguish worn coating from removable dirt.
- Clean overlooked seat trim and belts while following vehicle-specific safety and care instructions.
Table of Contents
- Tools and Products You Need
- Prepare the Car and Remove the Seats if Needed
- How to Clean Cloth Car Seats
- How to Clean Extremely Dirty or Muddy Cloth Seats
- Detail the Plastic Trim, Mounting Brackets, and Buckle Exteriors
- Clean the Seat Belts, Too
- Clean the Rear Armrest, Cup Holders, and Backrest
- How to Clean Coated Leather Car Seats
- Know the Difference Between Leather Dirt and Leather Wear
- Reinstall the Seats Safely
Tools and Products You Need
I like to keep this simple with common, relatively inexpensive supplies:
- A vacuum: A strong shop vacuum works well for loose dirt and debris.
- Detailing brushes: Use a larger upholstery brush for cloth and smaller brushes for seams, lettering, and tight spaces. A toothbrush is especially helpful.
- Microfiber towels: Have several clean, absorbent towels available for cleaning, drying, and buffing.
- Carpet and upholstery cleaner: This is the cleaner for the cloth portions of the seats.
- Leather and vinyl cleaner and conditioner: Choose products compatible with your seat finish.
- Interior detailer and plastic protectant: These handle the plastic trim around the seats.
- Soapy water: Useful for cleaning suitable hard plastic surfaces and exposed metal mounting brackets.
- An extractor vacuum: Optional for light surface cleaning, but highly recommended for deep-cleaning cloth seats.
- A steam cleaner: An optional tool for compatible surfaces, particularly sticky residue in hard plastic compartments.
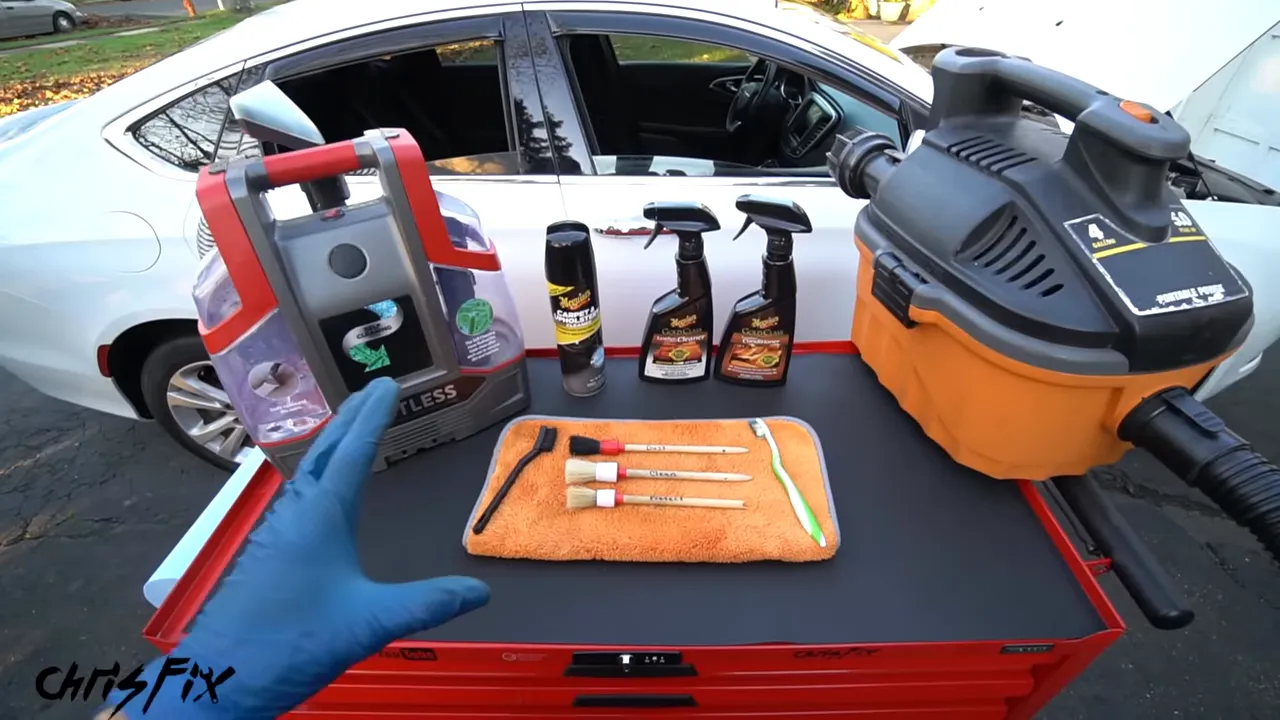
The two tools that really stand out are detailing brushes and an upholstery extractor. Brushes loosen dirt that suction alone misses. An extractor adds water and then pulls that water, along with dissolved dirt and cleaner, back out of the fabric.
Before applying any product, check the vehicle's care instructions and the product label. Test cleaners and protectants in an inconspicuous area, and keep moisture away from electrical connectors and seat electronics.
Prepare the Car and Remove the Seats if Needed
Removing the seats gives you much better access to the sides, backs, mounting brackets, and hard-to-reach areas. It also means working around wiring that may connect to seat-mounted airbags and other safety equipment, so this is not a step to rush.
Disconnecting the negative battery cable prevents the open doors from draining the battery and is part of preparing to disconnect seat wiring. I allowed 20 minutes after disconnecting the battery on these cars. Use your vehicle's service procedure and specified waiting period rather than treating 20 minutes as a universal rule. Airbag systems can retain electrical energy after the battery is disconnected.
If you are unfamiliar with these systems, leave the seats installed or have a qualified technician handle removal. The NHTSA airbag safety information provides useful background on why these components require care.
Front Seat Removal
- Position the seat so you can reach the front mounting bolts. Plan ahead if the seat needs electrical power to move.
- With the required battery-disconnection procedure completed, remove the front mounting bolts.
- Move the seat forward and remove the rear mounting bolts.
- Carefully tilt the seat to access the wiring underneath.
- Release the harness connectors and any wiring retainers according to the vehicle's service instructions.
- Lift the seat out carefully, keeping the metal rails away from the door panel, sill, and other interior trim.
On the car shown here, each front seat has four mounting bolts and a harness underneath. Your layout may be different.
Rear Seat Cushion Removal
The rear cushion on this car releases using two levers underneath, one on each side. Pressing those releases allows the cushion to lift out. Other cars use different clips or fasteners, so identify the attachment points before pulling on the cushion.
Once the seats are out, keep their connectors dry and place them somewhere you can work around all sides.
How to Clean Cloth Car Seats
Whether you are cleaning an ordinary daily-driver seat or one covered in dried mud, the basic process stays the same: vacuum, apply cleaner, agitate, remove the dirty liquid, and dry completely. The amount of brushing and extraction changes with the amount of dirt.
1. Vacuum and Brush Out the Seams
Start dry. Vacuum the entire seat to remove surface debris before introducing cleaner or water.
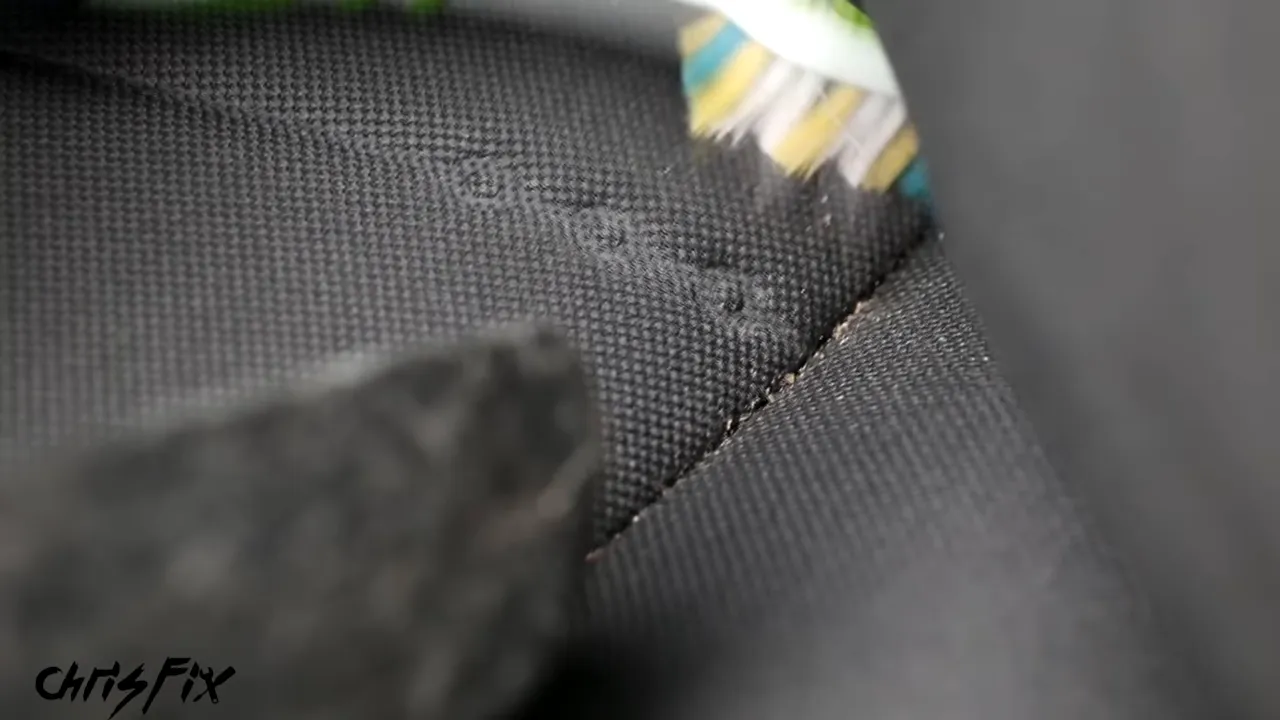
Pay special attention to the stitched seams and the crevices between the center panels and bolsters. Dirt packs into these areas, and a vacuum nozzle alone often leaves some behind.
Work a small brush along the seam while holding the vacuum nearby. The brush breaks the dirt loose, and the vacuum carries it away. Repeat this around the cushion and backrest instead of only cleaning the obvious center section.
2. Apply Carpet and Upholstery Cleaner
Cover the cloth section evenly with a suitable carpet and upholstery cleaner, following its application instructions. Then work it into the material with an upholstery brush.
The brushing is important. Simply spraying cleaner onto a seat does not do the same job as agitating it through the fibers. Work across the whole section, including the edges and contours.
3. Wipe Up the Cleaner and Dirt
Use a clean, dry microfiber towel to absorb the loosened dirt and cleaner. Press and wipe across the fabric, getting into the corners and crevices as well.
A towel that starts bright orange can quickly turn dark from the dirt it picks up. That is a useful reminder that a seat does not have to look terrible to need cleaning.
This method works for surface cleaning without an extractor. However, a towel can only remove so much from the upholstery and cushion underneath.
4. Extract the Dirt Below the Surface
Under the cloth is foam, and that foam can hold dirt, skin oils, and residue from previous spills. This helps explain why a seat sometimes develops rings or dark marks after it gets wet, even if it looked clean beforehand. Moisture can carry contamination back toward the surface as the seat dries.
For a deeper clean, use an extractor:
- Add a controlled amount of water to the fabric. I used plain water here after applying the upholstery cleaner.
- Use enough moisture to reach slightly below the surface, but do not flood the cushion.
- Pull the extractor slowly across the material to remove the dirty liquid.
- Make multiple suction passes to recover as much moisture as possible.
- Repeat the cleaning and extraction cycle if the seat still needs it.
Do not rush the suction passes. Moving slowly lets the machine recover more liquid. Water left in the seat can also leave dissolved dirt and cleaner behind.
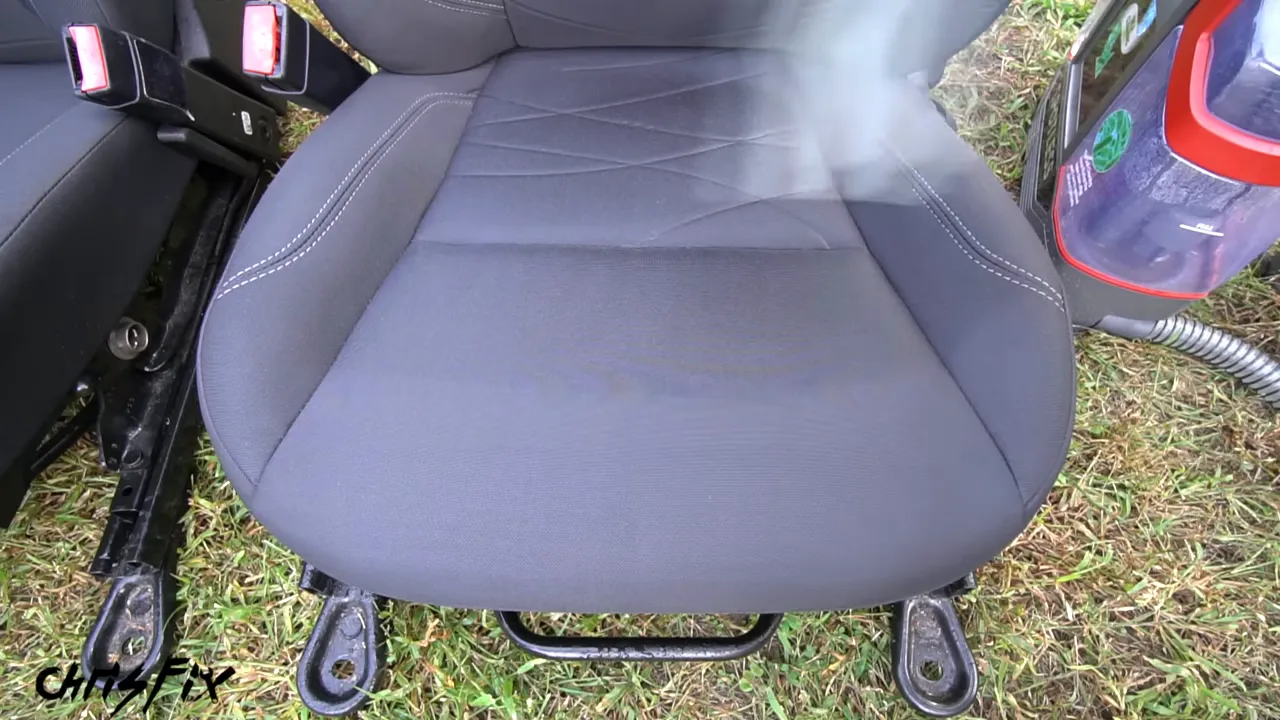
Do not stop at the seat bottom. Use the same process on the backrest, headrest, sides, and cloth-covered back of the seat. Those areas are easy to miss, but cleaning them is what makes the whole seat look finished.
How to Clean Extremely Dirty or Muddy Cloth Seats
A seat caked in dried mud looks like a much bigger project, but it does not require a completely different method. It requires more thorough dry cleaning before the wet work begins.
First, vacuum off as much loose dirt as possible. Then brush the remaining dried dirt across the fabric while vacuuming. On these muddy seats, brushing made a dramatic difference in what the vacuum could remove.
Once the dry debris is gone:
- Apply upholstery cleaner evenly over the cloth.
- Brush the cleaner into the material.
- Add a controlled amount of water with the extractor to help rinse and recover the cleaner.
- Extract slowly, working across the cushion and bolsters.
- Repeat as needed, then make additional suction-only passes.
For seats this dirty, the extractor is the tool I would use rather than relying on towels alone. The same process took these seats from visibly muddy to clean, evenly colored upholstery.
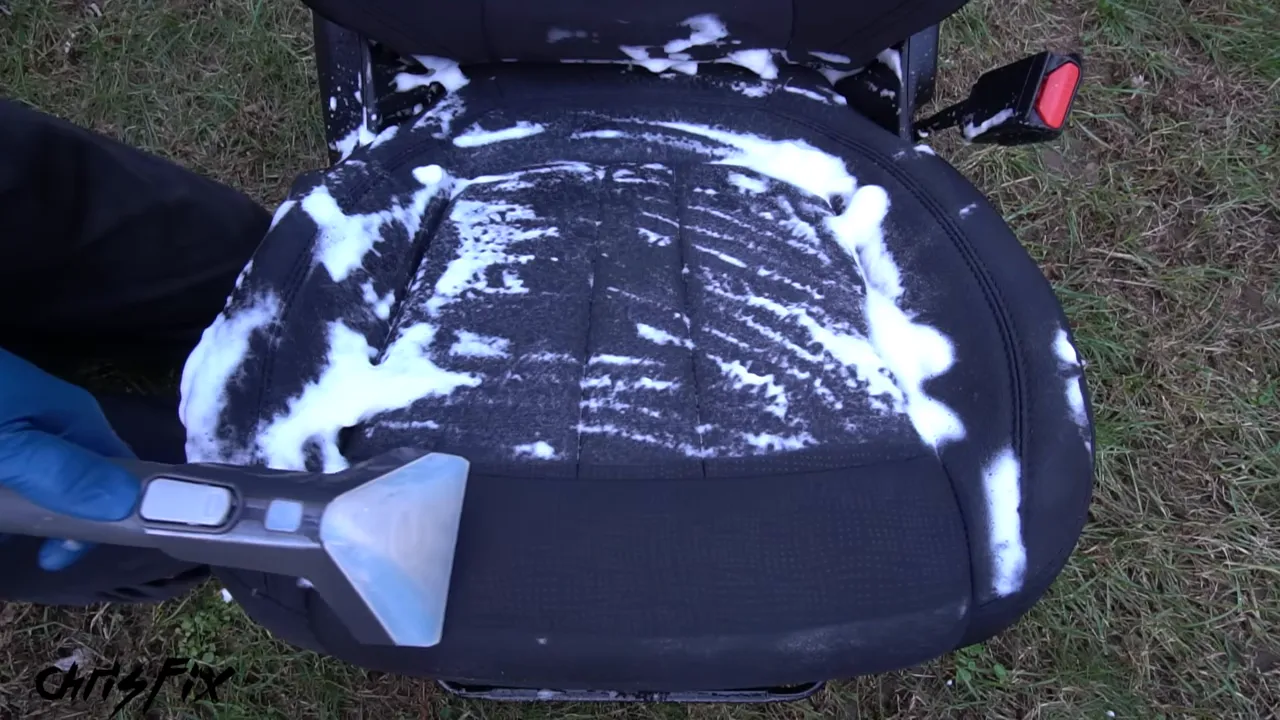
Let the seats dry completely before reinstalling them. A dry-looking surface does not necessarily mean the cushion underneath is dry. Trapped moisture can create a mold problem, so drying is part of the job, not an optional final touch.
Detail the Plastic Trim, Mounting Brackets, and Buckle Exteriors
Clean upholstery next to dusty plastic and dirty brackets still looks unfinished. These little details make a huge difference.
Plastic Seat Trim
Spray interior detailer onto a microfiber towel and wipe the plastic along the sides of the seat. Work around the adjustment handles and the edges where dust collects.
Once the trim is clean, apply a compatible plastic protectant to a brush and spread it evenly over the surface. Allow the label-specified dwell time, then buff away the excess with a clean towel.
The protectant used here deepened the faded appearance and left a clean finish without a greasy feel. The goal is restored-looking plastic, not a sticky coating that collects dust.
Metal Mounting Brackets
Vacuum loose debris from the exposed mounting feet. Use a small brush with soapy water to loosen the remaining grime, then wipe the brackets clean and dry.
Concentrate on the exposed mounting surfaces rather than washing water into the sliding mechanism or electrical components.
Seat Belt Buckle Exteriors
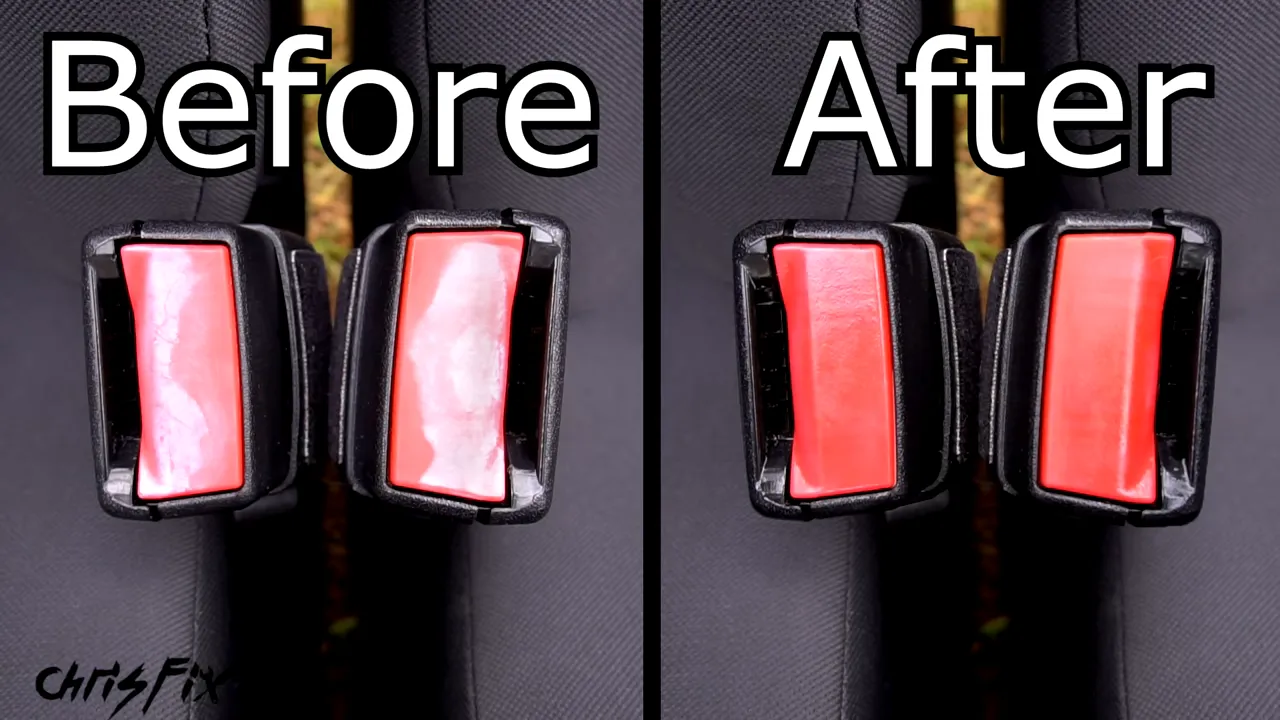
Look closely at the red release buttons and any recessed lettering. Dirt can collect inside embossed words such as PRESS, while scuffed plastic can appear pale and faded.
A small brush and a towel help clean the exterior details. In this example, protectant also made the faded red buttons look much richer. Because buckles are safety components, follow the manufacturer's cleaning guidance and keep cleaner, water, and protectant out of the latch opening and mechanism.
Clean the Seat Belts, Too
Seat belts touch your hands, clothes, neck, and shoulders every day. Even belts that appear clean can hold a surprising amount of dirt and oil.
Check the vehicle manufacturer's seat belt cleaning instructions first. Webbing is a safety-critical material, so do not assume that every upholstery cleaner or cleaning machine is appropriate for it.
The hands-on cleaning process is simple:
- Pull the belt all the way out.
- Hold it extended with a suitable clamp that will not damage the webbing.
- Apply the manufacturer-approved cleaning solution to a clean microfiber towel.
- Fold the towel around the belt and run it along the full length to clean both sides.
- Use a fresh, dry towel in the same way to absorb moisture and remaining dirt.
- Leave the belt extended until it has dried completely before allowing it to retract.
Applying cleaner to the towel gives you better control than spraying toward the belt's retractor.
I also used the extractor on these belts, adding water and recovering it from both sides. The collected water showed just how much dirt had been hiding in apparently clean webbing. Treat that as an additional method only where the vehicle's care guidance permits it, and keep liquid away from the retractor.
The important finishing step is the same either way: let the webbing dry fully before it rolls back into its housing.
Clean the Rear Armrest, Cup Holders, and Backrest
A folding rear armrest combines several different materials, so clean each section with the method that suits it.
Compartments and Hard Plastic
Open every compartment and vacuum out the crumbs and loose dirt. Check the cup holders and the storage tray underneath the armrest lid.
For the sticky, sugary residue here, I used a steam cleaner to loosen the mess before wiping it away. Use steam only on compatible surfaces, and do not assume a quick pass guarantees sanitization.
If the rubber cup holder insert lifts out, remove it so you can clean it separately and reach underneath. Clean the suitable plastic surfaces with soapy water, wipe them down, then apply a compatible protectant with a brush and buff off the excess.
Fabric Armrest and Rear Backrest
Use the cloth-seat process on the upholstered armrest: apply carpet and upholstery cleaner, brush it in, and extract it out.
Then repeat the process across the rear backrest and headrests:
- Vacuum the surface and seams.
- Apply upholstery cleaner.
- Agitate the fabric with a brush.
- Add a controlled amount of rinse water.
- Extract the cleaner, moisture, and dirt.
- Allow everything to dry completely.
The rear backrest did not look particularly dirty before cleaning, but the cloudy recovery water told a different story. That is why I clean the entire seat rather than treating only visible stains.
How to Clean Coated Leather Car Seats
Leather needs a different approach from cloth. Many automotive leather seats have a protective surface coating, so the surface you are cleaning is primarily that finish rather than exposed, unfinished leather.
That distinction matters when choosing products. For the coated seats here, I used a leather and vinyl cleaner and conditioner kit. Confirm your own upholstery type and care requirements before using the same approach, particularly with specialty or uncoated leather.
1. Vacuum the Seat
Remove loose dirt from the cushion, backrest, and bolsters. Flat leather panels are relatively easy to clean. The seams and crevices take the most effort.
2. Work the Dirt Out of the Stitching
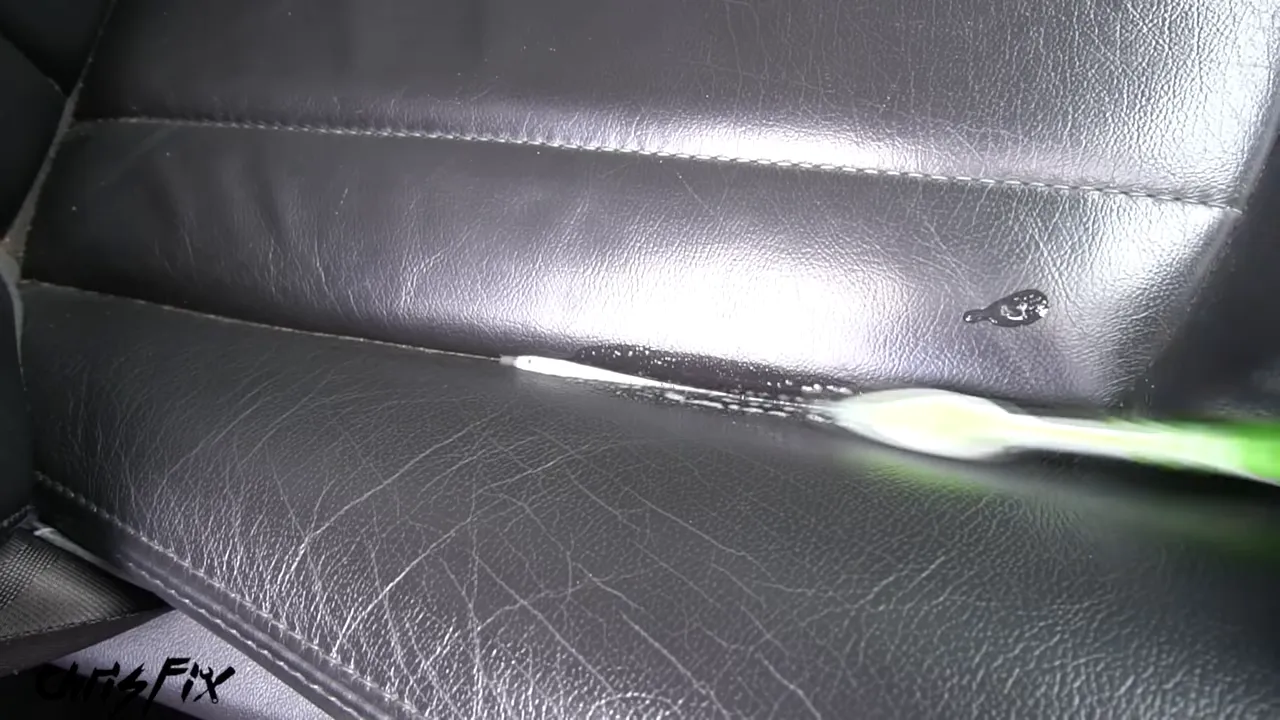
Use a small, gentle brush to loosen dirt along each seam. If dry brushing does not remove it, put a little compatible cleaner on the brush, work the area carefully, and absorb the residue with a towel.
Finish by vacuuming the loosened debris. Gently compressing the cushion beside the seam can open the crevice enough to improve access. Keep the nozzle smooth and avoid scraping or forcing it against the finish.
Do this around every stitched section. A clean center panel next to a dirty seam will not give you the same result.
3. Wipe the Flat Surfaces
Apply leather and vinyl cleaner to a microfiber towel and wipe the flat panels, following the cleaner's directions. Work methodically across the cushion and bolsters, switching to a clean part of the towel as it becomes dirty.
Once the seat is clean, allow it to dry before applying the conditioner or protectant.
4. Apply a Compatible Conditioner or Protectant
Spread the product evenly with an appropriate applicator or soft brush. Give it the recommended dwell time, then buff away the excess with a clean microfiber towel.
I included a brief steaming step before conditioning these seats, followed by drying them with a towel. That is an optional step, not a requirement. Heat and moisture need particular care around coated leather, so skip it unless your upholstery's care instructions permit it. You do not need to rely on steam to get a good cleaning result.
The finish should not feel greasy, sticky, or slippery. You want an even, rich appearance, not an excessive shine or product residue left on the seat.
Repeat the cleaning and protection process on the backrest, headrest, sides, and other compatible leather or vinyl surfaces. Use the product's recommended amount rather than assuming more is always better.
Know the Difference Between Leather Dirt and Leather Wear
Not every pale patch on a leather seat is dirt. The driver's outer bolster is a perfect example because it gets rubbed every time someone climbs in or out.
On this seat, the light-colored patch was worn through the surface finish. Cleaner could not remove it because the missing finish was the problem.
I cleaned the area, let it dry, then worked in a compatible conditioner and buffed off the excess. It darkened the exposed area enough to make the wear less noticeable, but the damage was still there.
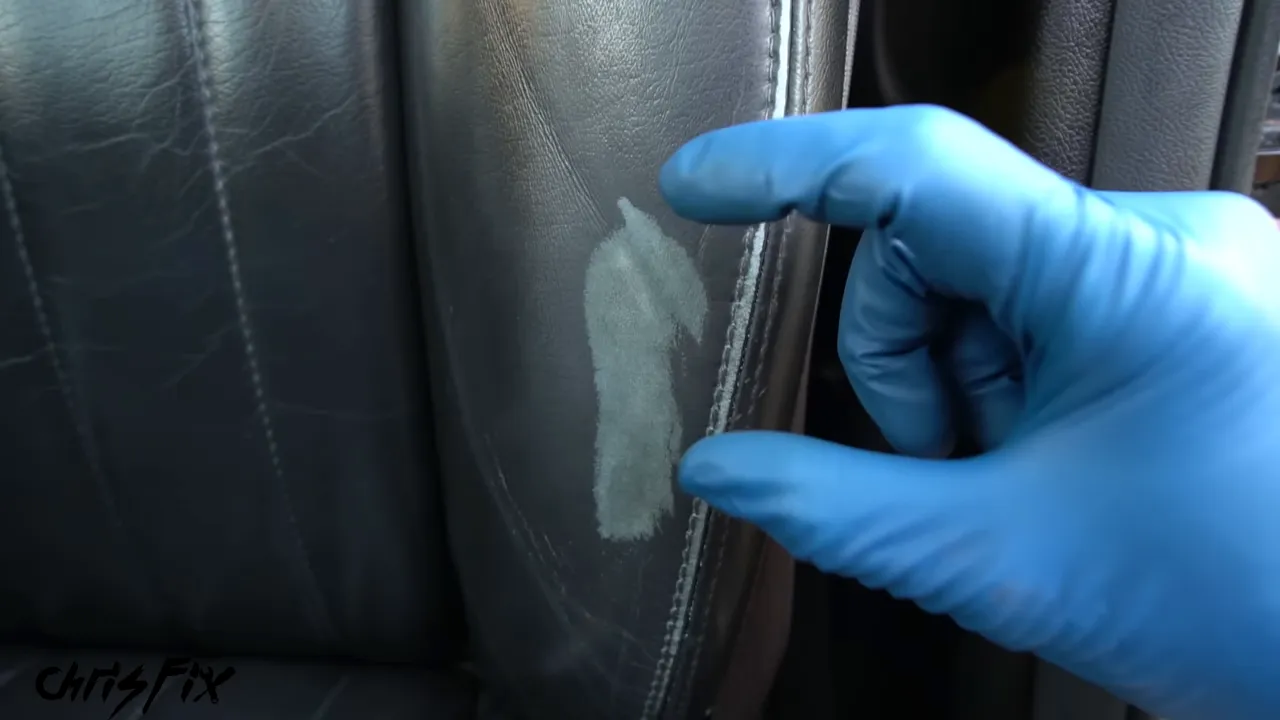
Conditioning can improve the appearance of wear, but it cannot replace missing color or coating. A proper repair is a separate job. Do not keep scrubbing a worn area in the hope that it will clean away.
For routine care, I use roughly six months as a reminder to clean and protect these seats, while following the vehicle and product instructions. Regular attention helps you keep the seams clean and notice bolster wear before it gets much worse.
Reinstall the Seats Safely
Once the upholstery and cushions are completely dry, reinstall the seats using the vehicle's service instructions.
- Refit the rear cushion. Route the buckles through their openings and engage the cushion retainers fully.
- Bring the front seats in carefully. Protect the interior trim from the metal rails and mounting feet.
- Reconnect every harness. Seat the connectors fully and reinstall the wiring retainers so nothing gets pinched or caught in the rails.
- Install the mounting bolts by hand first. Follow the manufacturer's requirements for bolt reuse, replacement, and thread treatment.
- Torque every mounting bolt to specification. Use the correct vehicle-specific torque values rather than guessing.
- Inspect the rails as you move the seat. Clean any newly exposed dirt before finishing.
- Reconnect the negative battery cable. Do this only after the seats and their electrical connections are fully installed, following the service procedure.
I used medium-strength thread locker on the mounting bolts in this example. That is not a universal instruction: use it only when it matches the vehicle's fastening requirements.
The final result comes from doing the simple steps thoroughly. Brush the seams, recover the dirty cleaning solution, clean the overlooked trim, and give everything enough time to dry. Whether the seats started with ordinary daily grime or a coating of mud, that attention to detail is what makes the interior look genuinely clean.


