The difference between a clean car interior and a super clean interior is in the details. Dust between the vent fins, grime around a dial, dirt packed into steering wheel stitching, and that sticky mess underneath the cupholder insert all make a difference.
You do not need a cabinet full of expensive products to get great results. A few suitable cleaners, some microfiber towels, and a good set of brushes can completely transform the interior.
I used two very different examples for this cleanup: Susan, a vandalized car with mud-covered door panels and melted candy in the console, and my sister’s daily driver with more typical everyday grime. The same basic approach works for both: remove loose dirt, clean the surface, then protect the appropriate materials.
What You'll Learn
- Remove loose dust before cleaning, then protect compatible interior surfaces for an even finish.
- Use detailing brushes for textured trim and damp, soft microfiber for delicate gauge lenses.
- Keep slippery protectants off steering wheels and pedals, and choose low gloss for dashboards.
- Clean, dry, and buff glass with separate towels, wiping along rear defroster lines.
Table of Contents
- Tools and Products You Need
- Prepare the Interior Before Cleaning
- Super Clean the Dashboard
- Clean the Steering Wheel, Control Stalks and Pedals
- Protect the Dashboard and Interior Trim
- Super Clean the Door Panels
- Finish the Door Jambs and Sills
- Deep Clean the Center Console
- Clean Car Glass Without Streaks
- The Final Check: Look for the Little Things
Tools and Products You Need
Keep the setup simple, but do not skip the brushes. A towel cleans the tops of textured surfaces. Brush bristles reach into the texture, seams, and little gaps where dirt actually gets trapped.
- Interior cleaner: Choose a mild product labeled for the plastics, vinyl, metal trim, and other materials you will be cleaning.
- Soapy water: For the steering wheel, pedals, and delicate printed controls, use a mild solution appropriate for the surface.
- Interior protectant: Look for UV protection and a finish that dries without greasy residue. Use a low-gloss or matte finish on the dashboard.
- Automotive glass cleaner: Choose an ammonia-free cleaner explicitly labeled safe for tint.
- Detailing brushes: Have soft brushes for general cleaning, a vent brush, and a toothbrush for small textured areas.
- Microfiber towels: Keep separate clean towels for dusting, removing cleaner, applying protectant, and cleaning glass.
- Vacuum: Use it to collect loose dirt as you brush and to clean pockets and fabric inserts.
The detailing brushes I use include a vent-cleaning tool with microfiber fingers. Labeling your cleaning and protectant brushes also helps keep the products separate.
A few optional tools make the job easier:
- A straw-style vacuum attachment reaches deeper between vent fins.
- A handled windshield-cleaning pad reaches the narrow gap above the dashboard.
- A steam cleaner helps loosen stubborn sugary deposits on removable console inserts.
- A waterless wash and wax works well on suitable painted door jambs and glossy trim.
- A clay bar and touch-up paint can address embedded contamination and small chips in painted door sills.
Check compatibility before applying anything. An interior contains several different materials, and one cleaner is not automatically safe for all of them. The interior cleaner used here, for example, was not suitable for suede. Follow the vehicle and product care instructions, particularly for screens, leather, and specialty finishes.
Prepare the Interior Before Cleaning
- Roll down the windows. This keeps protectant off the side glass while you work on the door panels.
- Plan for the doors to remain open. I disconnected the battery to avoid draining it during the extended cleanup. Follow your vehicle’s battery-disconnection procedure.
- Create working room. I removed the seats for this deep clean, which made the lower dashboard and console much easier to reach.
- Empty every storage area. Remove trash, loose change, candy wrappers, and everything else from the console, cupholders, and door pockets.
Seat removal is not necessary for every interior detail. If you do remove seats, follow the vehicle’s service procedure for wiring, airbag precautions, and correct reinstallation.
One habit will save you a lot of extra cleanup: spray products onto your towel or brush rather than spraying them around the cabin. Ideally, load the towel or brush outside the car. Uncontrolled mist lands on glass, screens, and surfaces you have already finished.
Super Clean the Dashboard
The dashboard process has three parts: dust, clean, and protect. Do them in that order so you are removing dirt rather than spreading it around.
1. Remove Dust From the Vents
Start with the vents because brushing them can release dust onto the surrounding dashboard.
- Hold a vacuum nozzle near the vent and loosen the dust with a soft brush.
- Use a microfiber-finger vent tool to wipe between the individual fins.
- If needed, use a straw-style vacuum attachment to reach deeper through the openings.
- Repeat for every vent, including those around the infotainment system.
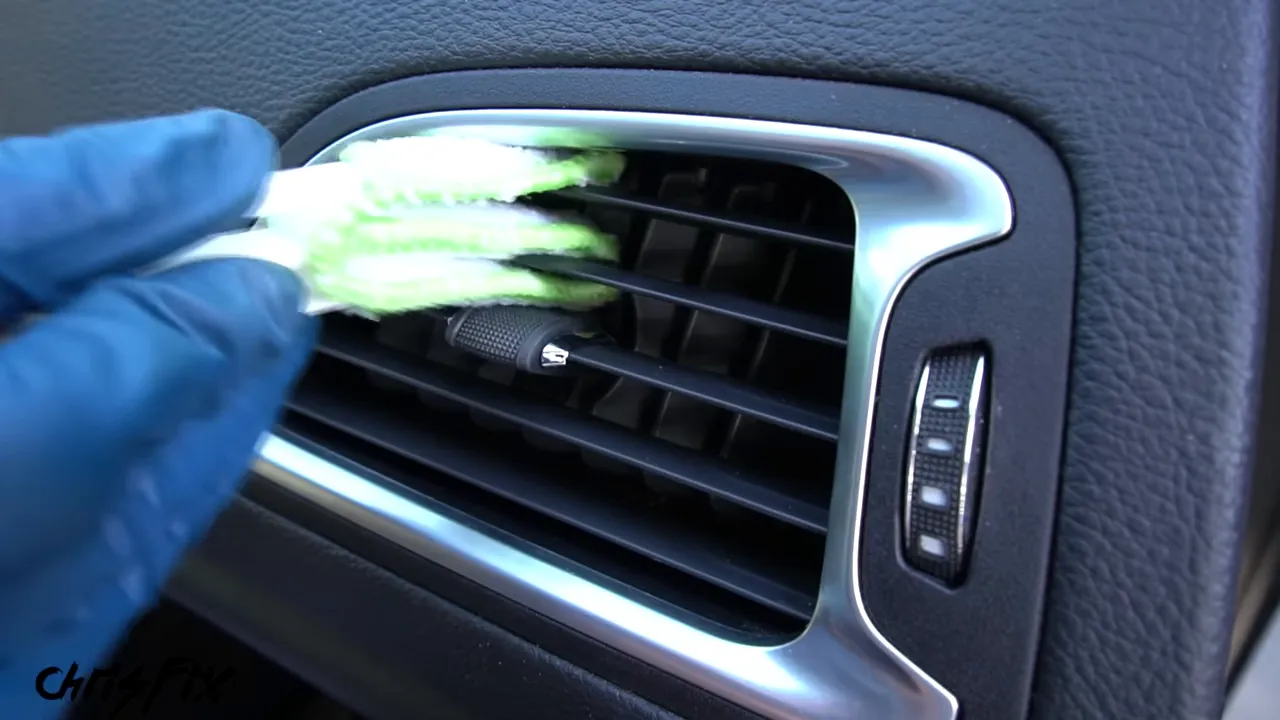
The brush loosens the dirt, and the vacuum catches it. That combination is much better than simply moving dust from the vent onto another part of the interior.
2. Dust the Dashboard With a Slightly Damp Microfiber Towel
Use a soft, high-pile microfiber towel lightly misted with water. Those longer fibers give dust somewhere to collect, and the slight dampness helps pick it up.
Lightly glide the towel over the dash pad and surrounding trim. Dust the infotainment area as appropriate for its finish, then use a soft brush around buttons and dials where a towel cannot reach.
The towel should be slightly damp, not dripping. You are collecting dust, not soaking the interior.
3. Treat the Gauge Cluster Lens Gently
The clear plastic over the gauges scratches easily. Do not clean it with a paper towel, napkin, tissue, or dry wiping material.
Use a clean, very soft microfiber towel lightly misted with water. Wipe straight across with minimal pressure, then use a fresh portion of the towel as needed.
I tested this on a spare Honda del Sol gauge lens. A dry paper towel left obvious scratches. A brush also left some lighter scratching. The damp microfiber did not leave visible scratching in the test. That is why the gauge lens gets a different approach from textured dashboard plastic.
Do not use compressed air around the gauge lens. It can push dust behind the clear cover, turning a simple dusting job into a gauge-cluster removal job.
4. Brush Cleaner Into Textured Dashboard Surfaces
Once the loose dust is gone, load your designated cleaning brush with a compatible interior cleaner. Work it over the dash pad, paying attention to the textured grain.
This is where brushes really make a difference. The bristles reach into the low spots that a flat towel tends to pass over. They also help reach the tight area where the dashboard meets the windshield.
Work in manageable sections. Wipe up the cleaner and loosened dirt before they dry. Use an absorbent microfiber towel so the contamination comes off the dashboard instead of drying back onto it.
5. Clean the Screen, Buttons, Dials and Gear Selector
Dirt collects around the edges of the infotainment screen, between buttons, and at the base of rotary controls. Give those seams some attention instead of only wiping the large, flat surfaces.
On the car cleaned here, I used a soft brush with compatible cleaner around the screen edges, then immediately wiped it dry. Do not assume every touchscreen can tolerate the same treatment. Follow the screen manufacturer’s cleaning instructions and avoid flooding the edges.
For the surrounding controls:
- Brush around each button and dial without forcing liquid into the openings.
- Use a toothbrush on suitable textured areas, such as the knurled edge of the gear selector.
- Check the narrow ring where a dial meets its surrounding panel.
- Wipe everything dry with a clean microfiber towel.
That tiny dirty ring around a control can make the whole panel look old. Removing it is a small job with a surprisingly big payoff.
Clean the Steering Wheel, Control Stalks and Pedals
Remove Hand Grime From the Steering Wheel
A steering wheel can look worn out when it is actually covered in grime. On my sister’s car, light gray buildup made the dark steering wheel look faded. Much of that discoloration was dirt, not damaged material.
Think about how much contact the steering wheel gets. Skin oils, moisturizer, grease, and dirt transfer from your hands every time you drive.
- Apply mild soapy water to a microfiber towel.
- Gently clean the steering wheel rim, working around its entire circumference.
- Use a toothbrush with soapy water in the bristles to gently loosen dirt in the stitching.
- Wipe away the loosened dirt and moisture.
- Clean the wheel’s center and button areas carefully, keeping moisture controlled around openings.
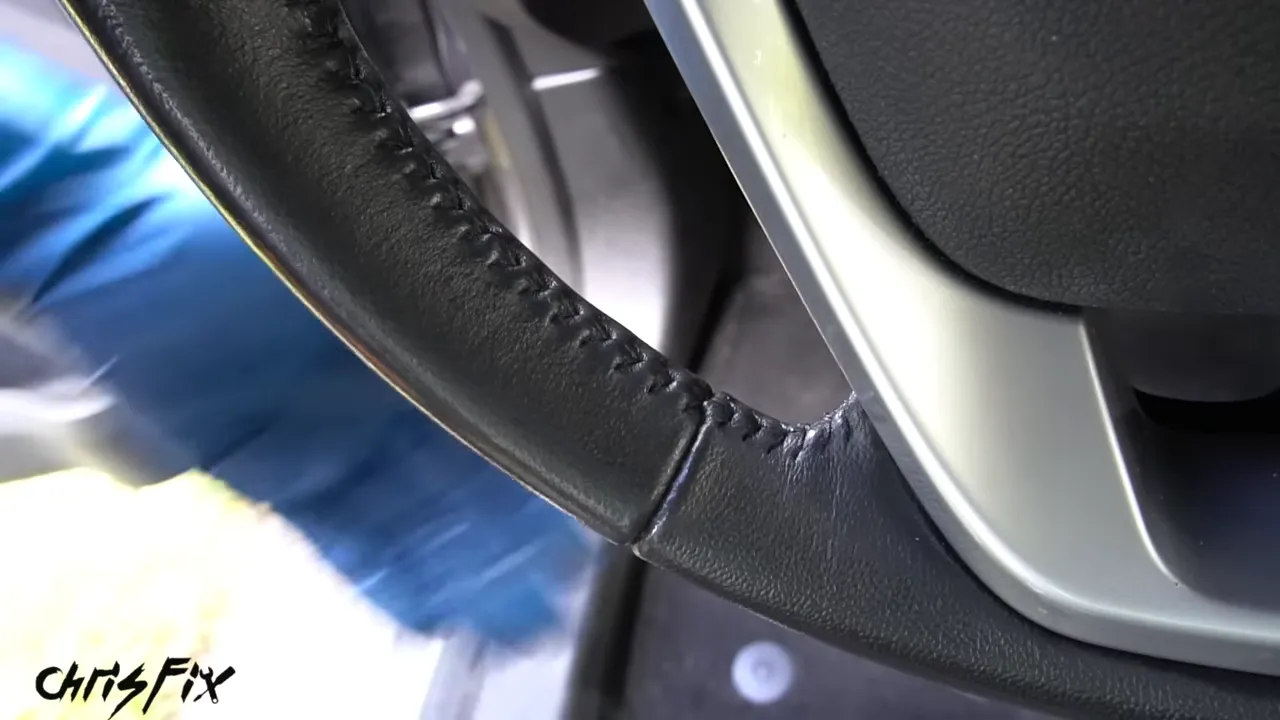
Holy smokes, the difference on this steering wheel was huge. The important part is that it was clean without becoming slippery.
Do not apply a slick or greasy protectant to the steering wheel. You need a secure grip, not extra shine. Use a cleaning method suitable for your wheel’s material and condition.
Be Gentle With Printed Symbols
Turn-signal and wiper stalks often have printed or painted symbols that can rub off surprisingly easily.
Use a soft microfiber towel with mild soapy water and light pressure. Avoid aggressive cleaners and hard scrubbing.
I learned this the hard way on my truck. An overly aggressive cleaner and too much rubbing faded part of the markings. The stalk became cleaner, but the missing print was permanent.
Clean the Pedal Grooves Without Making Them Slippery
The brake and accelerator pedals deserve attention, too. Dirt and little stones get packed into the rubber grooves.
- Place a towel underneath the pedals to catch dirt and cleaner.
- Use a brush with mild soapy water to clean the rubber texture.
- Wipe away the dirt and moisture.
- Carefully lift stubborn stones out of the grooves with a small pick or screwdriver without damaging the rubber.
- Give the pedals a final wipe and leave them dry.
Never dress the pedals with a slippery protectant. Maximum grip matters much more than a shiny finish.
Protect the Dashboard and Interior Trim
Use Low Gloss on the Dashboard
Once the dashboard is clean, apply a compatible protectant with UV inhibitors. The goal is to help preserve the material and restore an even appearance.
For the top of the dashboard, use a natural-shine, low-gloss, or matte protectant. A glossy dash can reflect sunlight, streetlights, and other lights into your field of vision.
I compared low-gloss and high-gloss products on adjacent sections of a door panel. Both improved the appearance, but the difference in sheen was easy to see. I like a shinier finish on some lower trim, but the dash pad gets low gloss.
- Apply protectant to a dedicated brush rather than spraying the dash directly.
- Spread it evenly across the compatible surface, following the product’s application directions.
- Take your time at the windshield edge so the product stays off the glass.
- Allow the recommended dwell time. The product used here sat for about a minute or two.
- Buff away the excess with a clean microfiber towel.
A low-gloss interior protectant can make faded-looking plastic appear much richer without giving the dashboard an overly shiny finish. It is not a repair for existing cracks or physical damage.
Keep Protectant Off Sensitive and Grip Surfaces
Protect the compatible trim around the infotainment system, but keep the product off the screen. If it accidentally touches the screen, wipe it away immediately with a clean microfiber towel.
You can also clean and protect suitable steering-column plastics and the vinyl boot behind the wheel. Lowering the steering wheel gives you better access.
Keep protectant off:
- The steering wheel.
- The pedal faces.
- The gauge cluster lens.
- The infotainment screen.
- Any material the product label excludes.
Before finishing, slide a microfiber towel through the accessible gap between the steering wheel and its base. That little flossing motion removes dirt that is easy to overlook.
Use a Different Approach for Glossy Trim
Glossy interior trim needs a gentler approach than textured plastic. In the Maserati, I treated the glossy, clear-coated trim much like a painted surface, using a compatible waterless wash and wax.
Apply the product generously to a clean microfiber towel, gently wipe the trim, let it sit as directed, and lightly buff with a clean, dry section. This combines cleaning and protection in one step.
Use this only on finishes approved for the product. Glossy decorative trim is not the same thing as a touchscreen.
Super Clean the Door Panels
Susan’s door panels were covered in mud, but the process was still straightforward: vacuum, clean, dry, and protect.
Vacuum the Fabric and Storage Pockets
Start by vacuuming loose dirt from the fabric sections, upper grab-handle pockets, and lower storage pockets. Remove any rubber pocket inserts so you can clean both the insert and the area underneath it.
Clean Plastic, Vinyl and Switch Surrounds
Use a compatible interior cleaner and detailing brush on the hard surfaces. Work into the texture, around the handle, and carefully around the window-switch surrounds.
Wipe the cleaner and dirt away with a microfiber towel before they dry.
Clean Fabric Inserts Separately
Fabric sections need their own cleaning step:
- Apply a suitable carpet or upholstery cleaner to the fabric without soaking nearby controls.
- Agitate gently with a brush to loosen the dirt.
- Extract the cleaner and dirt with a wet-capable shop vacuum configured for liquid pickup.
- Blot with a towel to absorb remaining moisture and contamination.
Do not use an ordinary dry-only household vacuum to collect liquid.
Detail the Speaker Grille
A towel alone cannot reach all the little holes in a speaker grille. Use a brush with controlled moisture to loosen the dirt, then wipe the surface and vacuum remaining moisture and debris from the openings. Avoid soaking the speaker behind the grille.
Protect the Compatible Surfaces
Spread protectant evenly over suitable plastic, vinyl, and approved leather surfaces, then buff off the excess. Keep it off fabric and glass.
Clean and protect the removable rubber insert before reinstalling it. For the speaker grille, use a lightly loaded brush so you are treating the surface rather than pushing excess product through the holes.
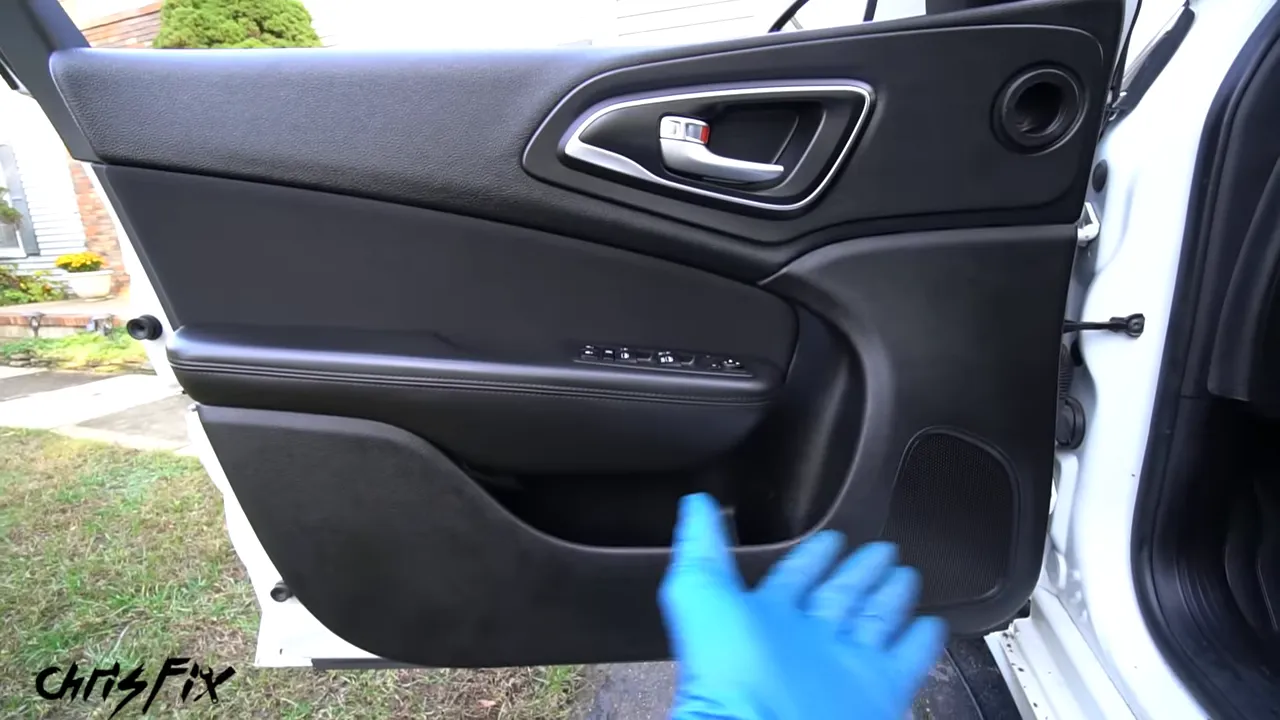
The product should dry without greasy residue. Brand matters less than choosing something compatible with the material, providing the protection you want, and leaving a clean finish that is not oily to the touch.
Finish the Door Jambs and Sills
A spotless door panel next to a dirty door jamb still looks unfinished. Clean the areas you see every time you open the door.
Clean Painted Jambs and Rubber Wiring Boots
Apply waterless wash and wax to a microfiber towel and gently wipe the painted jamb and sill surfaces. Switch to clean towel sections as they collect dirt.
Clean the rubber wiring boot between the body and door, then apply a compatible rubber protectant. Finish by cleaning and protecting the plastic sill trim, which often collects mud and shoe marks.
Remove Embedded Specks With a Clay Bar
If small specks remain after wiping the painted sill, they may be embedded contamination rather than ordinary loose dirt.
Lubricate the surface with a product suitable for your clay bar, then glide the clay back and forth over the affected area. Keep it lubricated and avoid unnecessary pressure. Wipe the area clean and inspect it again.
On this car, the clay lifted the stubborn specks out of the paint and left a much cleaner-looking sill.
Touch Up Small Paint Chips
Small chips can look like permanent dark dirt marks. A little matching touch-up paint makes a noticeable improvement.
- Shake the touch-up pen as directed.
- Use its preparation tip, if provided, to carefully clean and prepare the chip.
- Apply a small amount of paint inside the chip.
- Avoid overfilling it or adding enough paint to run.
This is a quick cosmetic touch-up, not a full paint correction. Repeat the cleaning process around all the doors so the entire interior has the same finished appearance.
Deep Clean the Center Console
Remove the Rubber Inserts
Removable console liners make a disgusting cleanup much easier. Pull out the cupholder insert and each pocket liner, then remove the debris underneath.
In Susan, the inserts were coated with melted candy, sticky residue, and trapped dirt. Taking them outside the car let me work on the mess without spreading it across the interior.
One opening underneath the inserts exposed this car’s manual shifter release. That release is vehicle-specific, so do not pull unfamiliar mechanisms while cleaning.
Use Steam to Loosen Melted Candy
On these compatible removable rubber inserts, steam helped soften the hardened sugar and push it out of the grooves.
- Use the steam cleaner carefully to loosen the heavy deposits.
- Apply mild soapy water to the removed insert.
- Agitate the remaining residue with a brush.
- Remove the loosened dirt and soap, using steam where appropriate for the material.
- Dry the insert, apply compatible protectant, and buff away the excess.
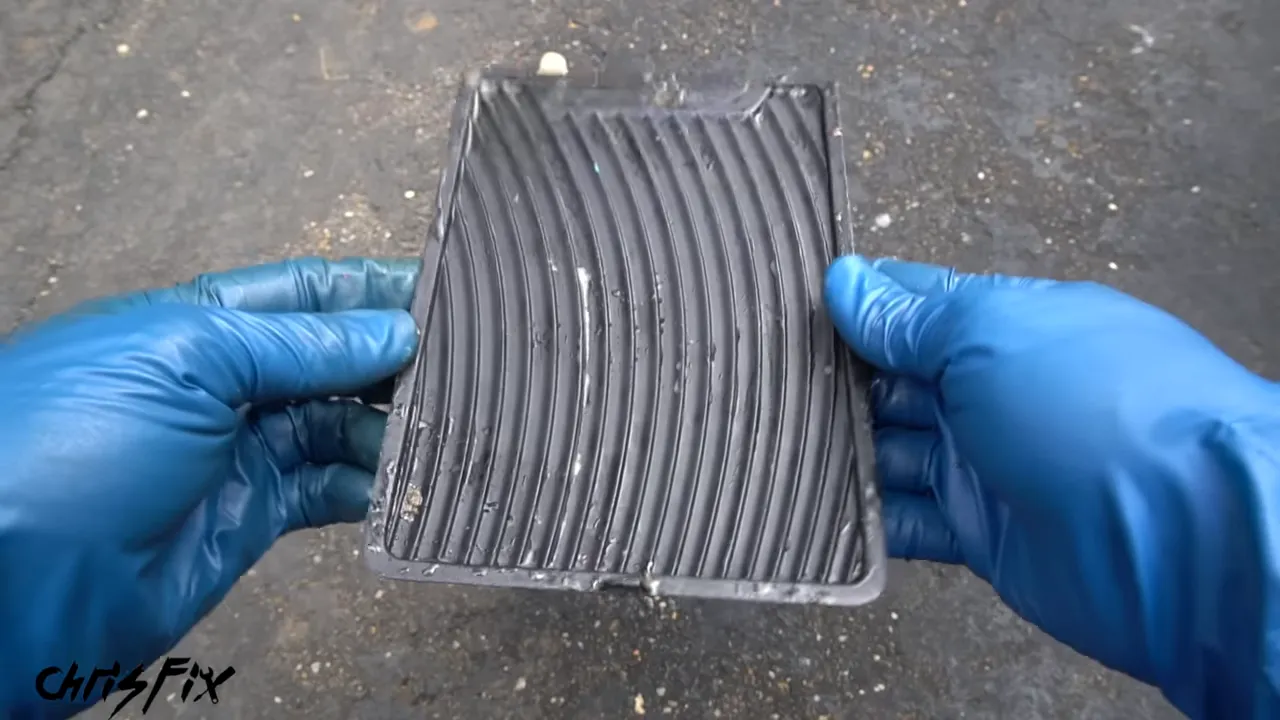
Steam can cause burns. Keep hands clear of the jet and follow the equipment instructions. I used it here on removed liners, not as a reason to blast heat and moisture into electronics or delicate interior trim.
Also, do not assume that a quick steam pass guarantees disinfection. Cleaning and disinfecting are different tasks, as explained in the EPA’s guidance on cleaning, sanitizing, and disinfecting. If sanitation is necessary, use a material-compatible process with the required treatment conditions.
Before reinstalling the liners, clean and dry the actual console cavities. Then clean and protect the console’s outside surfaces. There is no point putting a spotless liner back into a dirty pocket.
Replace a Damaged Console Lid When It Makes Sense
Cleaning cannot fix torn upholstery. Susan’s console lid had physical damage despite the car being a 2016 model with about 50,000 miles.
A replacement lid cost me about $25, making replacement more practical for this job than an upholstery repair.
On this particular console:
- Remove the rear plastic trim piece.
- Remove the four screws securing the lid.
- Lift out the old lid and position the replacement.
- Hand-tighten the screws without overtightening them into the plastic.
- Clip the trim piece back into place and check that the lid works properly.
Other consoles attach differently, but the lesson is the same: sometimes one inexpensive replacement finishes the transformation better than more cleaning.
Clean the Area Hidden by the Shifter
A conventional automatic shifter covers part of its surrounding trim when it is in Park. Move it, and suddenly a dirty section appears next to all your freshly cleaned plastic.
To access that area, I chocked the rear wheels, kept my foot on the brake, and moved the shifter using the car’s normal controls. Follow your vehicle’s procedure, secure it against movement, and keep the engine off.
Clean the newly exposed area, apply compatible protectant to suitable trim, and wipe it dry. Return the transmission to Park when finished.
Clean Car Glass Without Streaks
Save the glass for last. That way, you are not cleaning windows and then accidentally putting interior cleaner or protectant back onto them.
Use an ammonia-free automotive glass cleaner labeled safe for tint and fresh towels that have not been used with oily dressings.
My method uses three towels:
- Cleaning towel: A low-pile glass towel dampened with cleaner.
- Drying towel: A separate clean towel to remove the loosened contamination and liquid.
- Buffing towel: A soft, higher-pile microfiber for the final streak-removal pass.
The Three-Step Glass-Cleaning Method
Reconnect the battery according to the vehicle’s procedure if you disconnected it, then raise the windows.
- Clean: Spray the cleaner onto the cleaning towel, not directly onto the glass. Wipe across the entire window horizontally and vertically, using pressure appropriate for the glass or film.
- Dry: Follow with the drying towel to absorb the cleaner, dirt, and oils.
- Buff: Lightly buff with the soft finishing towel to remove remaining haze or streaks.
I like to clean both sides of the glass so it is easier to identify anything I missed.
Do Not Miss the Top Edge of the Side Windows
Once the main window is clean, lower it slightly. The upper strip that normally sits inside the seal often has a line of dirt you could not reach with the window closed.
Use the same cleaning, drying, and buffing process on that exposed strip.
Reach the Bottom of the Windshield
The narrow space between the dashboard and windshield can be awkward. One helpful technique is to stand outside the open door and reach your arm inside. That position lets you clean roughly half the windshield without folding yourself around the dashboard.
A handled windshield-cleaning pad makes the bottom edge easier to reach because its head is thinner than your hand.
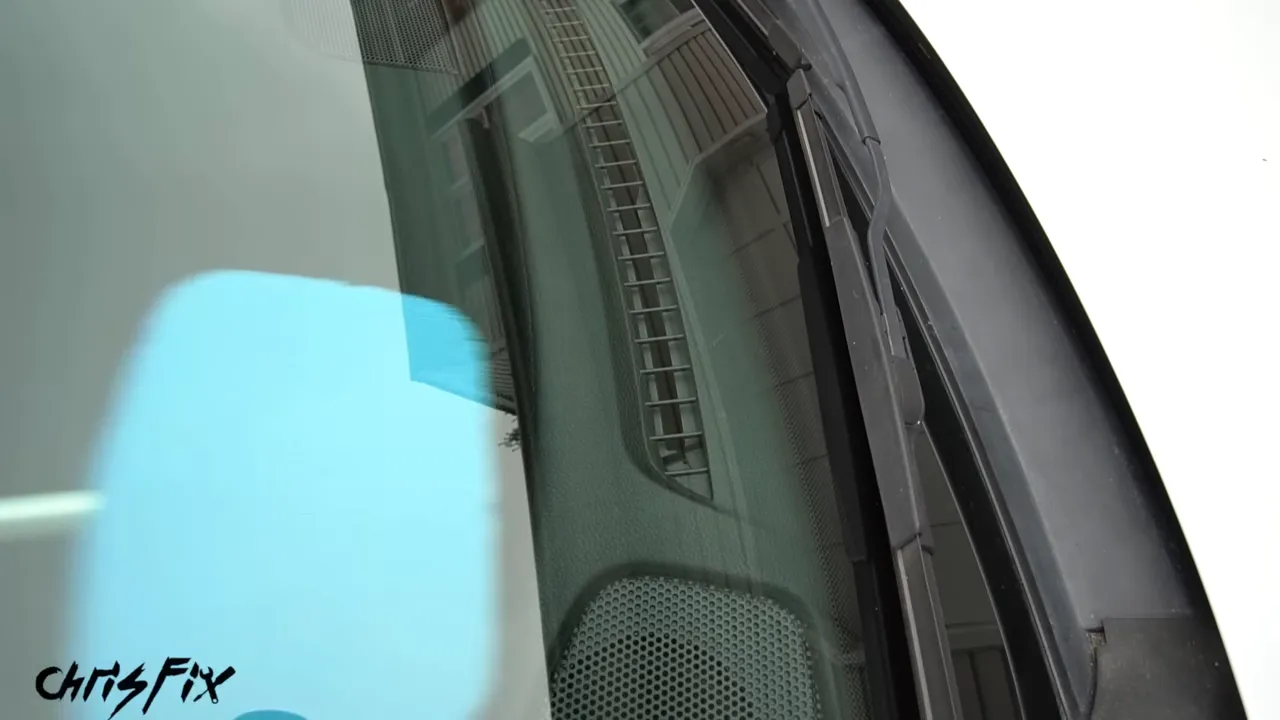
Whichever method you use, complete all three passes: clean, dry, and buff. Do not forget the rearview mirror, which often collects fingerprints when it is adjusted.
Clean the Rear Window Along the Defroster Lines
Fold the rear seats down if possible to give yourself more working room.
Use the same three-towel method, but change your wiping direction. Wipe lightly along the defroster lines, not across them. These lines usually run horizontally, so keep your strokes horizontal and avoid heavy pressure.
That gives you clean rear glass without unnecessarily stressing the heating grid.
The Final Check: Look for the Little Things
Before calling the interior finished, look closely at the places that usually get skipped: the seam beside the screen, the base of a dial, steering wheel stitching, pedal grooves, door-pocket liners, painted sills, and the trim hidden behind the shifter.
These are not complicated jobs. They just take a little patience and the right tool for each surface.
The reward is an interior that does not merely look wiped down. The dashboard has an even finish, the controls are clean around their edges, the console is usable again, and the glass is crystal clear. That is what makes it a super clean.
Seats, carpets, and the headliner need their own methods. For those parts of the interior, continue with my guides to deep cleaning car seats and cleaning carpets and the headliner.


