A dusty, greasy engine bay can look intimidating. There are wires everywhere, electrical connectors tucked into tight spaces, and years of grime covering surfaces you can barely reach. But getting it clean does not require expensive equipment or blasting everything with a pressure washer.
The trick is to separate the job into five simple steps: prepare, dry clean, wet clean, dry, and detail. Use water carefully, work one section at a time, and save the finishing products until everything is actually clean.
I used this process on several very different vehicles: a grease-covered Mustang, a Jaguar with everyday road grime, a muddy truck, and a van more than 20 years old with over 300,000 miles. Each needed a little different attention, but the basic approach stayed the same.
Plan on about two hours for a thorough job, depending on the engine layout and how far you take the detailing.
What You'll Learn
- Remove loose dust and debris before adding water to the engine bay.
- Cover the engine while gently cleaning the hood and surrounding compartment.
- Hand-clean sensitive engine areas with controlled cleaner application, brushes, and microfiber towels.
- Dry thoroughly before applying finishing products and reconnecting the battery.
Table of Contents
- What You Need to Clean an Engine Bay
- Step 1: Prepare the Engine Bay
- Step 2: Dry Clean Before Adding Water
- Step 3: Wet Clean from the Top Down
- Step 4: Dry the Engine Bay Thoroughly
- Step 5: Detail and Protect the Clean Surfaces
- Reassemble and Make the Final Check
What You Need to Clean an Engine Bay
Lay everything out beside the car before you start. Having your supplies within reach makes this a lot quicker and more enjoyable.
- Microfiber towels: Have plenty available. Separate the towels used for grease removal from those used for drying and finishing.
- Assorted brushes: Soft detailing brushes, paintbrushes, a toothbrush, and long-handled brushes help reach different surfaces.
- Long pipe-cleaning brushes: These reach between hoses and into narrow gaps.
- Cleaning wipes: Useful for lifting thick oil and grease before scrubbing.
- Soapy water: My simple mixture is a squirt of dish soap in a spray bottle filled with warm water.
- A garden hose: Use a gentle shower setting, not a concentrated jet.
- A large garbage bag: This shields the engine while you clean the hood and surrounding compartment.
- A vacuum: A wet/dry shop vacuum is especially useful. A leaf blower or air compressor can also help remove loose dust.
- Finishing products: Spray wax, a water-based trim restorer, and paint markers.
- Optional restoration tools: A suitable metal wire brush or rotary tool attachment, plus an appropriate hood-liner fabric dye.
- Protection: Gloves, safety glasses, and a dust mask for the dry-cleaning stage.
You do not need a special brush for every part. An old toothbrush works surprisingly well, and ordinary paintbrushes can handle plenty of the dusting. A few different sizes of detailing brushes simply make access easier.
Step 1: Prepare the Engine Bay
Start with an engine that is safe to touch
You can clean a cold engine or a mildly warm one. Warm grease can be easier to remove, but never spray cold water onto a hot engine. Let it cool until the surfaces are comfortably safe to touch. For this job, I cleaned the Mustang cold, and it still came out great.
Keep the engine off throughout the cleaning process. Put on gloves to protect your hands from oils and cleaners, and wear safety glasses in case dirt or liquid splashes upward.
Disconnect the battery
For the conventional vehicles used here, I disconnected both battery leads. If the battery is easy to access, removing it also opens up the tray and makes that corner much easier to clean.
Follow your vehicle's battery-disconnection procedure. On a typical negative-ground vehicle, disconnect the negative terminal first, then the positive, and keep the leads from touching the terminals. When reconnecting later, the usual order is positive first, then negative.
Disconnecting the battery is a precaution, not permission to soak electrical components. Water can still become trapped and cause corrosion or problems after power is restored. Check your owner's manual for model-specific cleaning restrictions and battery instructions. For Ford vehicles, the owner's manual library is a useful starting point.
Identify the areas you do not want to soak
Before introducing water, find the sensitive components:
- Alternator: Avoid directing water into its openings.
- Distributors and ignition components: On older engines, follow the spark plug wires to locate the distributor caps. Make sure the boots are properly seated.
- Spark plug wells: Recesses on top of an engine can hold water where it does not readily evaporate.
- Electrical connectors and sensors: Avoid direct spray, especially on aged or damaged connectors.
- Air intake openings: Keep water out of the intake, including any openings exposed if you remove intake tubing.
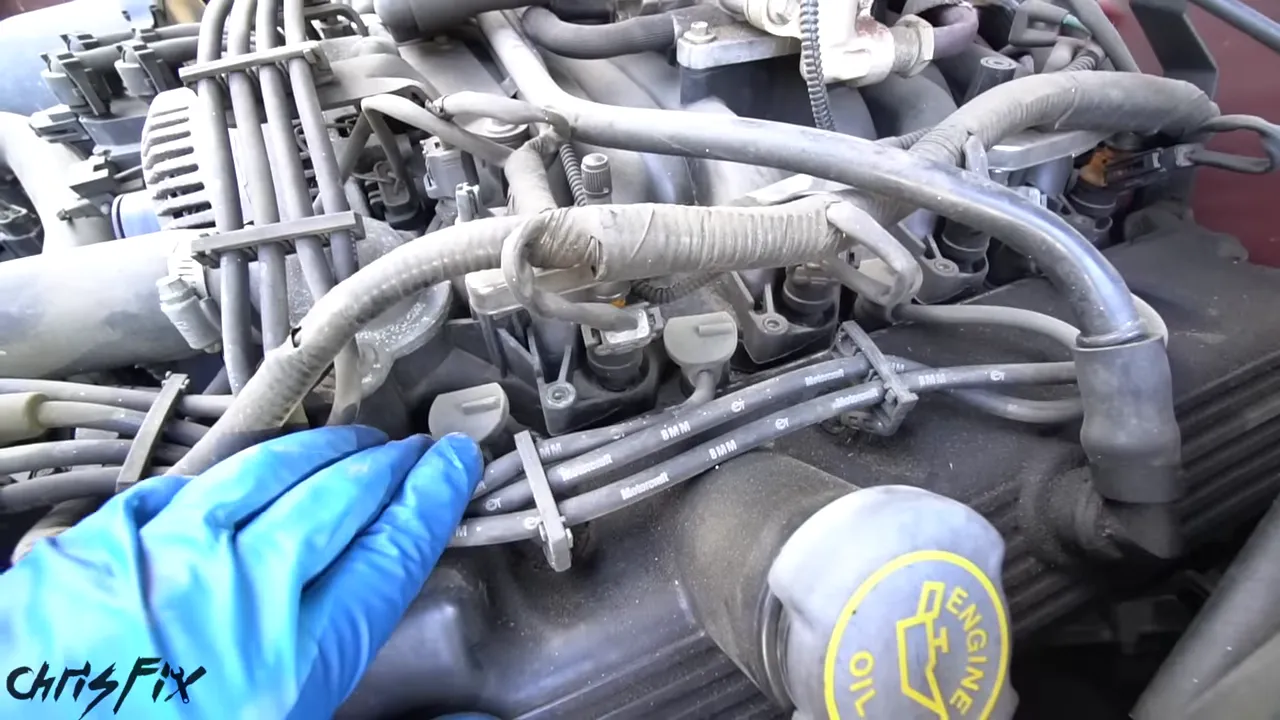
Plastic engine covers can help shield components, but do not assume everything underneath is waterproof. Avoid directing water behind them.
Underhood parts tolerate ordinary road splash, but spraying from above is different. Heat cycles, vibration, and age can weaken connector seals. That is why I use a gentle hose shower rather than a pressure washer. Even a little water forced past a seal can create trouble later.
Check caps and dipsticks
Make sure the engine oil dipstick is pushed fully into place. Check the automatic transmission dipstick too, if your vehicle has one. Confirm that the brake fluid and power steering reservoir caps are secure, along with any other fluid caps you will be cleaning around.
It takes only a moment, and it helps keep cleaning water where it belongs: outside the engine and fluid systems.
Step 2: Dry Clean Before Adding Water
A lot of what makes an engine look filthy is loose dust, leaves, and road debris sitting on top of everything. Get that material out while it is dry instead of turning it into dirty water and pushing it into tighter spaces.
Put on your dust mask, grab a brush, and work with the vacuum nozzle right beside it.
- Vacuum up loose leaves and obvious debris.
- Brush the surfaces to loosen settled dust.
- Hold the vacuum close enough to collect the dirt as it comes free.
- Switch brush sizes to work around hoses, sensors, and narrow gaps.
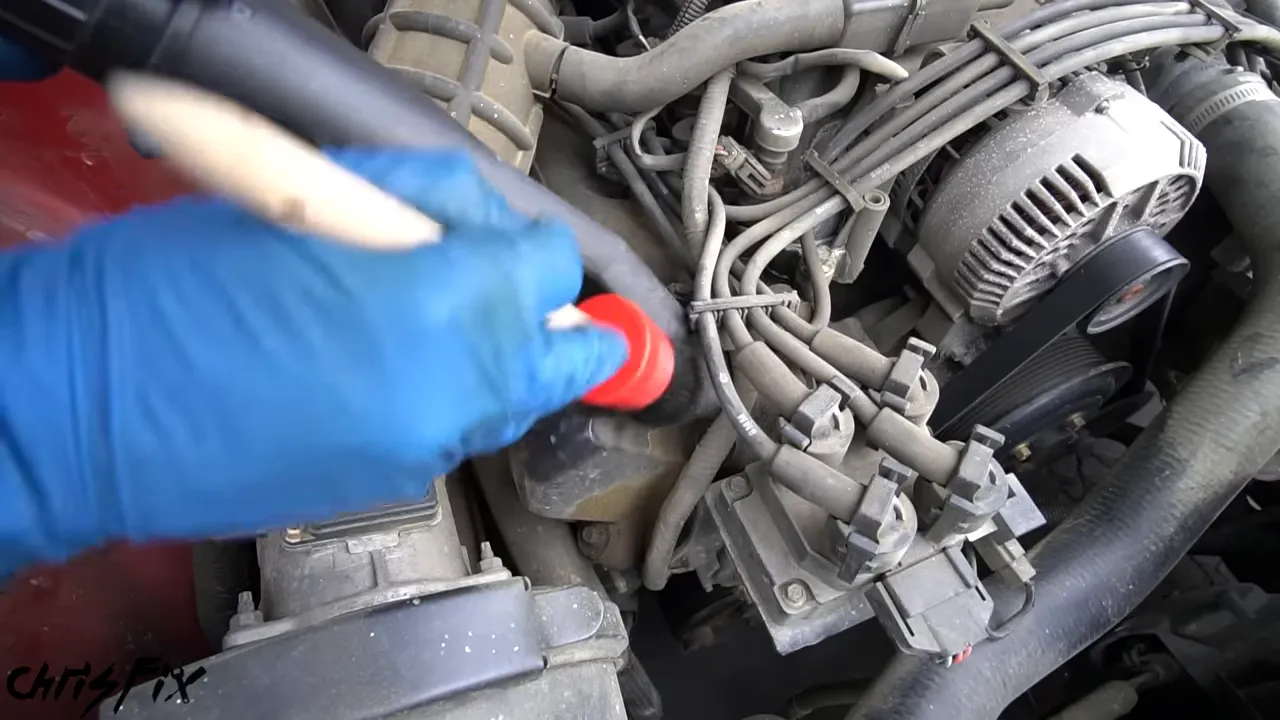
This stage can take about five minutes, and the difference is already noticeable. A long-handled brush gets into areas your hand cannot, while a small paintbrush or toothbrush works around more intricate parts.
If you do not have a vacuum, a leaf blower or an air-compressor nozzle can move loose dirt out. Some shop vacuums also have a blower port, so you can switch the hose to blow air rather than draw it in.
Optional: brighten exposed metal
Not every engine needs metal polishing. On the Fiesta, I left the aluminum alone and the engine bay still looked excellent. On the Jaguar, though, the large aluminum intake was such a prominent feature that its staining and oxidation stood out.
For suitable bare metal, a wire brush can remove surface discoloration. A rotary tool with an appropriate wire attachment makes a larger area quicker to work through and can leave a brighter finish.
Keep wire brushes away from paint, plastic, rubber hoses, wiring, and sensors. Confirm that the brush is suitable for the metal and finish before using it. This is an optional cosmetic step, not something to do indiscriminately across the engine.
The older van needed only a small touch: brightening the raised aluminum lettering on its black intake. Once the surrounding intake was clean and dark again, that silver lettering really stood out.
Step 3: Wet Clean from the Top Down
This is the part that makes people nervous, but the important distinction is simple: gently rinse suitable surrounding surfaces, then hand-clean the engine itself. You do not need to hose down every component to get a great result.
Cover the engine first
Spread a large garbage bag over the bulk of the engine. Position it to shield the top while leaving the surrounding compartment accessible.
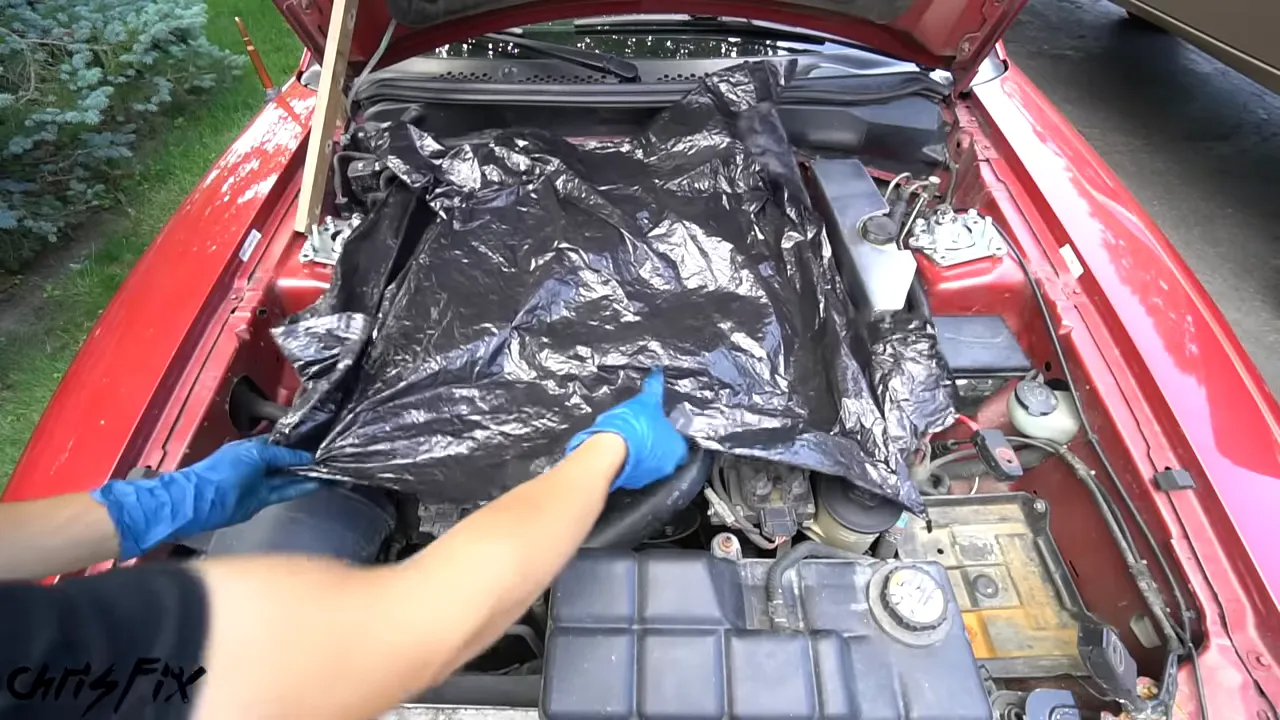
I use this precaution on exposed engines, engines with plastic covers, and engines tucked partly beneath the windshield cowl. The bag reduces how much water reaches the top while you work above it.
The cleaning order is:
- The underside of the hood.
- The outside edges of the engine bay.
- The engine itself, after removing the bag.
Clean the hood and inspect the liner
Start with the painted underside of the hood. Gently rinse it, apply soapy water, and wipe the paint with a microfiber towel to remove dirt and grease.
Before wetting the insulation liner, inspect its condition. If it is sagging, brittle, or delicate, do not soak it. Water can make a deteriorating liner worse.
The Mustang's liner was intact enough to clean. I rinsed it gently and applied cleaner. For stubborn dirt in a suitable liner, carpet cleaner can help. Follow the cleaner's directions, then gently rinse away the loosened dirt without saturating the material unnecessarily.
Do not worry if an otherwise clean liner still has cosmetic stains. We will address that separately during detailing.
Clean the outer engine compartment one section at a time
Leave the bag in place and pick a starting corner. I like to work around the compartment in a consistent direction so I do not miss sections.
- Gently rinse: Remove loose surface dirt without aiming into electrical connectors.
- Wipe off heavy grime: Use a cleaning wipe on easy-to-reach surfaces to lift oily buildup.
- Rinse the loosened dirt: Keep the flow controlled and away from sensitive parts.
- Apply cleaner: Spray soapy water or a compatible degreaser over the section.
- Agitate: Brush every suitable surface you can reach.
- Rinse again: Carry away the dirt you just loosened.
My soapy water mixture worked well on these vehicles. Whichever cleaner you choose, check its compatibility with the paint, metal, rubber, and plastic you are treating, and do not let it dry on the surface.
Use a long pipe-cleaning brush between brackets and around narrow gaps. The more surfaces you physically reach with a brush, the more complete the finished job will look.
Each section takes roughly five minutes to clean thoroughly. Repeat around the compartment, including the radiator support and the accessible battery-tray area.
Remove the bag without dumping water onto the engine
Lift the bag carefully, gathering it so any water on top stays contained instead of spilling onto the components below. With the surrounding compartment clean, you can focus on the engine without sending dirty runoff down from above.
Divide the engine into manageable sections
A big V8 with hoses and wires everywhere can feel overwhelming. Split it down the middle. Pick one side, then work from front to back before moving to the other.
If an easily removable intake tube blocks access, removing it can make the work much easier. On the Mustang, disconnecting the intake's electrical connectors and hoses opened up the passenger side and let me clean the intake assembly separately.
Only remove parts you are comfortable reinstalling correctly, and protect any exposed intake openings from dirt and liquid.
Lift the grease, mist, scrub, and wipe
Start with cleaning wipes to remove thick oil and grease. It is easier to lift that buildup directly than to spread it around with a wet brush.
Next, apply a controlled mist of soapy water to the surfaces you are cleaning. Around sensitive components, apply cleaner to the brush or towel rather than spraying directly.
Agitate the grime with your brush. Use the long pipe-cleaning brushes for narrow spaces, and use a toothbrush around small details and the outside of wiring harnesses. Be gentle with old wiring and brittle plastic.
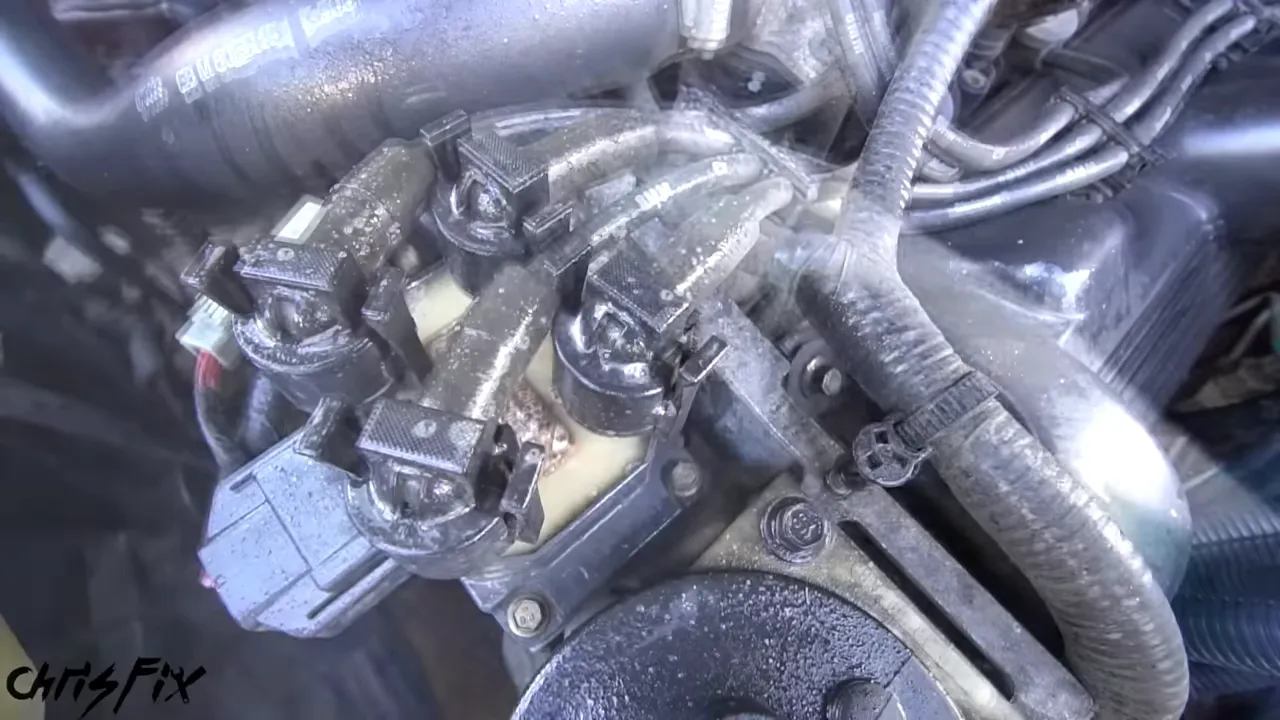
Instead of rinsing the engine with the hose, wipe the loosened dirt and cleaner away with microfiber towels. The towel absorbs the liquid along with the grease and grime, giving you much better control around ignition parts and electronics.
Do not worry about making the towel dirty. That is exactly what should happen. The grime is leaving the engine and ending up in the towel.
For a hard-to-reach space, wrap a microfiber towel around the end of a long cleaning brush and gently guide it into the gap. Keep any exposed wire or sharp end from scratching the surface.
Finish one side, then repeat on the other. At this point, the engine should look genuinely clean, even before adding any dressing.
Step 4: Dry the Engine Bay Thoroughly
Grab a fresh microfiber towel and dry all the accessible surfaces. This is not just a quick cosmetic wipe. You want the compartment dry before applying finishing products or reconnecting the battery.
As you dry, you will probably pick up a little remaining dirt. You may also find a spot you missed. Add a little soapy water where necessary, clean it, and dry it again.
Pay particular attention to places that hold standing water:
- Recesses around spark plug boots.
- Low spots on covers and brackets.
- The battery tray.
- Gaps beneath hoses and wiring.
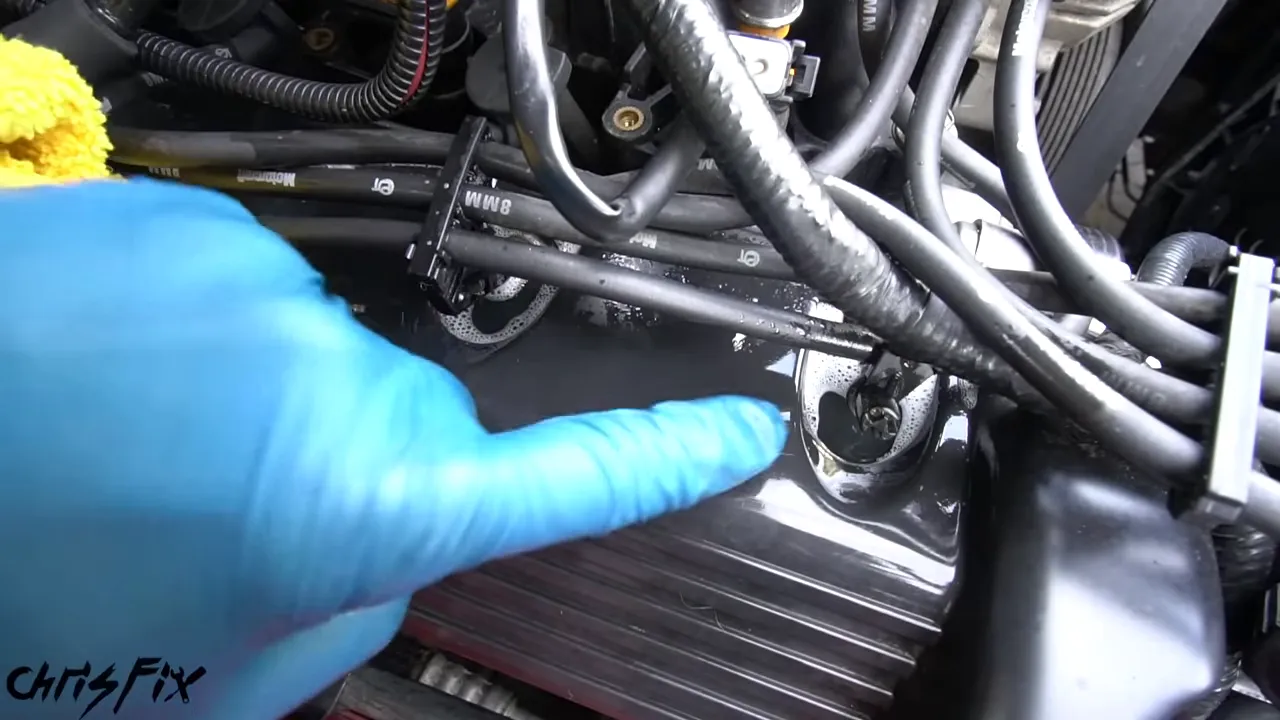
Absorb puddles with a towel. A wet/dry shop vacuum configured for liquid pickup can also draw water out of awkward recesses. Do not use a dry-only household vacuum for this.
Take your time here. Disconnecting the battery earlier does not replace the need to remove trapped moisture now.
Step 5: Detail and Protect the Clean Surfaces
This is the rewarding part. The dirt is gone, and now a few careful finishing touches bring out the paint, deepen the black trim, and clean up the small details that still stand out.
Restore the hood liner if needed
The Mustang's liner still looked stained after cleaning, and a new replacement was no longer available. I removed its retaining clips and took the dry liner off the hood to restore its appearance.
If you choose to recolor a liner, use a product specifically suitable for the liner material and its underhood application. Check the manufacturer's heat, flammability, drying, and curing requirements. Do not assume ordinary fabric paint or dye is appropriate.
This step is optional. If your liner already looks good, leave it alone. If it is structurally deteriorated, recoloring will not repair it.
Wax the painted surfaces
Apply your preferred spray wax to the clean painted areas beneath the hood and around the engine bay, following its instructions. Buff with a clean microfiber towel.
On the red Mustang, this made the paint look deeper and richer while adding protection. Keep the wax on the painted surfaces rather than spraying it indiscriminately over the engine.
Dress rubber and plastic without leaving a greasy coating
I use a water-based trim restorer that is safe for the surfaces being treated and dries non-greasy. The goal is a deep, clean black finish, not an oily layer that attracts dust.
Do not substitute motor oil or WD-40 for a proper trim product. Choose a dressing specifically compatible with the rubber and plastic you are treating.
- Put a small amount of product on a clean brush or applicator.
- Work around one side of the compartment, coating the intended rubber and plastic surfaces.
- Use the brush to reach complex shapes and recessed details.
- Allow the product to dwell as directed. For the product I used, I let it sit about 10 minutes.
- Buff the treated surfaces with a clean microfiber towel to even out the finish and remove excess.
Keep all dressing off the drive belt and pulleys. Contamination can cause belt noise or slipping. Apply carefully instead of broadly spraying everything.
Work one side at a time when buffing, just as you did during cleaning. It makes it easier to keep track of what is finished.
Touch up small rusty fasteners
Once everything else is clean, one rusty bolt can really stand out. For a small cosmetic touch-up, brush away loose surface rust and apply a suitable paint marker to the exposed area.
This is a finishing detail, not a repair for severely corroded hardware. The idea is to tidy up otherwise serviceable parts that distract from the clean compartment.
Refresh faded raised lettering
A paint marker also works well on raised lettering. The washer-fluid cap on the Mustang was readable but faded, so I carefully colored only the raised letters and symbol.
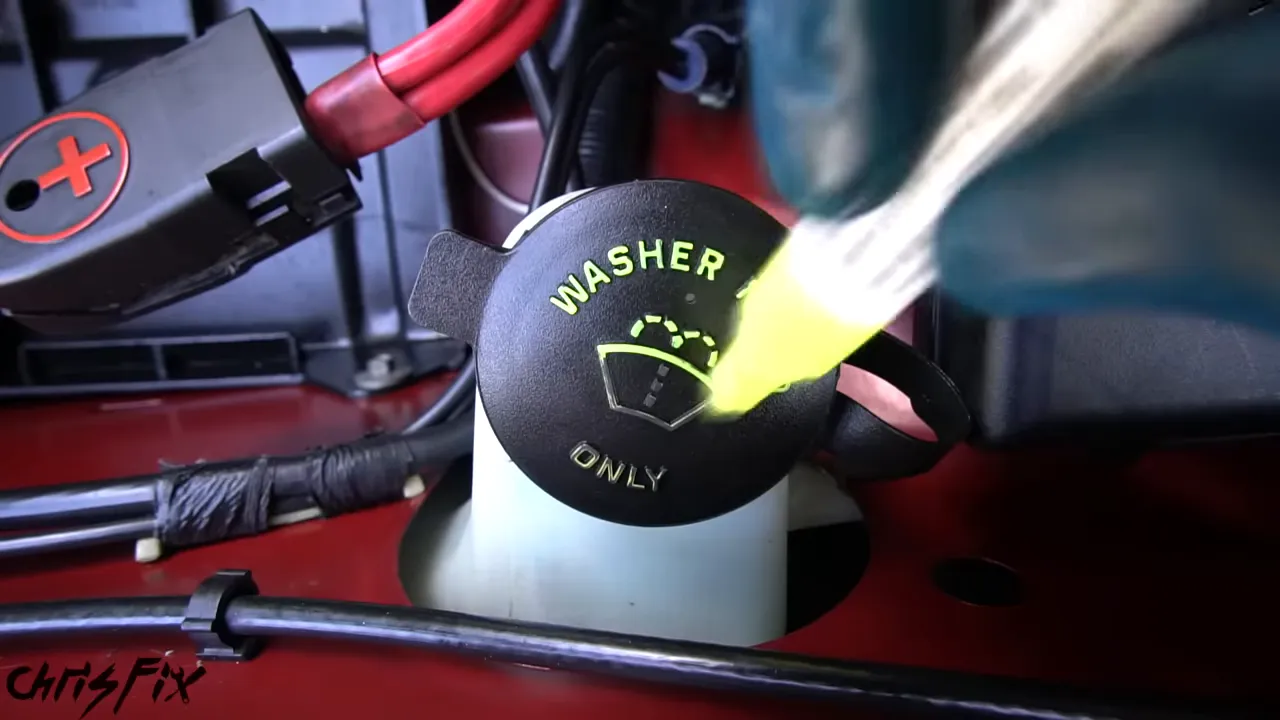
It takes only a little time, but that attention to detail makes a difference.
Reassemble and Make the Final Check
Reinstall anything removed for access, including the cleaned intake assembly, its hoses, electrical connectors, and clamps. Refit the hood insulation once its treatment is fully dry and ready for service.
Before reconnecting the battery, check that:
- All protective bags, towels, and tools are removed.
- No standing water remains around ignition components or electrical connections.
- Every disconnected hose and connector is back in place.
- The intake assembly is secure.
- Fluid caps and dipsticks are properly seated.
- The belt and pulleys are free of detailing product.
- The battery is correctly secured and ready to reconnect according to the vehicle's procedure.
Once everything is reassembled and dry, start the engine and check for normal operation and warning lights. The Mustang started normally after the cleaning, with no check-engine light.
That is the complete engine bay super clean: remove loose dirt first, control where the water goes, hand-clean the sensitive areas, dry thoroughly, and finish with the right products. Take your time, enjoy the little details, and you can turn a tired-looking engine compartment into something you are proud to open the hood on.


