Caked-on brake dust, black tar spots, brown tire sidewalls, and stains hiding inside the lug nut wells can make an otherwise clean car look neglected. The good news is that a regular garden hose, the right cleaners, and some attention to detail can make a huge difference.
For this deep clean, I started with daily-driver wheels that had gone more than two years and 20,000 miles without cleaning. That is not something I recommend! Leaving brake dust on a wheel that long can permanently damage the finish. Cleaning can remove contamination and staining, but it cannot bring back paint that has already corroded or disappeared.
The process comes down to five steps: rinse, clean, dry, remove stains, and protect. After that, a much simpler maintenance routine will keep you from having to start all over again.
What You'll Learn
- Rinse, deep clean, dry, remove stains, and protect for a complete wheel and tire detail.
- Use lubricated clay before compound, and distinguish removable contamination from permanently damaged paint.
- Apply tire dressing carefully to sidewalls and buff away excess to reduce sling.
- Maintain protected wheels regularly so brake dust does not develop into stubborn buildup.
Table of Contents
- Tools and Products You Will Need
- Step 1: Rinse the Wheels and Tires
- Step 2: Deep Clean the Wheel and Tire
- Step 3: Dry Everything Thoroughly
- Step 4: Remove Embedded Stains and Touch Up Damage
- Step 5: Protect the Tires and Wheels
- Finish the Wheel Wells Before Reinstalling
- Keep Your Wheels Clean Without Repeating the Whole Job
Tools and Products You Will Need
You do not need a pressure washer to get great results. It removes more buildup during the initial rinse, but a garden hose works fine for this job.
- Water: A garden hose with a spray nozzle, or a pressure washer used appropriately for the wheel and tire.
- Wheel cleaner: Choose one labeled safe for your particular wheel finish and any painted brake calipers it may contact. An iron-removing formula helps break down embedded brake dust.
- Soapy water: I used a little dish soap mixed with warm water to clean the tire sidewall.
- Bug and tar remover: For road tar that ordinary wheel cleaner leaves behind.
- Detailing brushes: Several sizes of soft brushes for the wheel, plus a stiffer nylon brush for the tire.
- Microfiber towels: Clean, older towels for dirty wheel work, and a fresh towel for the final protective coating.
- Clay bar and lubricant: Start with the least aggressive clay suitable for the job.
- Compound: For stubborn staining on a compatible glossy painted finish.
- Protection: A ceramic detailing spray for the wheel and an appropriate tire dressing for the sidewall.
- Safety equipment: Safety glasses, gloves, and, if removing the wheel, wheel chocks, a suitable jack, jack stands, sockets, and a torque wrench.
A small rotary tool with a wool buffing attachment and a wheel touch-up paint pen are optional. They help with heavily stained lug nut recesses and small areas of missing paint, but not every wheel will need them.
A good detailing brush set is especially useful. A towel cannot reach every corner around a valve stem or between closely spaced spokes. Different brush sizes let you clean those areas without forcing a large brush into a small opening.
Check product compatibility before you begin. A cleaner that works on one wheel finish may stain another. The clay and compounding work below is demonstrated on glossy painted wheels, so do not assume the same correction methods suit matte finishes, damaged coatings, or every type of bare metal.
Step 1: Rinse the Wheels and Tires
Start by thoroughly rinsing the wheel and tire. With a garden hose, use the strongest suitable spray setting to wash away loose dirt, grit, and brake dust.
The goal is not to make the wheel look clean yet. You are removing loose material so the cleaner has less work to do, and wetting the brake dust helps keep it from becoming airborne while you work.
A pressure washer can knock off considerably more of the caked-on buildup. That is helpful, but it is not essential. The cleaner and brushes will handle what the hose leaves behind.
Step 2: Deep Clean the Wheel and Tire
Remove the wheel for full access
For a true deep clean, I remove the wheel so I can reach the inside barrel and the backs of the spokes. Those areas collect a tremendous amount of brake dust and are difficult to clean thoroughly with the wheel installed.
Never rely on a hydraulic jack alone to support the vehicle. Work on a firm, level surface, secure the vehicle against rolling, and follow the vehicle manufacturer's lifting and support instructions.
- Chock the wheels that remain on the ground.
- Lift the vehicle at its specified jacking point.
- Position a properly rated jack stand at an approved support point and carefully lower the vehicle onto it.
- I leave the jack lightly touching the lifting point as an additional backup, not as a substitute for the stand.
- Check that the vehicle is stable before removing the wheel.
To help avoid scratching the wheel around the lug nuts, I use sockets with protective plastic sleeves. An ordinary metal socket can chip the paint if it knocks against the recess.
Once the wheel is off, remove the center cap if its design allows it. On this wheel, it pushes out from behind. That opens up another area that usually traps dirt.
Clean the face, rim edge, and valve stem
Spray the wheel cleaner over the face of the wheel. With an iron-removing cleaner, a purple reaction shows it reacting with iron contamination. On a wheel with this much brake dust, that reaction is very noticeable.
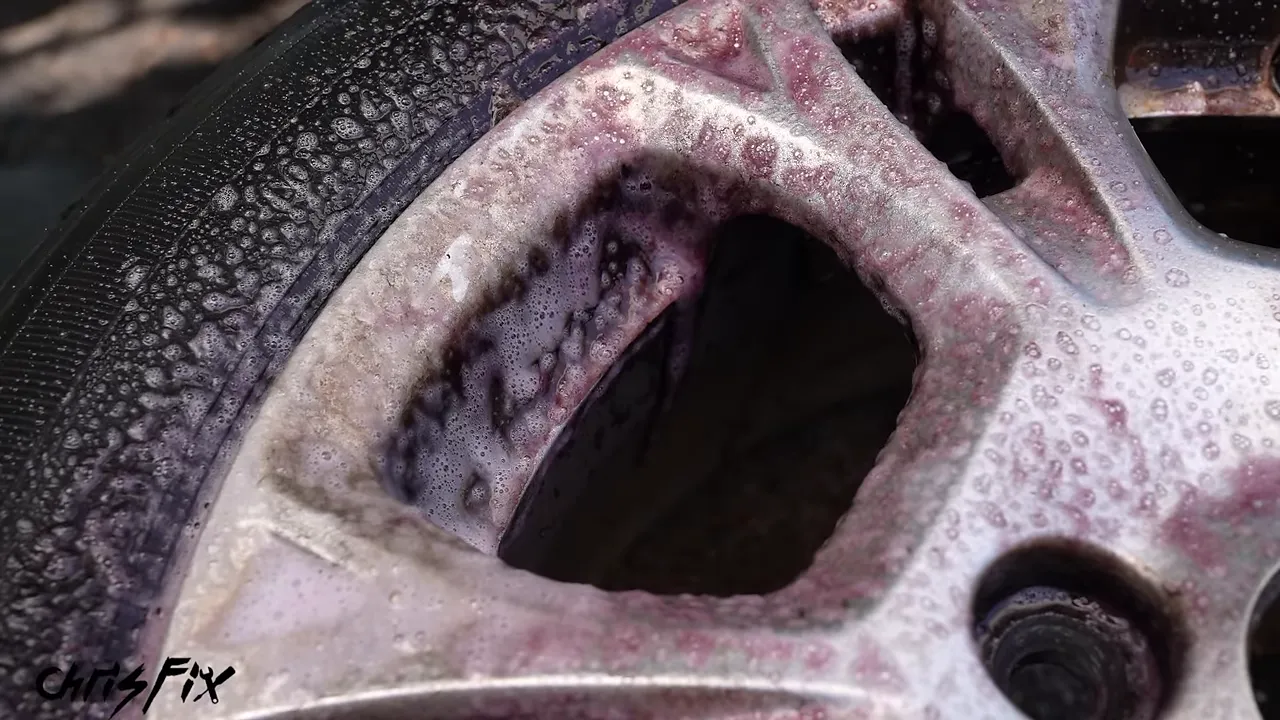
Spray some cleaner into the detailing brush, too, so you are working with lubricated bristles. Then brush the entire wheel, starting around the center and working outward.
Pay particular attention to these easy-to-miss areas:
- The narrow gap between the rim and tire: Brake dust packs into this edge and can damage the finish over time.
- Around the valve stem: Use a smaller brush to reach behind and around it.
- Between the spokes: Switch brush sizes rather than struggling with one that does not fit.
- Inside the lug nut wells: Brush deep into each recess, not just around its opening.
- The center cap opening: A small brush or toothbrush can reach the inner edge.
Use the larger brush on broad surfaces and the smaller brush in tight corners. Choose brushes with soft bristles and no exposed metal that could strike the paint.
Do not let wheel cleaner dry on the surface. Follow its dwell-time instructions and rinse promptly after agitation. If necessary, work in smaller sections so you can rinse before the cleaner dries and leaves staining.
At this point, most of the loose and caked-on brake dust should be gone. Any remaining discoloration gets addressed during the stain-removal step, so do not keep scrubbing indefinitely trying to remove a stain with ordinary washing.
Clean the lug nuts separately
Dirty lug nuts stand out against a freshly cleaned wheel. Brush their exterior surfaces with wheel cleaner, work around each side, and rinse thoroughly.
This is a small detail, but the difference between a brown, dull lug nut and a clean, shiny one is obvious once everything goes back together.
Scrub the tire sidewall
Do not apply tire dressing over a dirty sidewall. Proper cleaning gives the dressing a clean surface to adhere to, which helps it last and reduces the chance of it flinging onto the car.
That brown tint on a tire is not always just dirt. Tires contain protective antiozonants that migrate toward the surface as the rubber moves and flexes. This process, called blooming, can contribute to the brown appearance.
For this cosmetic deep clean, I clean the exposed sidewall and follow with a protective dressing. I leave the hidden inner sidewall alone rather than scrubbing it just for appearance.
- Spray the outer sidewall with soapy water.
- Use a soft brush to spread it over the entire surface.
- Let it soak for about a minute without allowing it to dry.
- Scrub with a stiffer nylon tire brush, working into the molded lettering, grooves, and texture.
- Rinse thoroughly.
The white suds will often turn brown as dirt and surface residue lift away. The stiffer brush is useful here because a tire sidewall is not smooth. All those little patterns trap material that a soft brush can leave behind.
A dressing is a finishing product, not a repair for cracked or aged rubber. For broader inspection and maintenance guidance, the NHTSA tire safety guide is a useful reference.
Clean the barrel and backs of the spokes
Flip the wheel over carefully, protecting the freshly cleaned face from abrasive contact. Spray the barrel and backs of the spokes with wheel cleaner, agitate with your brushes, and rinse.
This is where years of neglected brake dust really show up. On my wheel, cleaning exposed corrosion and damaged finish behind the spokes. That is an important distinction: a clean surface can still be a damaged surface. More cleaner will not replace missing paint.
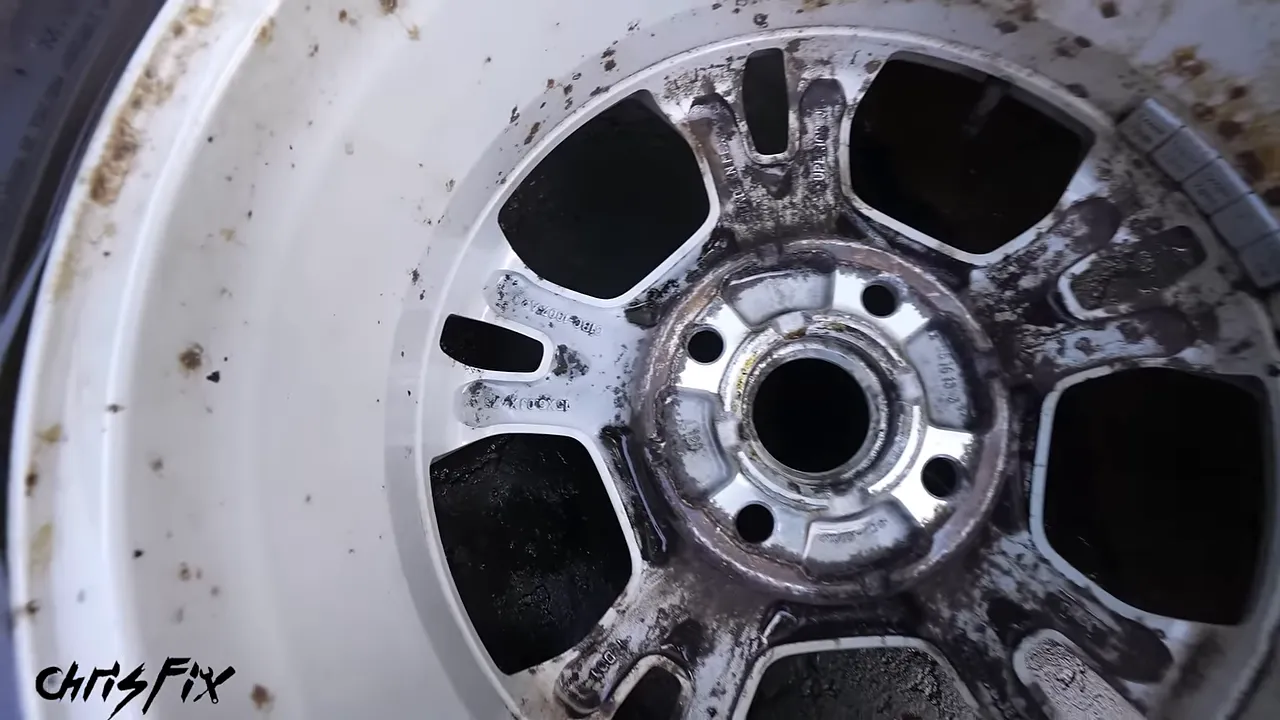
Remove road tar from the barrel
Once the brake dust is gone, inspect the barrel for larger tar patches and tiny black specks. These often need a dedicated bug and tar remover.
Apply the remover as directed, work it into the spots with a finish-safe brush, and use a microfiber towel to lift away the softened tar. Rinse as instructed. Take your time with stubborn patches rather than scraping them with something that could damage the coating.
For especially stubborn spots, gentle warming can help soften the tar. I used a heat gun, but this requires care: do not heat solvent-wet surfaces or work near flammable vapors. Follow the remover's safety instructions, and only consider warming a clean, dry area before applying more product. Keep the wheel merely warm, never hot, to avoid damaging the paint.
One larger patch on my wheel turned out to have bare metal underneath. I suspected an old brake-fluid spill might have damaged the paint, but the cause was not certain. Either way, once the paint is gone, that is a finish repair rather than a cleaning problem.
After cleaning the back, give the wheel face a final rinse to remove any residue that ran around to the front.
Step 3: Dry Everything Thoroughly
Dry the wheel with a clean microfiber towel instead of letting water evaporate on its own. Water spots and leftover chemical residue can spoil the clean finish you just worked to achieve.
Wipe the face, spoke edges, rim lip, lug nut recesses, and center opening. Then turn the wheel over and dry the barrel and backs of the spokes. Dry the tire sidewall before dressing it, too.
This is also a useful inspection pass. A small amount of loosened residue may wipe away with the towel, while stubborn spots become easier to identify on the dry surface. If you find grit or substantial dirt, clean that area again rather than dragging it across the paint.
Use clean, older towels for this work and save your best paint-care towels for the body of the car. Older does not mean dirty or gritty.
Step 4: Remove Embedded Stains and Touch Up Damage
Start with the least aggressive clay bar
If the wheel looks clean but still has dark embedded specks or staining, start with clay before moving to compound. Clay pulls bonded contamination from the surface and traps it in the clay itself.
You only need a small piece. Pinch some off, flatten it, and lubricate the area generously.
Never rub clay over dry paint. A detailing spray supplied with a clay kit is a straightforward lubricant choice. I used wheel cleaner for this demonstration, but only use that combination if the cleaner and clay instructions allow it, and do not let it dry.
- Lubricate the stained area.
- Move the clay back and forth with controlled pressure.
- Wipe the area clean with a microfiber towel and inspect the result.
- Fold and knead the clay to expose a clean face before moving to the next spot.
The black specks that appear in the clay are the contamination you just removed. Kneading matters because you do not want to keep rubbing that dirty surface against the wheel.
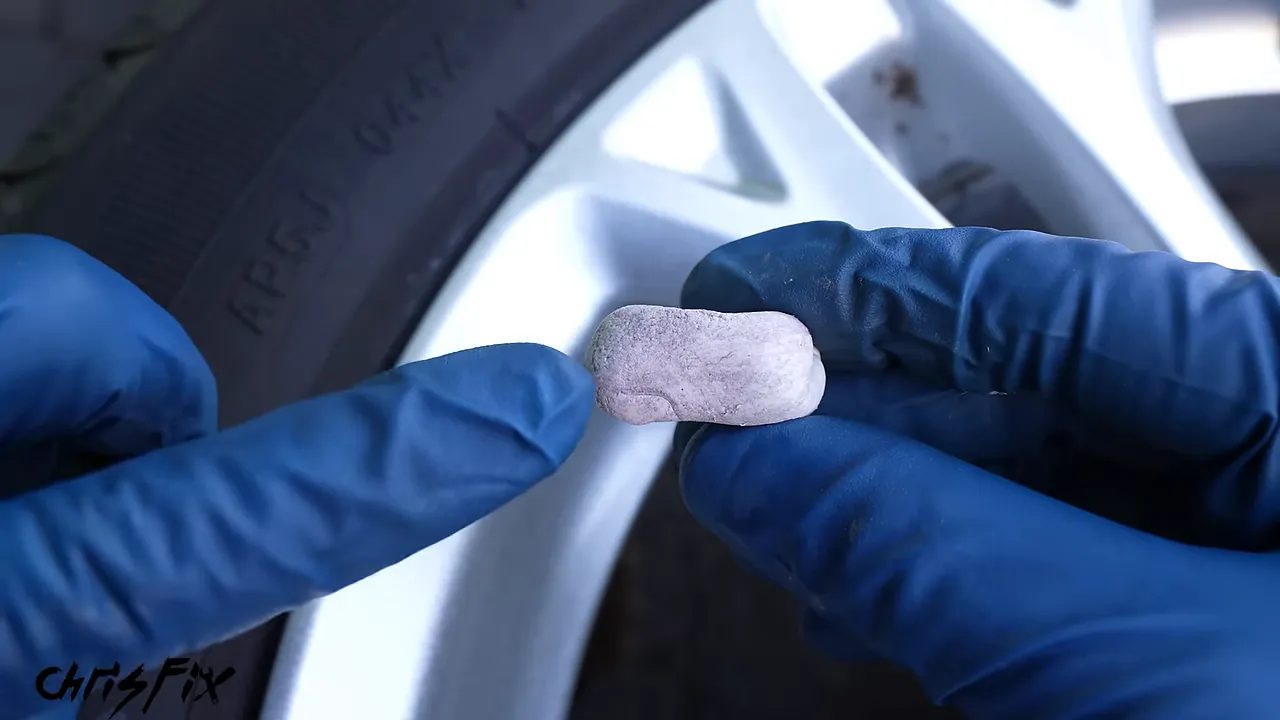
Small pieces of clay also fit into narrow areas around the spokes. On this wheel, claying removed the remaining contamination from the face, but the lug nut wells still needed more work.
Compound stubborn lug nut well stains
Heavily stained lug nut recesses can take a long time to polish by hand. A small rotary tool with a wool buffing wheel speeds up the job, but it also makes it easier to damage the finish if you get aggressive.
Fit the correct buffing attachment securely, apply a small amount of compound inside the recess, and start at low speed. Work carefully along the stained painted walls of the well.
Keep the speed conservative and avoid heat buildup. Taking a little longer is much better than burning through the paint. Keep the metal shaft away from the wheel finish.
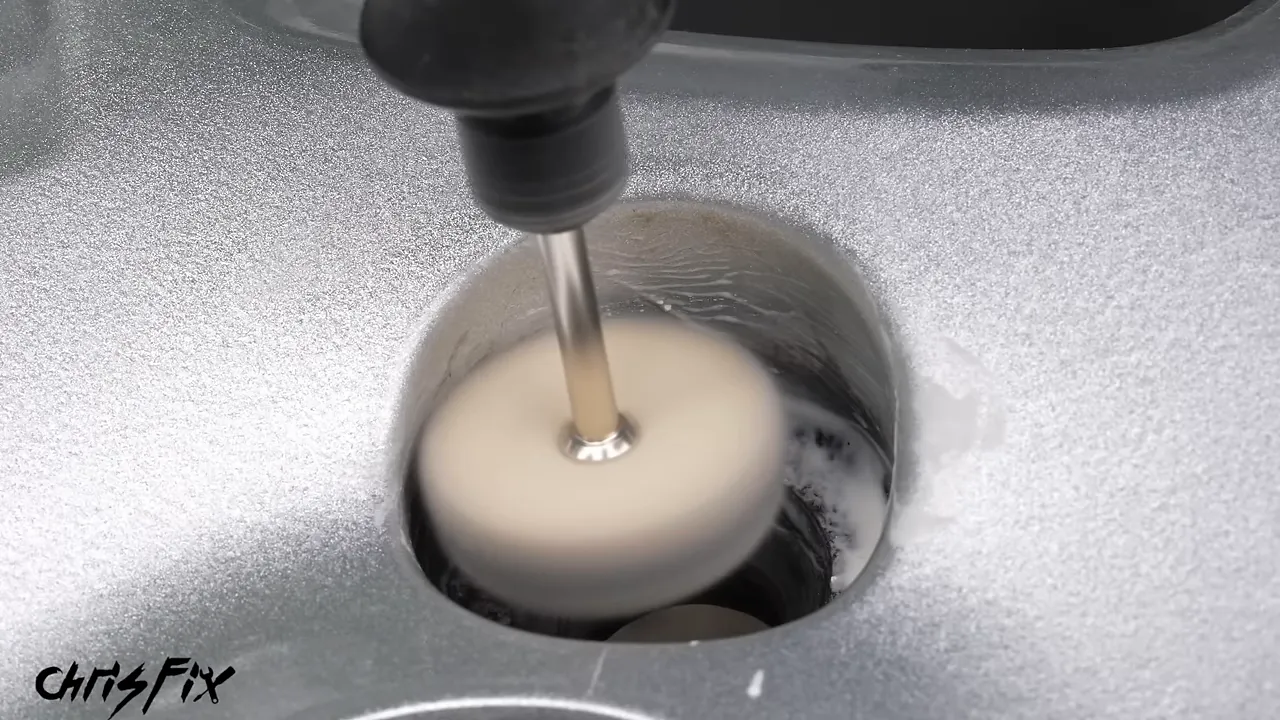
Wipe away the residue and inspect before doing more. Repeat only where needed. The improvement can be dramatic, but the process also reveals whether any dark areas are actually corrosion or missing paint rather than removable stains.
Touch up small areas of missing paint
After compounding, I still had damaged paint near the bases of the lug nut wells. A wheel touch-up paint pen made those areas much less noticeable.
Clean the damaged painted area as directed by the paint manufacturer. I used alcohol to remove residue, then carefully applied a matching silver touch-up paint. Keep paint off the lug nut seating surfaces, threads, and wheel mounting surfaces.
The light silver I used was not an exact vehicle-specific match, but its color and metallic flake blended well with the surrounding finish. Touch-up paint is not the same as professional refinishing, yet it can make small chips nearly disappear from a few feet away.
Allow the paint to dry and cure according to its instructions before further cleaning or coating.
Optional: compound the glossy wheel finish
If your wheel has a compatible glossy painted finish, you can work a little compound over the face with a microfiber towel to improve the gloss.
Use controlled, moderate pressure, then turn the towel to a clean side and wipe off the residue. Inspect the spoke edges and face for small chips while you work, and touch them up separately if needed.
The barrel can benefit from the same treatment. Compounding removed remaining discoloration on mine and brought back a cleaner, deeper shine. Small touch-ups inside the barrel also made exposed chips less obvious.
Do not compound fresh touch-up paint, and do not use this gloss-enhancing step on a matte finish. The goal is to improve an intact finish, not polish away damage that needs refinishing.
Step 5: Protect the Tires and Wheels
Apply tire dressing safely
A clean tire looks better, but dressing gives the sidewall a more even finish. I prefer a gel because it is easier to place accurately than a spray. There is less chance of overspray landing on the wheel, driveway, or brake components.
Keep tire dressing off the tread, tire shoulders, and all braking surfaces. It is slippery. Do not use it on motorcycle tires or tires being prepared for track use, where product reaching a grip surface is particularly hazardous. If a brake friction surface becomes contaminated, address it properly before driving rather than assuming a quick wipe makes it safe.
For a road-car sidewall, use a foam applicator or a microfiber towel folded to roughly the width of the sidewall.
- Spread gel across the applicator and work it into the material so it applies evenly.
- Wipe around the outer sidewall, working product into its texture.
- Use a small detailing brush to reach the narrow rubber edge beside the rim.
- Check for missed areas and even out the coverage.
- Let the product sit for the time directed, then buff off excess.
That last step matters. Thick patches of dressing can sling off as the wheel spins. Even a glossy finish should not have puddles of product sitting on it.
Choose a matte, glossy, or in-between finish
You can adjust the appearance by how much excess product you remove:
- Wet, glossy look: Lightly buff to remove buildup while retaining more shine.
- Lower-gloss or matte look: Buff more thoroughly to remove more surface gloss.
- Subtle new-tire look: Aim between those two extremes.
I prefer a slight gloss. It looks clean and cared for without looking soaking wet.
Protect the wheel with ceramic detailing spray
With the tire finished, prepare the wheel for its protective layer. I wipe the compatible, fully cured wheel finish with alcohol to remove compound residue and any accidental tire-dressing smears. Use a preparation method approved for your finish and coating.
After the preparation product evaporates, spray the ceramic detailer onto a clean microfiber towel. Work it over the face, around the spokes, and into the small recesses. Avoid touching the dressed tire with that towel, or you will transfer dressing back onto the wheel.
Repeat the preparation and application on the barrel. Follow the detailer's directions for buffing and curing.
This coating does not stop brake dust from collecting. Its job is to help protect the surface and make the next cleanup easier, so contamination is less likely to bond as stubbornly.
Replace a damaged center cap
My original center cap had a bubbling finish. No amount of cleaning was going to flatten that coating again, so I replaced it.
Line up the replacement, snap it into place, and remove any protective film. A fresh center cap is a small detail, but it makes sense when the rest of the wheel now looks so much better.
Finish the Wheel Wells Before Reinstalling
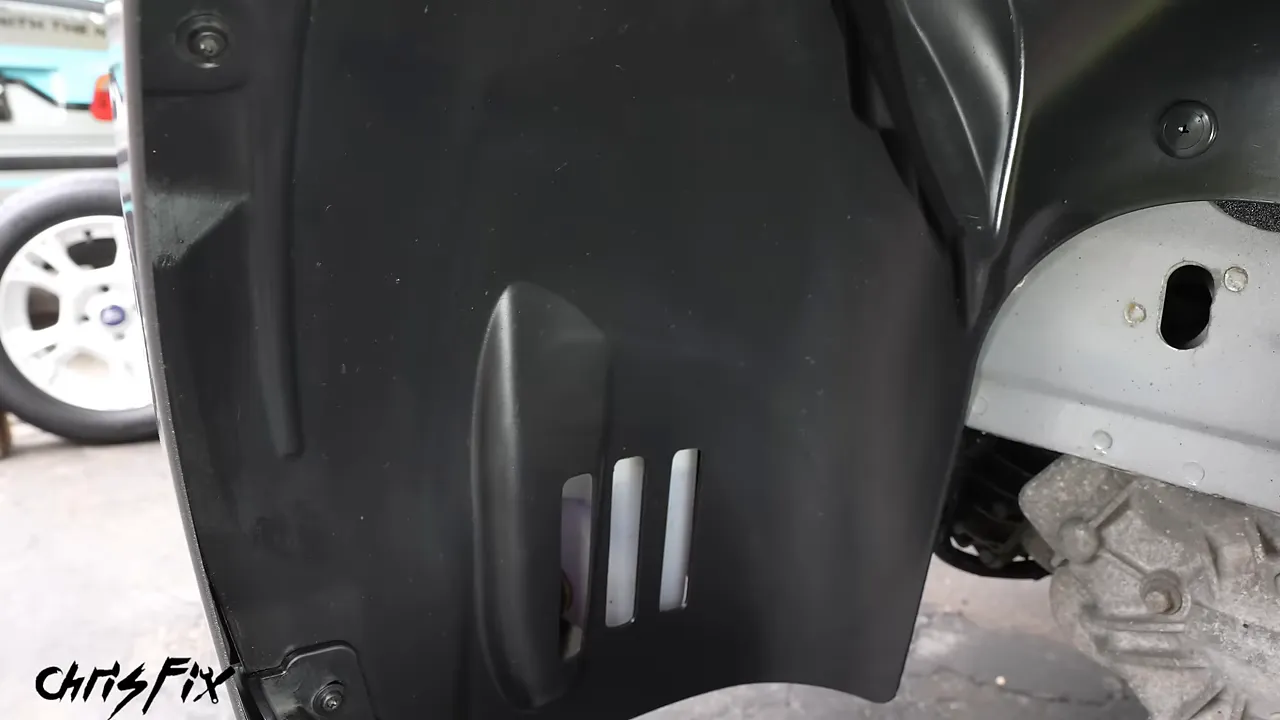
A sparkling wheel next to a dirty wheel well still looks unfinished. With the wheel already off, cleaning the plastic liner is quick.
- Rinse loose dirt from the plastic liner.
- Spray with soapy water.
- Agitate with a brush.
- Rinse thoroughly and towel-dry.
- Apply a compatible ceramic plastic restorer to the liner as directed.
The restorer brings back a darker plastic appearance and adds a water-repellent layer that helps with future cleanup. Apply it carefully and keep it away from brakes and tire grip surfaces.
I also went further on this car: I cleaned and sanded rusty suspension components, painted them black, refinished the caliper in red, and installed new brakes. Those are separate jobs, not required wheel-cleaning steps. If you tackle them, use suitable products and procedures, and protect all friction surfaces, mounting surfaces, rubber parts, and moving components from paint.
The red caliper looks great behind the silver wheel. Extra horsepower from red paint, though? That part is definitely a joke.
Reinstall and torque the wheel
Reinstall the wheel and start the lug nuts correctly by hand. Tighten in a crisscross pattern, using a torque wrench and the manufacturer's specified torque and procedure.
Safely raise the vehicle enough to remove the stand, then lower it as directed for your vehicle's wheel installation procedure. Complete any final torque checks before driving.
Keep Your Wheels Clean Without Repeating the Whole Job
The best part of a super clean is that you should not need to do this much work every time. Stay ahead of the buildup, and routine cleaning becomes much easier.
How often depends on your mileage and how quickly your brakes coat the wheels with dust. About once a month is a reasonable starting point for the routine shown here, with the interval adjusted to your car.
- Rinse the wheel and tire.
- Apply a compatible wheel cleaner.
- Use detailing brushes around the valve stem, spoke corners, and other tight areas.
- Reach through the spokes with a wheel barrel brush to clean inside without removing the wheel.
- Rinse, dry, and refresh protection according to the product instructions.
There is no need to automatically clay, compound, or touch up the wheels during every wash. Those are correction steps for contamination or damage that ordinary cleaning cannot address.
Start with a thorough clean, protect the finish, and do not let brake dust build up for years. The valve stem, lug nut wells, barrel, center cap, and tire edge are all small details, but together they make the difference between a wheel that is merely washed and one that looks genuinely super clean.


