A rolling toolbox might look like a simple metal cabinet, but there is a lot going on behind those drawers. Massive steel coils have to be cut, stamped, bent, welded, cleaned, painted, and assembled before that box is ready to hold your tools.
With my own house and garage finally becoming a reality, tool storage was the next piece of my dream garage setup. The dirty concrete floors had already been transformed with epoxy, and a two-post lift was installed for maintenance and repairs. I still love working with hand tools, a jack, and jack stands in the driveway, but having a dedicated place for everything is something I have always wanted.
My first toolbox was a Craftsman my parents gave me as a kid, and I still have it. So getting to visit Craftsman’s factory in Sedalia, Missouri, and help make a new box was pretty special. Craftsman supported this project and gave me access to the factory and the people who make these toolboxes every day.
Table of Contents
- Inside the Craftsman Toolbox Factory
- 1. Delivering and Slitting the Raw Steel
- 2. Stamping the Drawer Blanks
- 3. Roll Forming the Drawer Fronts
- 4. Bending Flat Blanks Into Drawer Bodies
- 5. Spot-Welding the Drawers Together
- 6. Building the Main Toolbox Cabinet
- 7. Cleaning and E-Coating the Toolbox
- 8. Final Assembly, Inspection, and Packaging
- From the Factory Floor to My Garage
Inside the Craftsman Toolbox Factory
The Sedalia facility covers 475,000 square feet. It started operating in 1978 and had produced more than 30 million toolboxes by the time of my visit.
The box we are following is a 52-inch, 10-drawer rolling toolbox, one of Craftsman’s bestselling models at the time. I chose it because it combines competitive pricing with manufacturing right here in the USA, using global components. That last part matters: the country-of-origin claim includes global materials, not that every component comes from the United States.
Before getting into the machinery, here is the basic construction of a drawer:
- Cut and stamp steel into a flat blank.
- Bend the blank to form the bottom and sides.
- Make separate front and rear pieces.
- Spot-weld those pieces into one drawer.
- Clean, coat, and cure the drawer.
- Install it into the finished cabinet on drawer slides.
The cabinet follows a similar path, but with its own reinforcing features, welding equipment, and hardware. Everything starts with the steel.
1. Delivering and Slitting the Raw Steel
The slitter bay holds hundreds of master coils waiting to become tool storage. During my visit, the factory was receiving about 15 truck deliveries a day, with two coils on each truck.
The shipment we followed contained American steel from Arkansas. Each master coil weighed approximately 24,000 pounds, about the weight of six passenger cars. A worker uses a wireless remote to operate a 20-ton overhead crane, lifting the coils off the trailer and moving them into position.
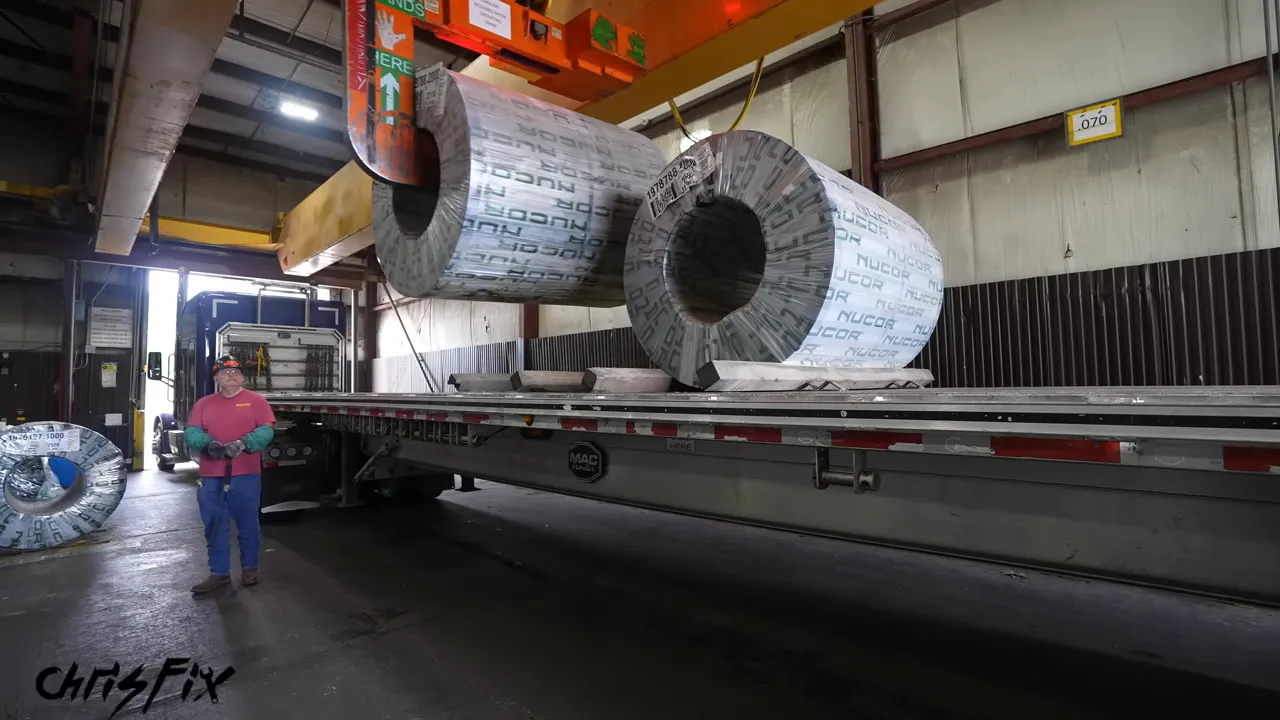
After the packaging and steel banding are removed, the coil feeds into the slitting machine. The name explains the job: it slits the wide steel strip into narrower widths needed for individual toolbox parts.
Before running the whole coil, a worker checks the strip widths with large calipers. Once the measurements are correct, the cut ends feed onto a drum that winds them into smaller coils.
At full speed, the steel travels at approximately 1,200 feet per minute, or 20 feet every second. A master coil contains about 7,000 feet of steel, so the machine can slit the entire length in just under six minutes.
The slitter also trims the outer edges to make them straight and true. Those edge strips wind onto a separate drum for recycling rather than being discarded.
Tracking the Scrap
Once the narrower coils are finished, workers band and tape them so they cannot unwind. A trolley carries them to the weighing station, where a forklift places each coil on a scale.
Weighing the usable steel helps the factory account for how much material was removed as scrap. That is worth tracking when the facility recycles roughly 7.2 million pounds of steel each year.
2. Stamping the Drawer Blanks
The next machine turns a continuous strip of steel into individual drawer blanks.
A coil is loaded onto a drum, and the leading end passes through a series of straightening rollers. These remove the bends and waves left from being wound into a coil. The flattened strip then feeds into the press.
With every stroke, the press applies more than 200 tons of force to punch holes, create perimeter cutouts, and cut the steel into sheets. Those openings and notches are not random. They are features needed during later forming and assembly operations.
One of these coils produces about 1,500 blanks, with each blank becoming one drawer. Running the full coil through the press takes approximately an hour.
The collection hopper fills much sooner than that. About 15 minutes into the run, production pauses so the hopper can be lifted away from the stacked blanks. The stack moves aside, the hopper goes onto a fresh pallet, and stamping resumes.
Checking Dimensions Before Making More Parts
A sample blank goes to quality control before the batch is released for the next operation.
The worker places it on the glass bed of a dimensional analysis machine and adds weights to hold it completely flat. A laser checks the overall dimensions and the positions of the stamped features against the required tolerances.
For this sample, the inspection display showed green results, meaning the checked features were within specification. Once approved, the stack is wrapped and moved into storage until the other drawer components are ready.
3. Roll Forming the Drawer Fronts
The drawer front starts as a narrower coil of steel. Like the drawer blank material, it first passes through rollers that flatten it.
A small press stamps features along both edges. After that, the steel enters a roll-forming machine, where a series of rollers gradually changes its shape.
Instead of making one sharp bend all at once, each roller adds a little more shape. By the end of the machine, the upper edge has become the handle profile used to pull the drawer open, and the lower edge has a finished curve.
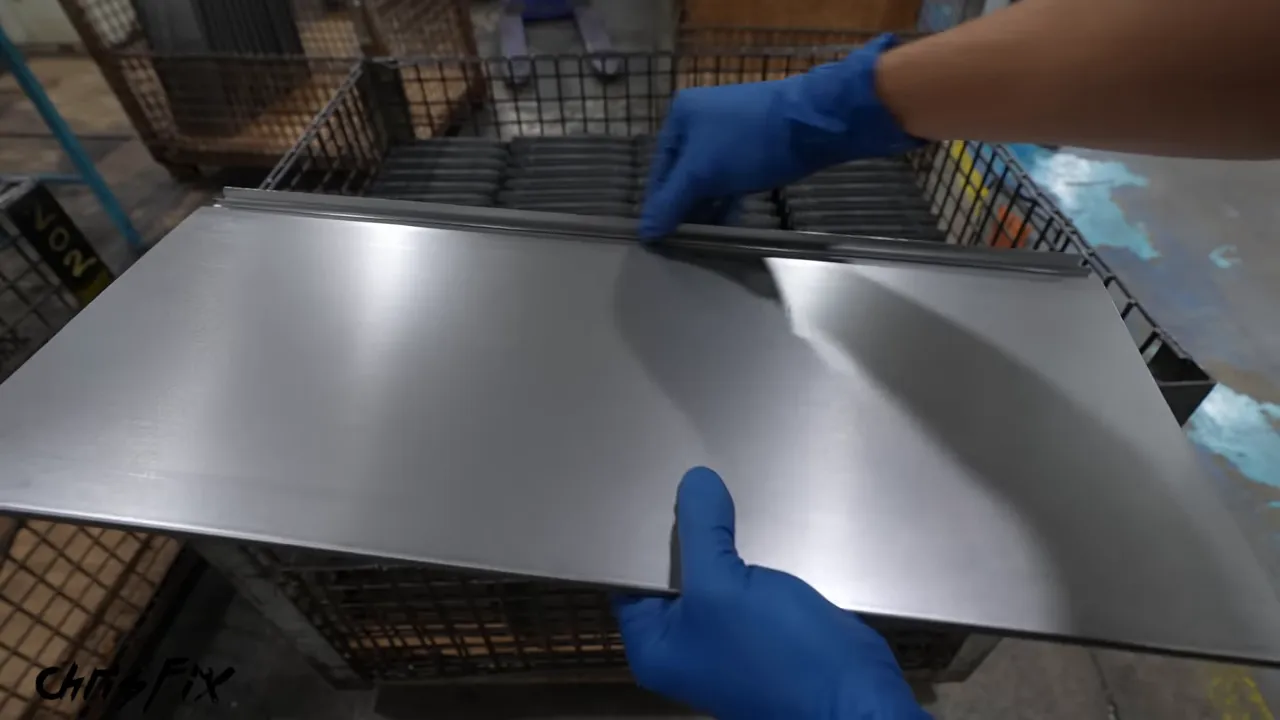
The cutting operation is especially cool. The cutter moves along with the steel, allowing the line to keep running rather than stopping for every cut.
A red laser detects the stamped edge feature. The cutting mechanism locates that feature, matches the moving strip’s speed, and cuts the front to length. The finished pieces travel down a conveyor, where a worker carefully collects and stacks them to prevent damage.
4. Bending Flat Blanks Into Drawer Bodies
Now the stamped blanks return to the production line.
A vacuum lifting system picks up one sheet at a time and places it on a conveyor. The sheet travels into a bending brake, which clamps it firmly so it cannot shift during forming.
The first operation creates a small 90-degree lip along the edge. A clamping bar holds the sheet while the bending leaf swings upward to form the metal.
Next, the blank enters a second brake. Two clamping bars hold it in place, and two bending leaves fold the opposite sides upward. Just like that, the flat sheet starts looking like a drawer.
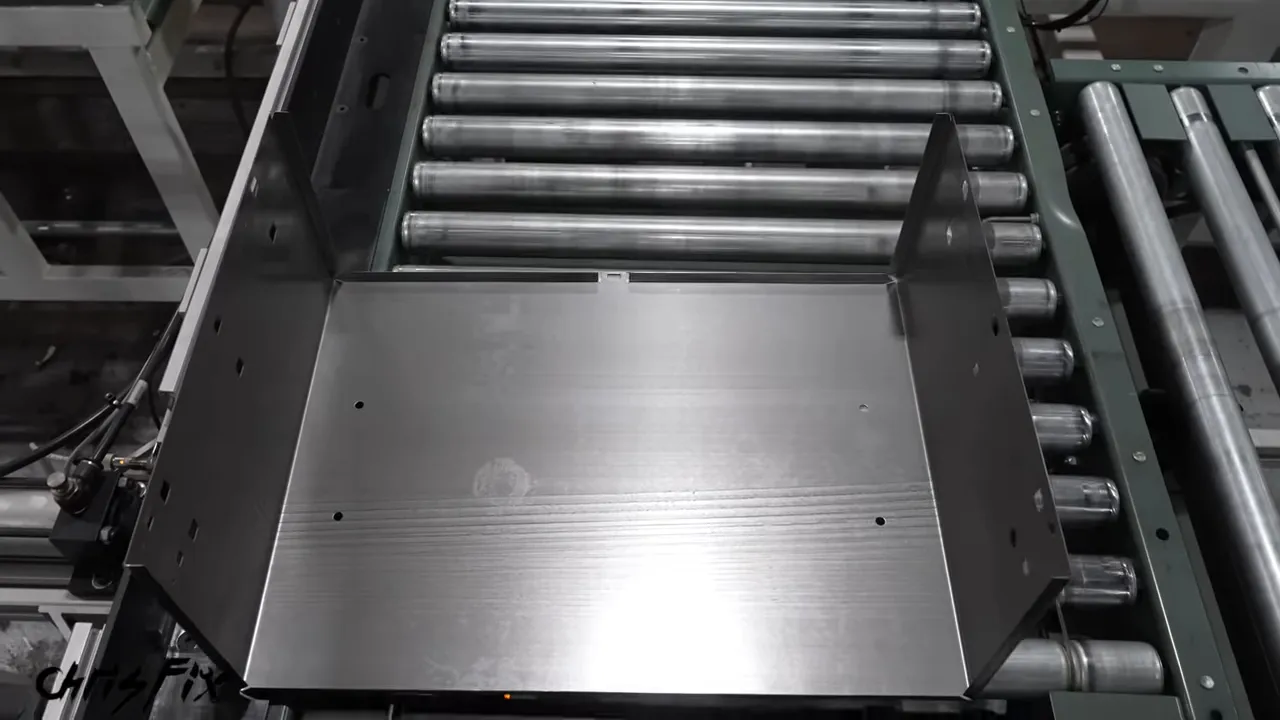
The front and rear are still missing, but the bottom and both sides now come from one formed piece of steel.
5. Spot-Welding the Drawers Together
A worker fits the separate rear panel and roll-formed front onto the drawer body. Then the assembly moves into the spot-welding machine.
The machine clamps the drawer, lowers eight welding arms, and makes 16 spot welds to attach the front and rear to the sides. Each weld receives more than 5,000 amps of current.
The bottom connections receive another 12 welds: six along the front and six along the rear. At that point, the separate components have become one complete drawer.
Before it heads to paint, a worker checks the welds visually and flexes the front and rear pieces to confirm that the joints are secure and there is no unwanted movement.
Approved drawers are neatly stacked and moved to the coating area. The combination of automated welding and a hands-on inspection is a theme throughout this factory: machines handle repeatable operations, while people fit parts, verify results, and keep the process moving.
6. Building the Main Toolbox Cabinet
Adding Strength to the Back Panel
The cabinet back begins as another flat, stamped steel sheet. Before assembly, it receives four reinforcing ridges.
Those ridges are important because they give the panel extra stiffness. The shape of the metal contributes to the strength of the finished box.
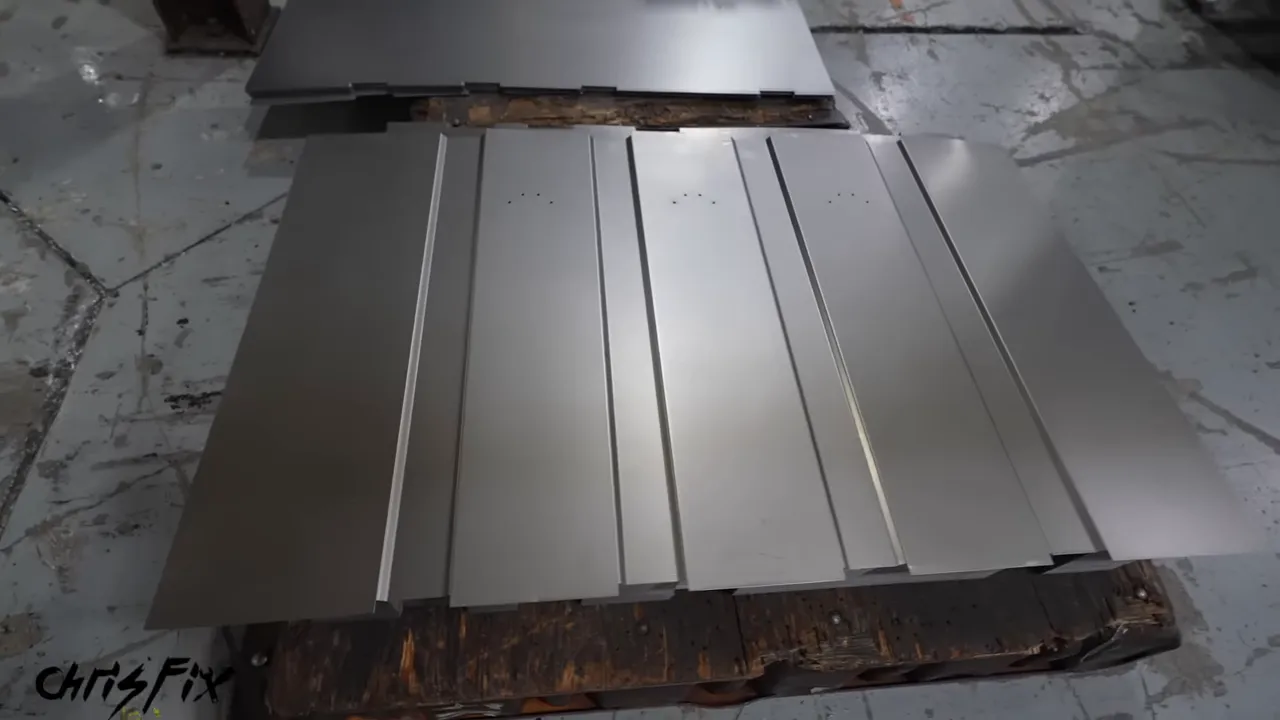
An industrial robot handles this operation. It picks up a sheet with vacuum cups and places it on an angled locating rack. Gravity slides the sheet into a corner, giving the robot a consistent reference position before it picks it up again.
The robot then positions the sheet precisely in the press for each of the four ridges. That repeatability makes this a good application for automation. It also creates skilled work around operating, maintaining, and programming the equipment.
Welding the Shell
A worker places the reinforced back panel into a fixture and fits the left and right sides. A spot welder capable of making 12 welds at once joins the sides to the back.
The fixture then flips the assembly over, and the cabinet shape becomes much easier to recognize.
Farther down the line, a worker fits the top between the sides and back, then adds a single handheld spot weld to keep it in place during the next operations. Other workers install the middle support brace and bottom panel.
The assembly then enters the squaring welder. This machine does two jobs:
- It clamps the cabinet so the sides, top, and bottom are square.
- It makes five separate spot welds at each corner to secure the structure.
Getting the cabinet square before permanently joining it is a critical part of building the box correctly.
Why Some Parts Use Rivets Instead of Welds
Not every connection is welded. The internal supports for the drawer slides are riveted because reaching those locations with welding equipment would be complicated and time-consuming.
Workers also rivet in the lock rods, which secure the drawers when the key is turned.
Finally, two long braces attach to the bottom where the caster wheels will mount. These braces help distribute the cabinet’s weight across the wheel mounting areas.
7. Cleaning and E-Coating the Toolbox
The bare cabinet and drawers are ready for paint, but the preparation comes first. And just like painting anything else, the prep is one of the most important parts.
Hanging the Parts Correctly
Workers suspend the cabinet from the red coating line and the drawers from the black coating line. Together, the factory’s overhead monorail system extends for just under two miles.
The drawers hang at specific angles and orientations. That is not just for convenience. When they enter the paint tank, air needs a path to escape so it does not remain trapped and prevent the coating from reaching the metal.
Seven Stages of Cleaning
The parts pass through a seven-stage cleaning process that takes about 15 minutes. Think of it as a giant dishwasher for tool storage.
Warm, high-pressure water and strong cleaners remove dirt, dust, oil, and even fingerprints that could contaminate the finish.
The final rinse uses reverse-osmosis, deionized water. This highly purified water helps avoid residue and water spots as the parts dry.
Next, a convection dryer operating at 325°F evaporates the remaining water in a matter of minutes. The clean, dry parts are now ready for coating.
How Electrophoretic Coating Works
The painting method is called electrophoretic coating, usually shortened to e-coating.
Instead of spraying paint onto the outside, the factory submerges the entire cabinet in a paint bath. In this system, the paint particles carry a positive charge, while the metal cabinet carries a negative charge. That electrical attraction deposits the coating onto the metal.
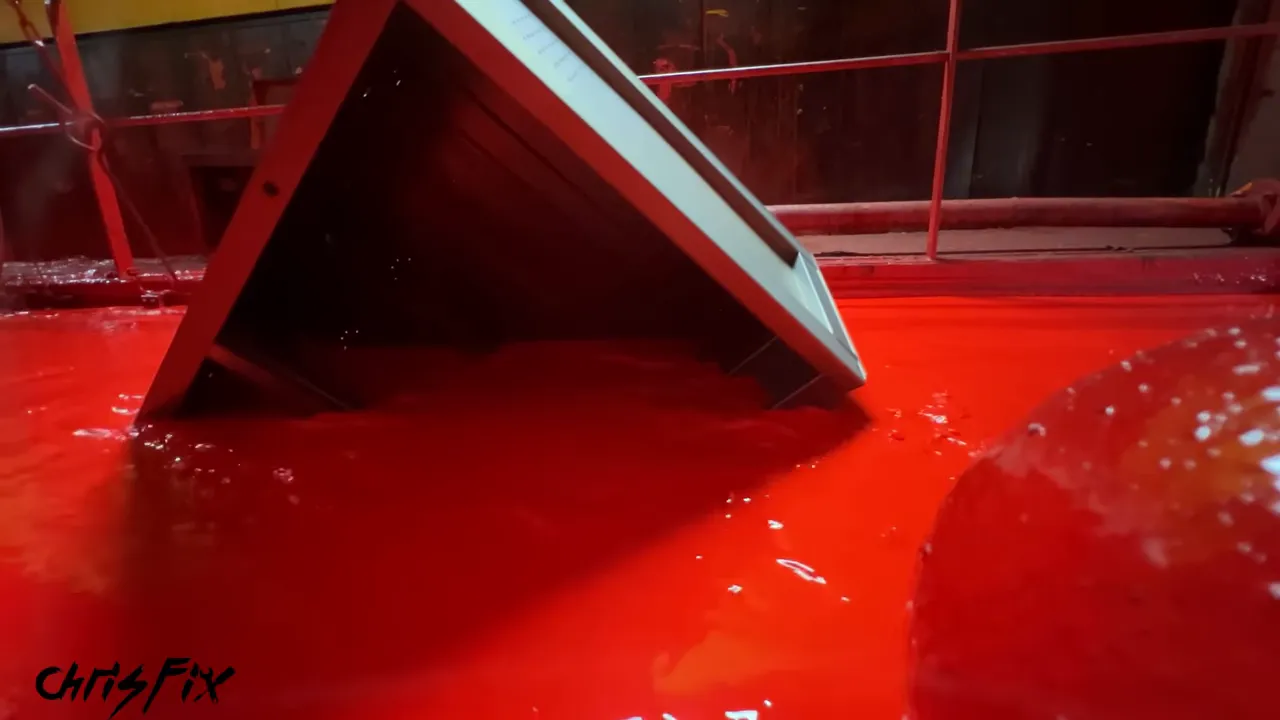
The red paint tank holds approximately 27,000 gallons. After traveling through it, the cabinet receives a filtered-water rinse to remove excess paint and help prevent drips or runs.
The drawers go through the same process in black paint.
There are several useful advantages to this approach:
- Efficient paint use: Paint that does not deposit onto a part remains in the bath for subsequent parts.
- Coverage in difficult areas: Immersion helps the coating reach tight corners and recessed areas that can be harder to cover by spraying.
- A durable finish: The coating provides chemical and chip resistance for everyday use.
For more background on the technology itself, the Electrocoat Association provides resources about electrocoating.
Curing the Finish
After coating and rinsing, the parts travel to an oven near the factory roof, set to 400°F.
About 15 minutes later, the paint is fully cured, and the cabinet and drawers arrive at final assembly. The transformation from bare steel to that red-and-black finish is pretty incredible.
8. Final Assembly, Inspection, and Packaging
Two workers add protective foam beneath the cabinet and carefully remove it from the monorail. Then the assembly line adds the hardware and finishing pieces.
Locks, Slides, and Handle Trim
First come the two locks, the Craftsman badge, and the safety label. I got to install the badge and safety sticker on the box that would eventually come home with me.
Next, workers install the drawer slides at the appropriate positions for the different drawer depths. Each slide receives a retaining rivet to keep it secured to the cabinet during use.
The country-of-origin label is added, identifying the box as made in the USA with global materials.
Meanwhile, another worker takes the painted drawers off the monorail and slides aluminum trim over the formed handles. An air hammer seats the trim into place.
The drawers are then installed from the top down. One worker handles the left side of the cabinet, and the next installs the right side. They make lining up drawers and slides look easy!
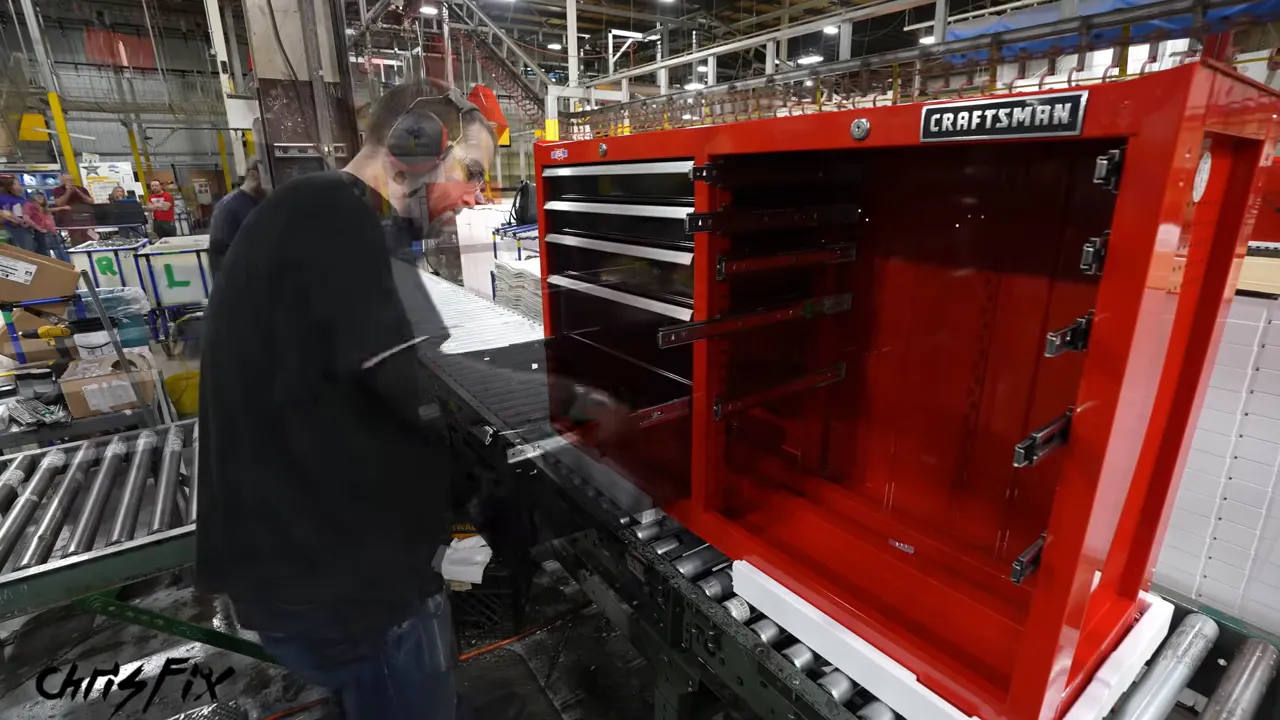
Once installed, the drawers are riveted to the ends of the slides so they cannot pop off during use.
What Gets Packed Inside
The bottom drawer becomes a convenient place to pack the remaining components:
- Drawer mats.
- A box of caster wheels.
- The cabinet’s side handle.
- A mat for the top of the toolbox.
Those parts are installed at home rather than arriving mounted on the cabinet.
The Final Quality Check
Before packaging, a worker looks over the cabinet for defects, checks the drawers and locks, and adjusts any handle trim that is not perfectly aligned.
The workers encouraged me to sign the box I helped assemble, so we could identify that exact one when it arrived.
A cardboard carton is lowered around the toolbox, and additional foam protects the top during shipping. The package passes through an automatic sealer that folds and glues the top and bottom flaps.
Finally, a forklift loads the packaged toolbox into a tractor-trailer. What entered the factory as coiled steel is now a finished product ready for delivery.
From the Factory Floor to My Garage
A few days later, that same toolbox arrived at my house, signature and all. Getting to unpack the actual cabinet I had followed from raw steel through forming, welding, painting, and assembly was something special.
It also became part of a larger storage setup, with cabinets, work surfaces, and rolling tool storage finally giving my tools a proper home. Even my original childhood toolbox fits right in.
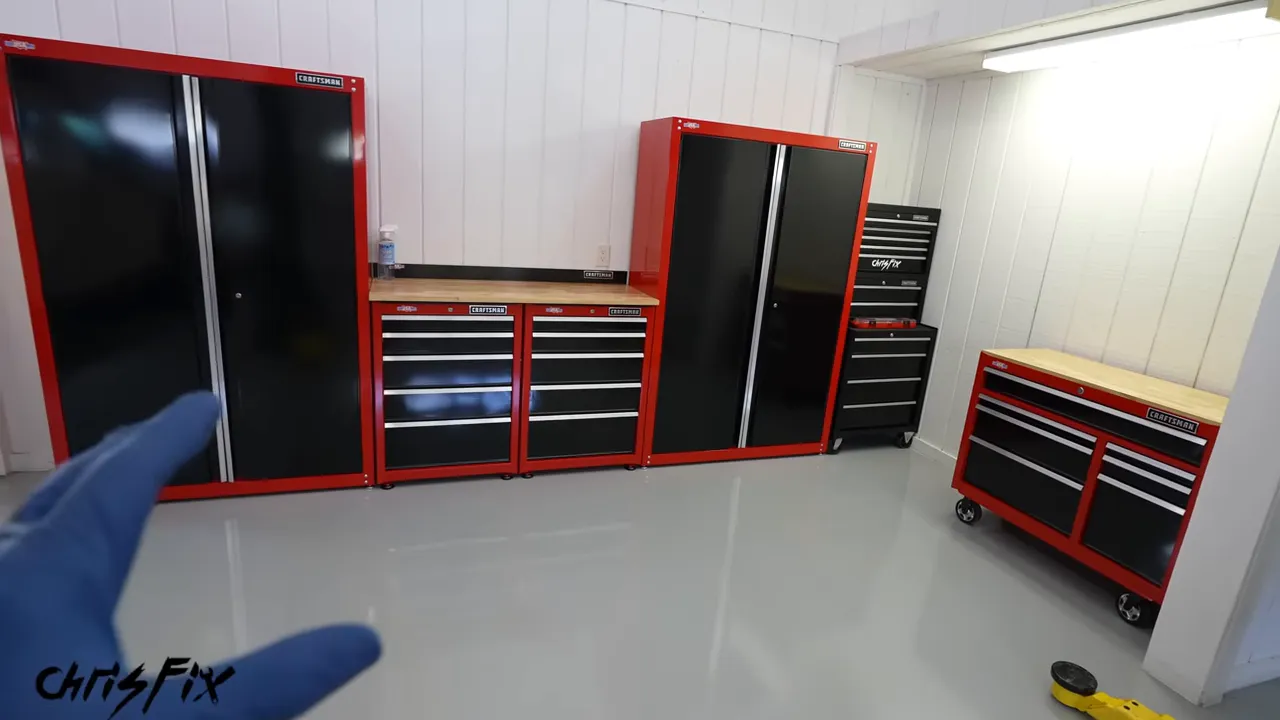
The biggest thing this process shows is how many details go into a toolbox that looks straightforward from the outside. Precisely located holes, formed reinforcing ridges, square welded corners, accessible riveted joints, clean metal, and properly cured paint all contribute to the finished product.
And behind every machine are people unloading steel, checking dimensions, fitting panels, inspecting welds, installing hardware, and making sure the finished box works. A huge thank-you to the Craftsman employees who made it possible to follow the entire process.
If you need a rolling toolbox, this is one worth considering, especially if supporting American manufacturing matters to you. Now you know exactly what goes into making it.
|


