The best gift for somebody who works on their own car is a tool that makes them think, Man, I wish I had this on my last repair. It might solve a tight-access problem, pull years of dirt out of a seat, or let them see inside an engine without taking it apart.
For my seventh annual Christmas gift list, I picked tools and gadgets I personally use and like. These selections aren't sponsored. The goal is to find useful, different gifts, including things that even a well-stocked toolbox might be missing.
There are five main gift groups, plus smaller stocking stuffers to go with them. And this year, I have something special for the youngest car enthusiasts, too. Prices and product details below reflect this 2022 selection.
Table of Contents
- A Bonus Gift for Kids: How to Change a Flat Tire
- 1. Ratcheting Flare Nut Wrenches and Extendable Ratchets
- 2. An Extractor Vacuum for Deep-Cleaning Car Interiors
- 3. Cordless Tire Inflators: Milwaukee M18, Milwaukee M12, and Ryobi 18V
- 4. A Knife and Tool Sharpener With Uses Beyond the Garage
- 5. A Borescope Camera for Looking Where Other Cameras Can't
- Pick the Gift That Solves Their Next Problem
A Bonus Gift for Kids: How to Change a Flat Tire
Before the tools, here's something I spent over a year working on: my children's book, How to Change a Flat Tire.
It's about more than changing a tire. The story teaches kids that helping somebody, staying positive, and using practical skills can make anyone a hero. I designed it for children around eight to ten years old and younger, with the goal of getting the next generation interested in cars and useful life skills.
For kids who aren't reading yet, there's a QR code that opens a read-aloud version with me reading the story and adding sound effects.
At launch, the book was $9.99. To be completely transparent, I make a little over a dollar per book and need to sell more than 4,000 copies just to break even. This project is about introducing kids to something useful and showing them that they can help others.
1. Ratcheting Flare Nut Wrenches and Extendable Ratchets
Ratcheting flare nut wrenches: A specialty tool that earns its space
A regular flare nut wrench is useful, but it doesn't work in every situation. The problem usually isn't getting it onto the fitting. It's finding enough room to turn it.
Here's a perfect example: the brake-line fittings at the distribution block near my master cylinder. With a conventional flare nut wrench installed, the handle hits a sensor before I can get enough movement. Repositioning it doesn't help much because the master cylinder and nearby brake lines block the other angles.
A ratcheting flare nut wrench with a swiveling head changes that. The head can sit on the fitting while the handle angles into an open space, and the ratcheting action lets me work back and forth without removing and repositioning the wrench after every turn.
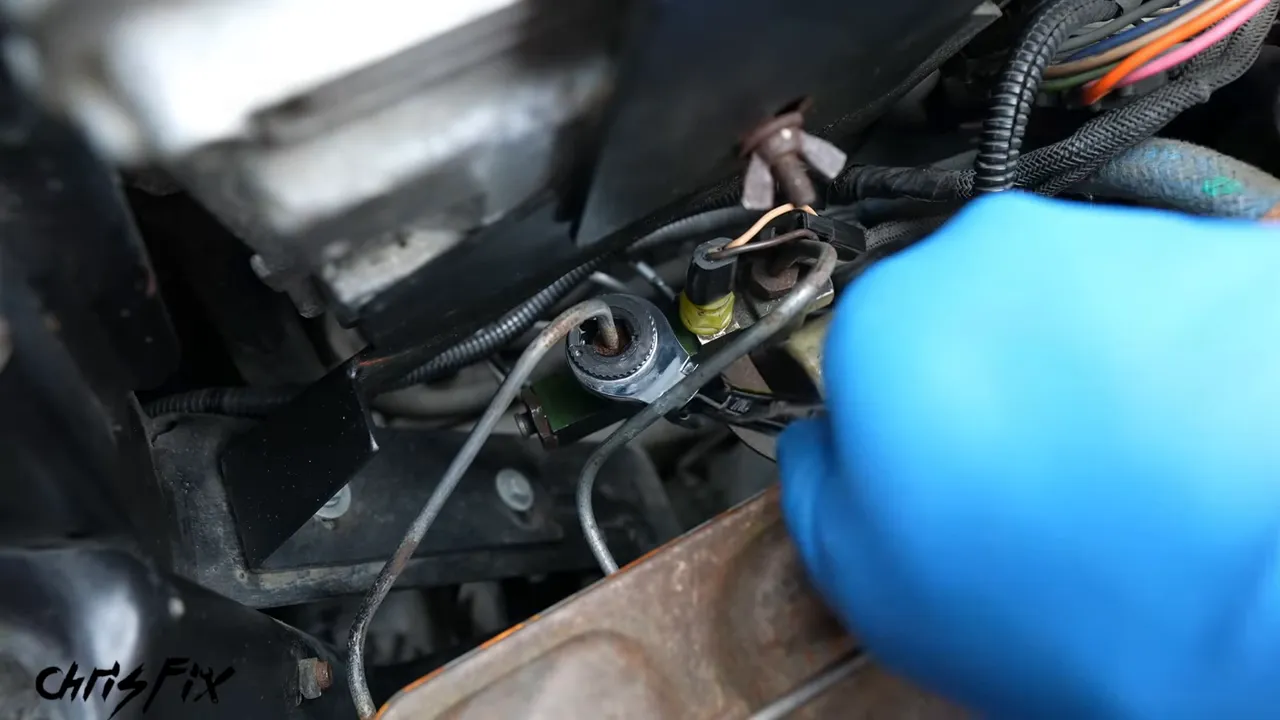
There's also a simple trick for getting the wrench back off the line. If the ratcheting section has rotated so the opening is closed, turn that mechanism until the openings line up again. Then the wrench slides off.
This isn't necessarily an everyday tool. But when a normal wrench won't swing, it can save a lot of time and frustration. That's exactly the kind of specialty tool that makes a great gift.
Extendable ratchets: Compact when you want them, longer when you need leverage
My three-piece ChrisFix extendable ratchet set includes 1/2-inch, 3/8-inch, and 1/4-inch drives. Each ratchet works at its regular length, but the handle extends and locks in place when you need more leverage.
That makes a big difference on tight fasteners. In my demonstrations, a short ratchet didn't give me enough leverage to loosen the truck's lug nuts or a stubborn caliper bolt. Extending the handle made both jobs much easier. Once the fastener is loose, you can collapse the ratchet and keep working with a shorter tool.
I didn't just pick a ratchet that looked nice and put my name on it. I bought extendable ratchets from different manufacturers and tested them over three years. Some had more movement in the head and telescoping section than I liked. They hadn't necessarily broken, but that loose feeling bothered me.
The features I paid attention to were:
- Tight tolerances: Very little unwanted movement with the handle collapsed or extended.
- A positive locking collar: A solid snap when the handle locks into position.
- Useful drive sizes: Three ratchets for different-sized jobs.
- Organized storage: A fitted foam tray that makes a missing tool obvious.
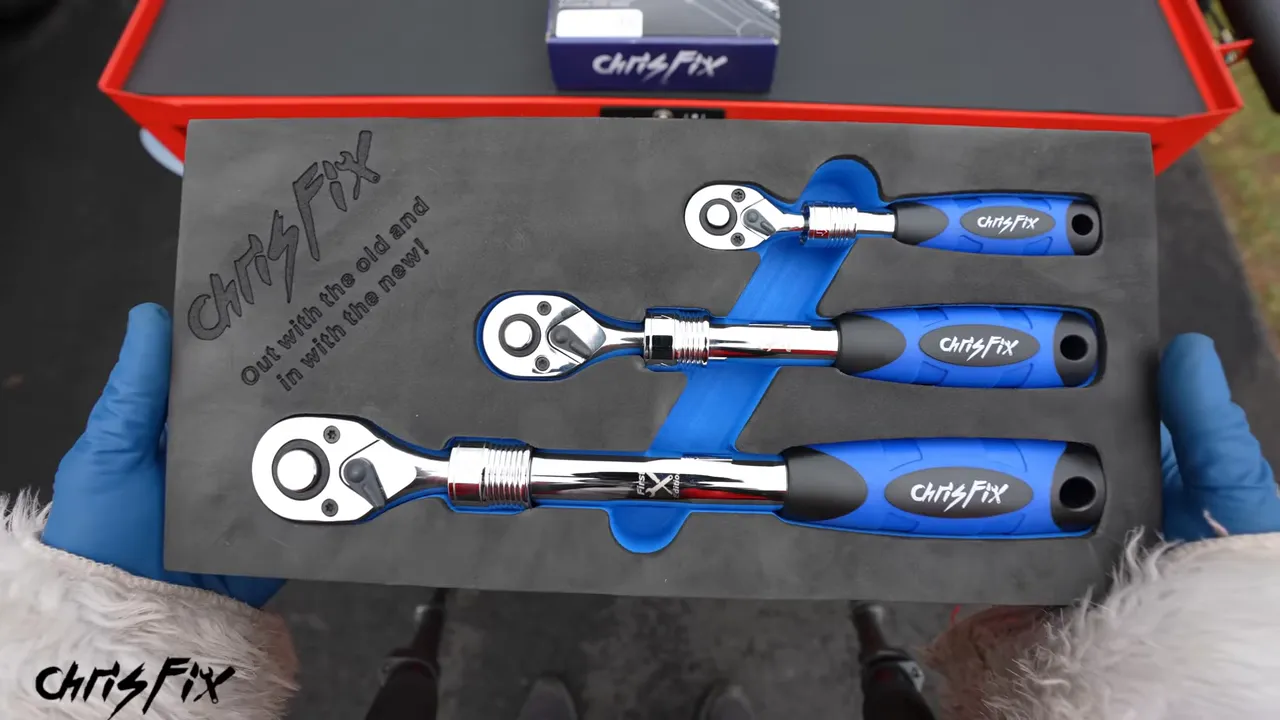
The tray fits horizontally or vertically in a toolbox drawer. The set also comes with a limited lifetime warranty, and the initial production run included a first-edition marking.
For somebody who already owns basic sockets and ratchets, this is a useful upgrade rather than just another duplicate tool. Use the appropriate drive size and stay within the tool's intended limits.
|
Stocking stuffer: Reverse brake bleeder
Normal two-person brake bleeding works: one person presses the pedal, the other opens the bleeder, fluid comes out, the bleeder closes, and then the pedal is released. Repeat until the air is out.
Sometimes, though, trapped air makes it difficult to get a firm pedal. That's where a reverse brake bleeder can be useful. Instead of moving fluid down toward the caliper, it pumps fresh fluid into the caliper through the bleeder and moves air upward toward the master-cylinder reservoir.
The basic process I demonstrated is:
- Place the supply hose in fresh brake fluid of the correct specification.
- Prime the tool until its hoses contain fluid rather than air.
- Remove the bleeder's dust cap and connect the outlet hose.
- Open the bleeder and pump fresh fluid into the system.
- Close the bleeder, remove the hose, and reinstall the dust cap.
The big advantage is that you can operate it by yourself. However, brake systems are safety-critical, and this isn't a substitute for the vehicle's specified bleeding procedure. Follow the vehicle and tool instructions, including any ABS requirements, and monitor the reservoir as fluid moves back into it.
2. An Extractor Vacuum for Deep-Cleaning Car Interiors
A regular vacuum removes loose dirt and dust. That doesn't mean the carpet or seat is completely clean. Dirt can remain trapped down in the fibers, and that's where an extractor vacuum makes a huge difference.
A water-injection extractor has two separate tanks: one for clean water or the appropriate cleaning solution, and another for the dirty water it recovers. The nozzle sprays liquid into the fabric, then extracts that liquid along with the loosened dirt.
To use it, press the spray trigger and slowly move the nozzle along the carpet with moderate downward pressure. The satisfying part is seeing dirty water travel through the nozzle while a cleaner strip appears behind it.
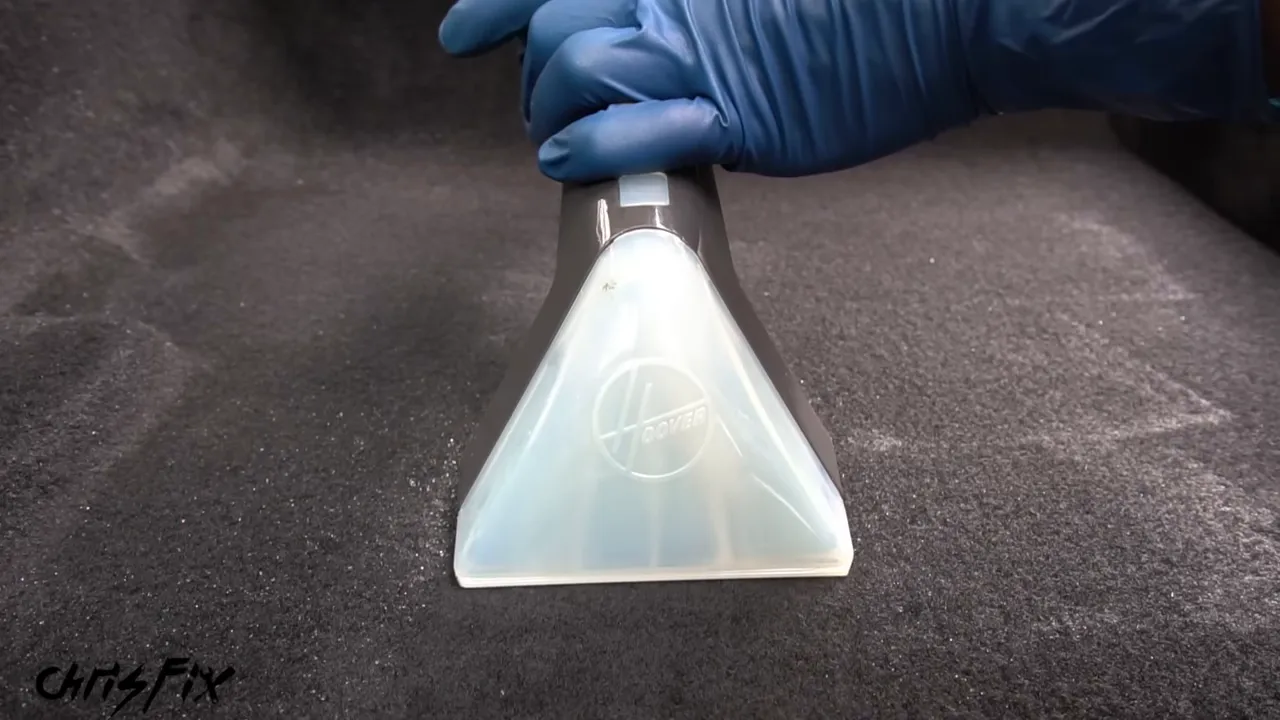
After the carpet dried, mine looked dramatically better. The recovery tank made the result even clearer: all that dirt had been hiding in carpet that had already been vacuumed.
I've also used extraction on cloth seats and floor mats. After washing a suitable floor mat, extracting the water helps it dry rather than leaving it soaked. The same deep-cleaning approach can help remove odor-causing dirt instead of just covering the smell with air freshener.
I demonstrated it on seat belts, too, but safety equipment deserves extra care: follow the vehicle manufacturer's cleaning instructions rather than assuming every cleaner or wet-cleaning method is suitable.
And this gift isn't limited to the garage. An extractor can also clean appropriate household carpets and rugs, which makes it useful for somebody who likes detailing but wants a tool with more than one job.
Stocking stuffer: An extractor attachment for a wet/dry shop vacuum
If the person already owns a wet/dry shop vacuum, a clear extractor attachment is a smaller alternative to buying a complete extractor.
The important distinction is that this attachment doesn't inject cleaning solution. You apply and agitate the cleaner separately, then use the vacuum to recover it.
- Spray the fabric with an appropriate cleaning solution.
- Brush the area to work the cleaner into the fibers and loosen dirt.
- Use the extractor attachment on a properly configured wet/dry vacuum to remove the dirty liquid.
- Allow the fabric to dry fully.
I really like the transparent nozzle because you can see what is being pulled out. In my seat-cleaning demonstration, the dirty water collected in the previously clean shop-vac tank showed just how much grime had come out.
The shop vacuum I used also provided strong suction. It's a great way to get more use out of a tool that's already in the garage, although performance depends on the vacuum and attachment combination.
Stocking stuffer: A steam cleaner for sticky messes
A small steam cleaner is another handy detailing gift, especially for sticky grime that sits in grooves and corners.
My test was a removable rubber console liner covered in melted chocolate and candy. I filled the steamer with plain water, closed it, plugged it in, and let it heat up. The heat softened the sugary mess while the pressure pushed it out of the liner's grooves.
Once the residue was gone, the liner looked good again without a long scrubbing session. That's a useful result from a small tool.
Steam is extremely hot. Follow the tool's instructions, keep it away from skin, and confirm that the surface can tolerate the heat. Don't assume a quick pass provides a verified sanitizing treatment.
3. Cordless Tire Inflators: Milwaukee M18, Milwaukee M12, and Ryobi 18V
Dragging out a large air compressor, extension cord, and hose just to inflate one tire gets old pretty quickly. Cordless tire inflators make that job much simpler.
I chose three options because they cover different budgets. In this 2022 comparison, the Milwaukee M18 was the premium, professional-oriented choice. The Ryobi 18V cost roughly one-third as much, and the Milwaukee M12 sat in the middle.
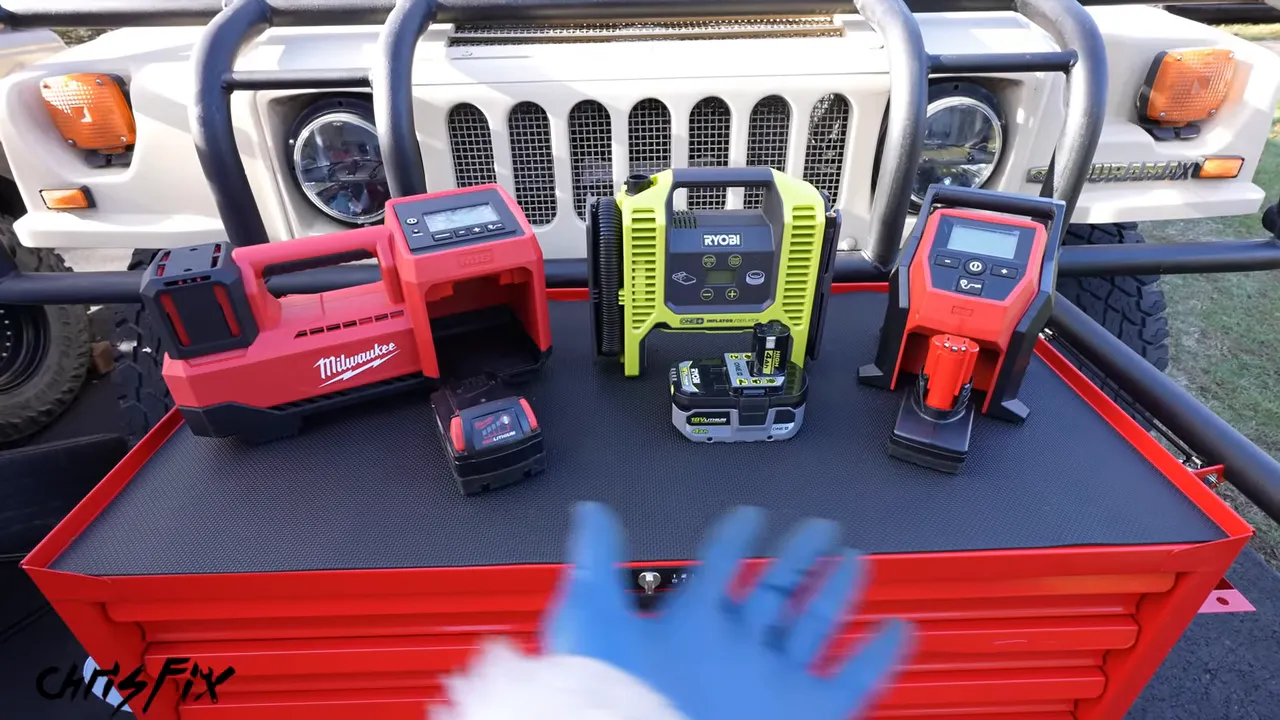
For a practical test, I lowered a 32-inch truck tire to 10 psi and used each inflator to bring it to a 35 psi target.
- Milwaukee M18: About three minutes to inflate the tire, with a measured noise level of 83 decibels. Its freshly charged battery indicator dropped by about 25 percent.
- Ryobi 18V: About nine minutes, with a measured noise level of 73 decibels. Its fully charged battery indicator dropped by about 50 percent.
- Milwaukee M12: About seven minutes, with a measured noise level of 76 decibels. The inflator's battery indicator showed about 50 percent remaining afterward.
The M18 was clearly the fastest in this test. The Ryobi was quieter at the measurement point and offered a lower purchase price, while the M12 provided a middle-ground option.
Those are results from the tire and batteries I used, not universal runtime figures. The battery percentages also aren't a direct comparison of energy efficiency between different battery packs.
All three handled the job, and the compact, cordless format is the real attraction. For occasional home use, speed might matter less than price or choosing a tool that fits the recipient's existing battery system.
Also, 35 psi was my test target, not a recommendation for every vehicle. Use the manufacturer's specified cold tire pressure. NHTSA's tire-safety guidance explains how to find and check the correct pressure.
Stocking stuffer: A lug wrench with a built-in torque wrench
A lug torque wrench combines the leverage and spinning action of a lug wrench with the controlled tightening of a torque wrench.
The handle slides into different positions:
- Extended to one side: More leverage for breaking lug nuts loose.
- Centered: A balanced spinning position for quickly removing or installing loosened lug nuts.
- Torque setting selected: Final tightening to the required specification.
The handle has bearings, so the tool spins freely. After reinstalling the wheel and snugging the nuts, I used the dial and indicator window to set the wrench to 100 foot-pounds for the particular wheels in my demonstration.
Always use the torque specification and tightening sequence for the vehicle and wheel you're working on. The appeal here is doing the removal, spinning, and final torquing with one tool instead of switching between several.
4. A Knife and Tool Sharpener With Uses Beyond the Garage
A knife and tool sharpener might not sound like a car gift at first, but it's useful for somebody who likes maintaining tools.
This belt-style sharpener works on kitchen knives, scissors, pocket knives, multitool blades, hunting knives, and fillet knives. With the guide removed and the tool rotated into position, it can also sharpen larger cutting tools such as loppers, hatchets, and lawnmower blades.
One thing I learned in culinary school is how troublesome a dull knife can be. In my test, the dull knife needed a lot of pressure just to cut through a lemon's rind. After sharpening, it sliced through much more easily.
How the sharpening process works
- Place the heel of the blade in the appropriate guide against the abrasive belt.
- Start the sharpener and draw the blade back at a steady speed.
- As the tip reaches the belt, stop the tool before pulling the tip clear, following the sharpener's instructions.
- Repeat on the opposite side of the blade.
- Alternate sides as needed for the blade's condition.
For the very dull knife in my demonstration, I made about five passes per side. That isn't a fixed requirement for every knife.
The kit includes replacement belts. I hadn't worn one out during my use, and the instruction manual estimated around 75 knives before belt replacement, depending on use.
Scissors use their own guide position. For larger tools, the removable guide and rotating body provide access to the exposed belt. That versatility is what makes this a useful gift for the garage, kitchen, garden, and fishing gear.
Stocking stuffer: A Leatherman multitool
I've tried plenty of multitools, and this Leatherman multitool became my favorite. I'd used one almost daily for three years, including while fishing and boating, before buying a second one and having my name engraved on its blade.
The model I selected is made in America, carries a 25-year warranty, and combines 21 tools. You can carry it using the pocket clip or the sheath.
The main pliers aren't spring-loaded, but the needle-nose tips meet accurately. The gripping section handles nuts and bolts when a proper socket isn't available, and the replaceable cutters handled the stainless fishing wire I use. There's also a wire-stripping feature for occasional work when dedicated strippers aren't nearby.
The folding tools lock open and release with a button. Useful features include:
- A small saw for occasional cuts when a full-size saw isn't available.
- An awl, inch and centimeter markings, and a file.
- A serrated blade and a plain-edge knife.
- Spring-loaded scissors that work well for trimming zip ties.
- Phillips and flathead driving tools, plus an opener.
The file surprised me with how often I reached for it, especially to remove corrosion from metal. And the scissors are handy for cutting a zip-tie tail close so it doesn't leave a sharp edge.
It doesn't replace a full toolbox. It gives you a useful collection of tools when the toolbox isn't with you.
Stocking stuffer: Metric and SAE nut-and-bolt gauges
If you've got a bag of miscellaneous fasteners, you know the problem: you find a bolt that looks right, but you have no idea what diameter or thread pitch it is.
A nut-and-bolt thread gauge removes the guesswork. Thread bolts into the labeled holes, or thread nuts onto the labeled studs, until you find the correct fit.
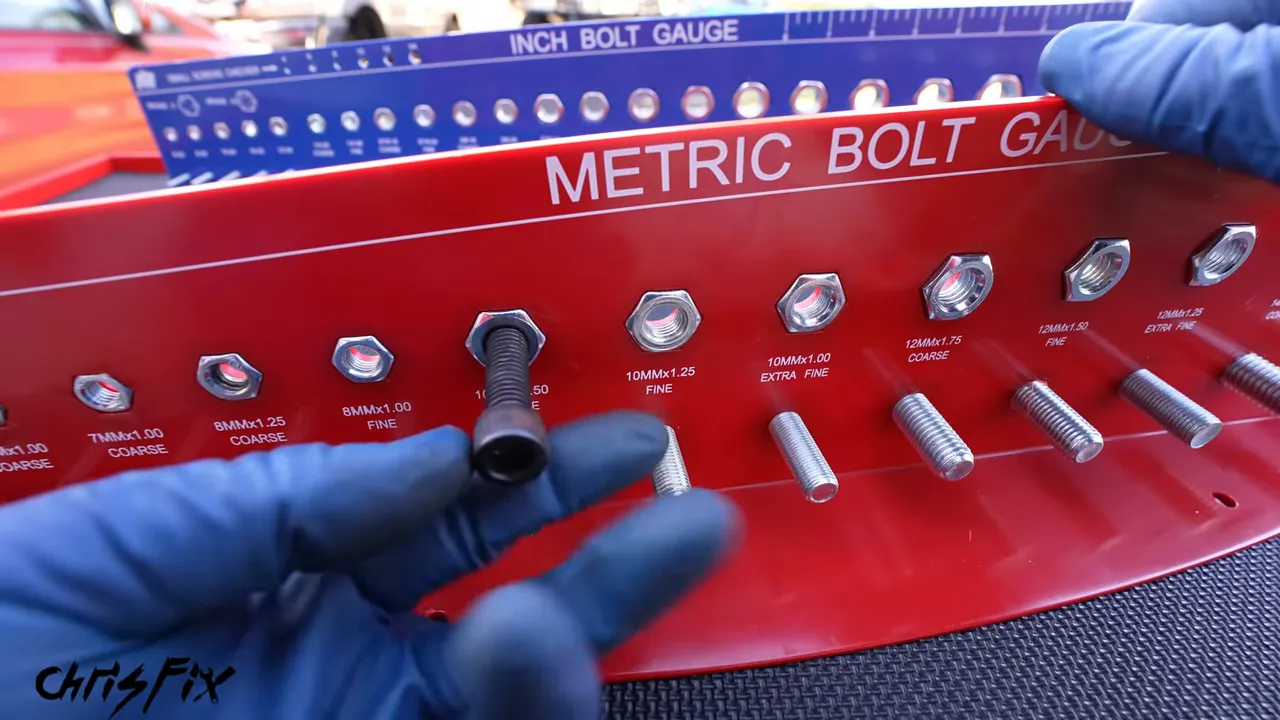
For example, my mystery bolt was too small for the 12 mm position. At 10 mm, the extra-fine thread didn't fit, and the 1.25 mm pitch still felt too tight. The M10 × 1.5 position threaded smoothly, identifying the correct diameter and pitch.
I used the same method on an old castle nut and identified it as a 14 mm fine-thread nut. The point is to find a smooth fit, not force the fastener onto the gauge.
With metric and SAE gauges in the garage, you can write down exactly what you need before heading to the store or ordering a replacement.
5. A Borescope Camera for Looking Where Other Cameras Can't
A borescope camera is one of those tools that immediately makes you think of more places to inspect.
The unit I selected has its own screen, so there's no phone pairing, laptop connection, or wireless setup to deal with. It records pictures and video at 720p, and the supplied autofocus camera has a light at its tip.
One useful application is inspecting the inside of a boxed frame rail. The camera fits through an existing access hole and shows metal you otherwise couldn't see.
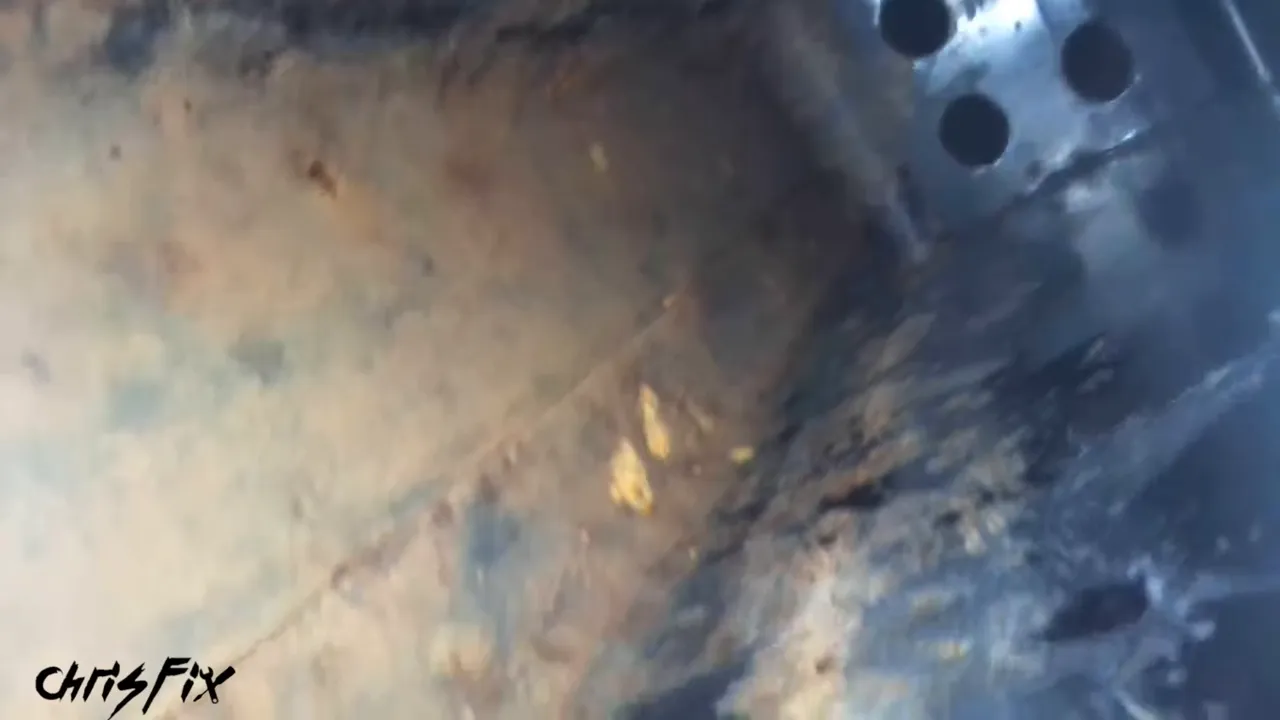
Inside my 1996 vehicle's frame, I found some surface rust along the bottom, while the upper area still showed factory paint. Aiming and feeding the camera took a little practice, but the inspection was useful.
The kit also includes a magnet and hook for trying to retrieve small objects, plus a 90-degree mirror for looking sideways.
Choose a camera head that fits the inspection
The standard autofocus head was too large for the tight spark-plug access I wanted to inspect. An optional smaller dual-lens camera solved that problem.
It has one forward-facing lens and another on the side. After removing a spark plug, I could insert the smaller camera and use the side lens to inspect a valve. There was less visible carbon buildup than I expected.
Camera diameter matters as much as the screen features. A borescope that works well inside a frame rail may need a different probe for an engine inspection. Choose the head for the actual opening and the direction you need to see.
Stocking stuffer: Cavity wax and long applicator wands
If somebody wants to keep their vehicle for a long time, cavity wax is a practical companion to the inspection camera.
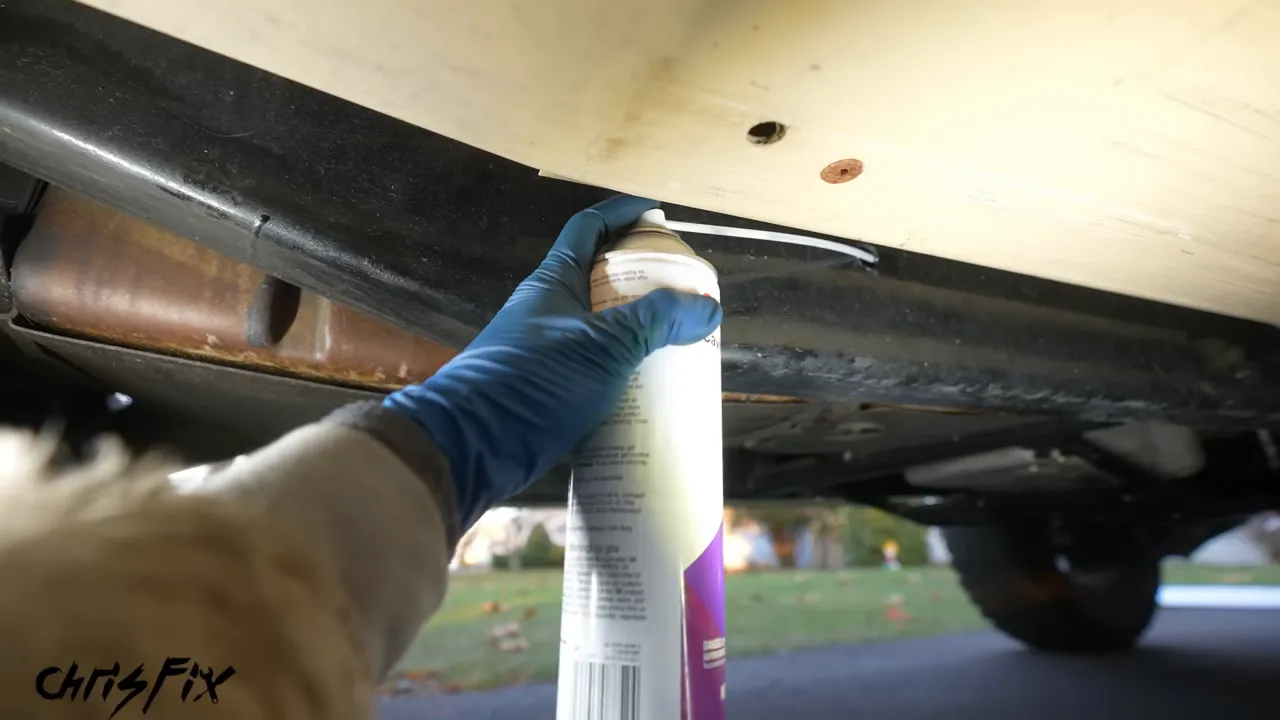
It leaves an oily, waxy corrosion-protection coating inside enclosed areas such as frame rails and behind body panels. Long applicator wands help deliver the coating through small access holes that a regular spray nozzle can't reach.
Preparation matters. In my cold-weather demonstration, I showed the coating's consistency on a dirty, rusty area without completing the cleaning step because it was below freezing. That was a demonstration, not the preparation method to copy. Clean and dry the area as directed by the product instructions so you aren't coating trapped dirt and moisture.
For the enclosed Hummer frame, the application worked like this:
- Attach the appropriate long spray wand to the can.
- Feed the wand into an existing frame access hole.
- Press the nozzle while slowly withdrawing the wand to coat the interior.
- Reposition it to reach the section in the opposite direction.
I put the borescope inside the frame to see the application. Coverage wasn't perfect in the freezing conditions, but the wax spread around the interior, including the lower area where I'd seen the most surface rust.
Cavity wax is a corrosion-protection treatment, not a repair for metal that's already structurally damaged. Used with proper preparation and application, it's a useful gift for the person who cares about the parts of the car nobody normally sees.
Pick the Gift That Solves Their Next Problem
For the person tackling repairs, ratcheting flare nut wrenches and extendable ratchets offer access and leverage. For the detailing enthusiast, an extractor or shop-vac attachment produces a result you can actually see. A cordless inflator makes routine tire care more convenient, while a sharpener and multitool earn their keep far beyond the driveway.
And for somebody who enjoys diagnosing problems or preserving an older vehicle, a borescope, thread gauge, and cavity wax are useful additions that might not already be in the garage.
That's what makes a good tool gift: it isn't just interesting to unwrap. It helps the next time there's a dirty seat, stubborn fastener, low tire, or hidden area that needs attention.
Use safe working practices, follow the vehicle and tool instructions, and choose the right equipment for the job. Happy holidays, and enjoy the time with your friends and family!


