The best gift for somebody who works on cars is a tool that makes an annoying job easier. Not something that sits in the toolbox looking nice, but something you keep reaching for because it saves time, effort, or a whole lot of frustration.
These are my five main Christmas gift ideas for 2025, each paired with a smaller stocking stuffer. I focused on affordable, useful products that you might not already own. These picks aren't sponsored. They're tools and products I use, and each one solves a real problem around the car, driveway, or garage.
Table of Contents
- 1. Portable Air Blowers: Between a Leaf Blower and Compressed Air
- 2. Cordless Heat Guns: Quick Heat Without an Extension Cord
- 3. Oil Stain Remover: A Gift for the Driveway Mechanic
- 4. Pocket Pry Bars: Small Tools With a Lot of Uses
- 5. A Swivel Sprayer and Foam Cannon for Easier Car Washing
- A Bonus Gift for Young Car Enthusiasts
- Pick the Gift That Solves Their Everyday Frustration
1. Portable Air Blowers: Between a Leaf Blower and Compressed Air
A leaf blower is great until you're trying to maneuver it around a mirror or clear a small patch of leaves. A can of compressed air is handy, but sometimes you need more airflow. These large portable air blowers and mini air blowers fit right between the two.
Both sizes charge through USB-C and come with different nozzle attachments. The blower demonstrated is rated for about an hour on low, but full power is where it gets interesting: roughly 100 mph airflow, with just under 10 minutes of runtime at full blast.
My favorite use: drying a car
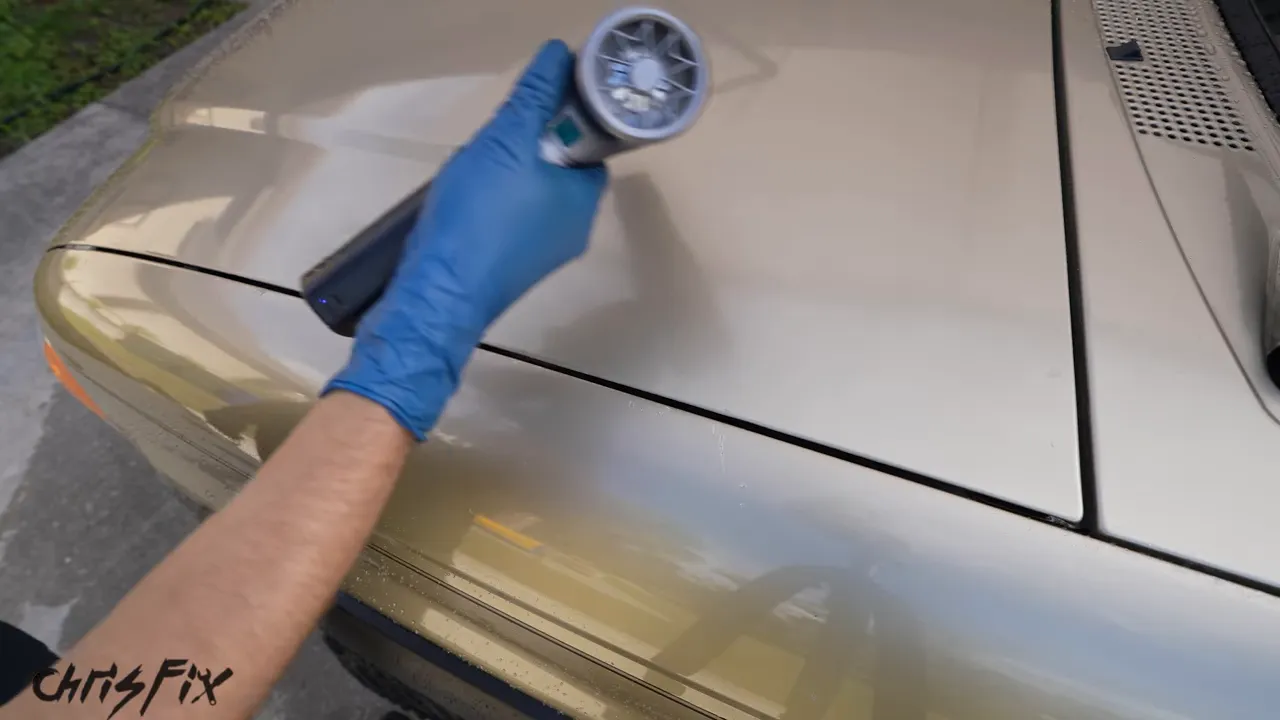
The flat nozzle is my favorite attachment for drying paint after a wash. Twist the old nozzle off, line up the replacement, and twist it into place. The smaller, lighter tool is much easier to manage than a full-size leaf blower.
Air drying is touchless, and it reaches places a towel can't. It pushes water off painted panels, clears tight areas around trim, and works on glass without leaving towel streaks.
Fresh snow, leaves, vents, and even pool floats
For a snow test, my buddy Jacob from The Straight Pipes tried both sizes on a snow-covered car. They cleared fresh snow well without dragging a brush across the paint. The mini version is especially convenient because it fits in a glove box.
Keep the expectations realistic, though. These aren't tools for removing heavy, wet snow or thick ice. They're useful for loose, fresh snow, not a replacement for every winter cleanup tool.
Some other jobs I've used them for include:
- Clearing leaves from a truck bed.
- Cleaning a small section of driveway or porch without starting a gas blower.
- Blowing dust out of hard-to-reach car vents.
- Inflating a pool float with the mini blower.
The pool float took about a minute and a half on high. Pinching its valve helped air enter more easily. These blowers won't replace a leaf blower for a whole yard, but for quick jobs, the convenience is hard to beat. The units featured also come with a one-year warranty.
Stocking stuffer: fuses that light up when they blow
Light-up automotive fuses look ordinary until one blows. Then an indicator lights up, making the failed fuse much easier to identify.
That sounds like a small improvement until you're folded under a dashboard, trying to pull individual fuses out of an awkward fuse box.
Even an accessible fuse box can involve some detective work. On my truck, the owner's manual lists both a cigar lighter fuse and an auxiliary power point fuse. The outlet I was troubleshooting was protected by fuse 22, the auxiliary power point, rather than the cigar lighter entry you might initially choose.
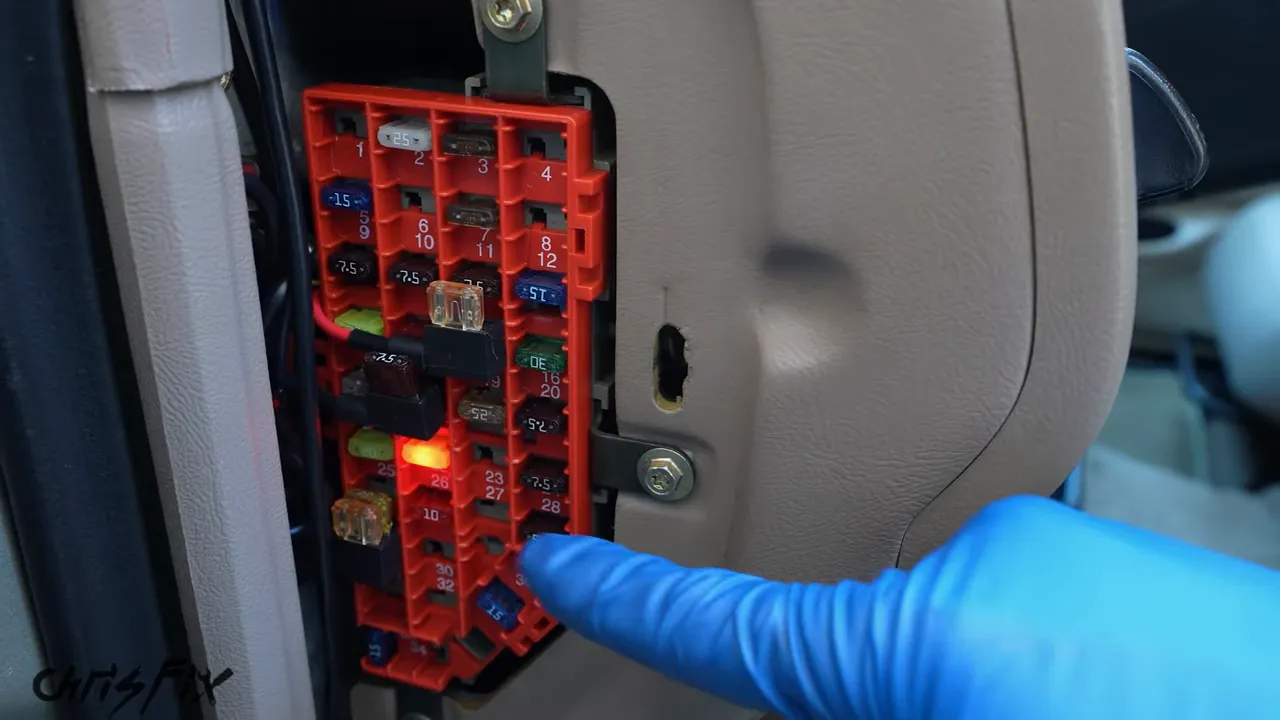
With a light-up fuse installed, the failed fuse was immediately obvious in the demonstration. I replaced the truck's older fuses with matching light-up versions and still had plenty left in the kit.
Use the correct fuse type and amperage for the circuit. And don't deliberately short a circuit to test these. The point is to make finding a failure easier, not to create one.
2. Cordless Heat Guns: Quick Heat Without an Extension Cord
A corded heat gun works great. The inconvenience is getting power to it, especially for a quick repair away from an outlet. By the time you've found and untangled an extension cord, you could have finished the job.
A cordless heat gun solves that problem. I use Ryobi and Craftsman examples, but Milwaukee, DeWalt, Ridgid, Makita, and other major cordless tool brands offer them too.
Buy for the battery system the recipient already owns. The bare tool may be reasonably priced, but buying into a different battery platform changes the value.
Look for a heat-shrink attachment
The accessory I'd make sure to include is a heat-shrink attachment that wraps around the connection and helps concentrate heat where it's needed.
For a conventional heat-shrink butt connector, the process is straightforward:
- Insert the stripped wire into one end of the connector.
- Crimp it with the insulated-connector section of the crimping tool so you don't cut the heat-shrink sleeve.
- Insert and crimp the second wire.
- Heat both ends until the sleeve shrinks tightly around the wire insulation.
The sealed ends help keep water out of the connection. That's important because moisture can lead to corrosion and weaken the repair over time.
Removing old decals and stickers
A heat gun is also useful for bumper stickers, vinyl decals, window stickers, tint removal, and removing a vehicle wrap. Old stickers often break into little pieces when you try to peel them cold.
Move the heat gun back and forth to warm the adhesive, then carefully peel the sticker away. Don't hold the heat in one spot, because you can damage the paint.
In my examples, the bumper decals and a sticker on the glass peeled away cleanly without leaving residue. It's a simple job that becomes much more convenient when you don't have to drag a cord around the car.
Stocking stuffer: solder-seal butt connectors
Regular crimp-style heat-shrink connectors are tried and true, but the crimp needs to be right. Too tight can damage the sleeve. Too loose can leave a wire that pulls out.
Solder-seal butt connectors are an alternative that combines a solder ring, heat-shrink sleeve, and adhesive sealing rings. There's no crimping step.
- Slide the connector onto one wire before joining the ends.
- Twist the stripped wire ends together tightly.
- Slide the connector back over the joint, centering the solder ring over the bare wire.
- Start heating the middle until the sleeve begins shrinking.
- Heat both ends so the adhesive rings seal around the insulation.
- Return to the center until the solder melts into the wire strands.
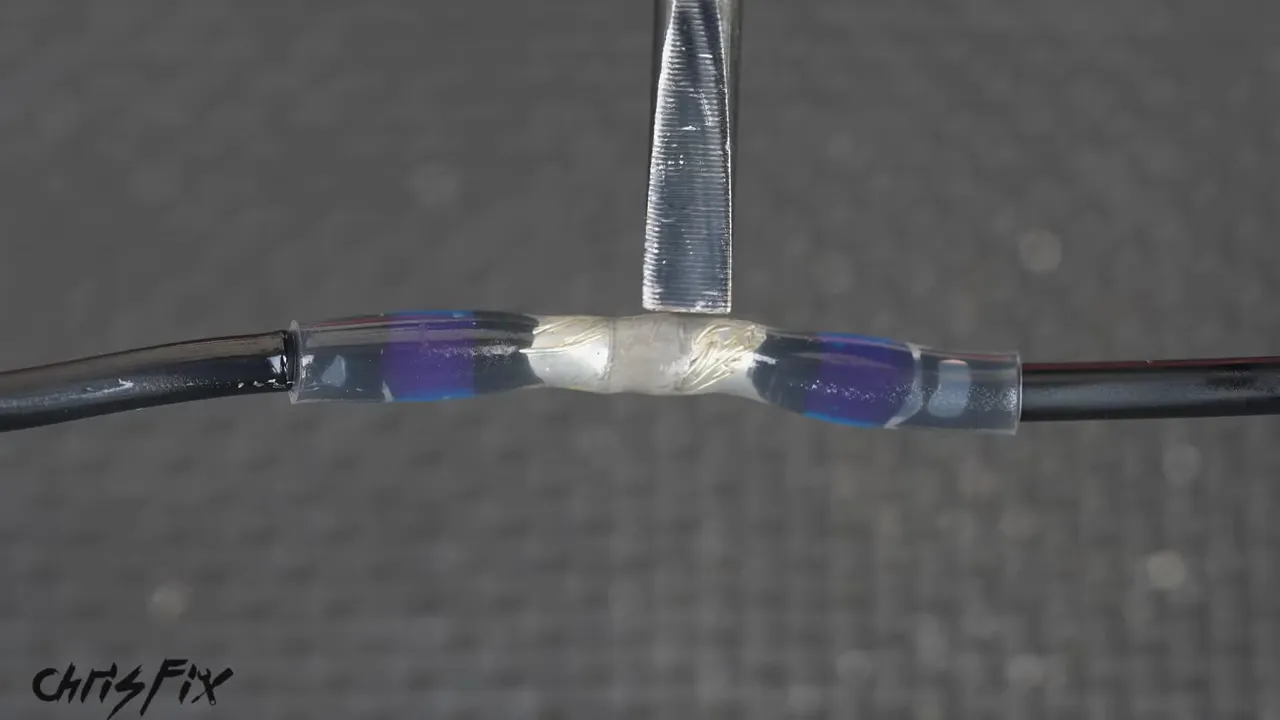
The important detail is that the solder actually melts into the strands. A sleeve that has merely shrunk isn't the same as a completed soldered connection.
The finished sample held together when I pulled hard on it. The assortment featured covers wire sizes from 26 AWG through 10 AWG, making it a handy kit for a range of wiring repairs.
3. Oil Stain Remover: A Gift for the Driveway Mechanic
Only somebody who works on cars would get excited about oil stain remover. But if you've had a project car sitting in the driveway, you know exactly why it belongs here.
I had an oil stain that had soaked into my pavers for more than a year. The surrounding driveway looked good, but that one spot wouldn't come clean. This oil stain remover made a huge difference.
How I treated the stain
- Remove loose dirt. Scrub the area with a stiff-bristle brush, then clear the dust away.
- Shake the bottle thoroughly. Apply a thin coat that completely covers the oil stain.
- Work it into the surface. Brush the cleaner into the stained pavers and feather the edges into the surrounding area.
- Leave it overnight. The treatment demonstrated needed at least 12 hours for the microbes in the liquid to break down the oil.
- Remove the dried coating. Wear a dust mask, brush the dried material loose, and collect it. I vacuumed it up to avoid spreading powder onto nearby cars.
- Rinse away remaining residue. I hosed off the white residue, then let the pavers dry before checking the result.
Feathering the edges helps avoid leaving one sharply defined treated patch. I applied more product than a thin coat in the demonstration because the stain had been there so long, but follow the product's application instructions rather than assuming more is better.
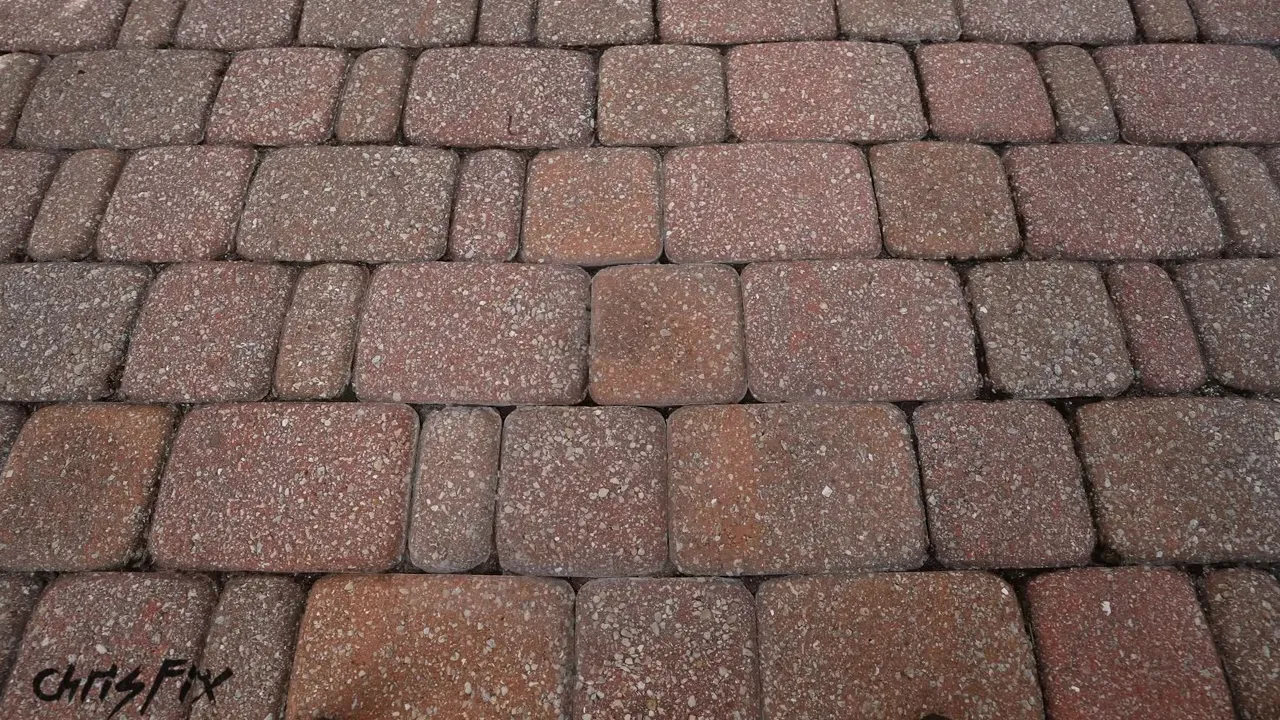
This cleaner is intended for surfaces such as concrete, pavers, and brick. It's not recommended for black asphalt driveways, largely because the white residue can stain them.
Once the pavers dried, the old oil mark was gone in my test. For somebody who repairs cars at home, cleaning up the evidence on the driveway can be a pretty useful gift.
Stocking stuffer: see-through grinding wheels
A regular grinding wheel blocks your view of the area directly underneath it. When you're smoothing a weld, that means moving back and forth while estimating where the bead starts and ends.
These see-through grinding wheels use three cutouts to improve visibility while the disc rotates. It's a simple design change, but it lets you see the work area and make finer adjustments.
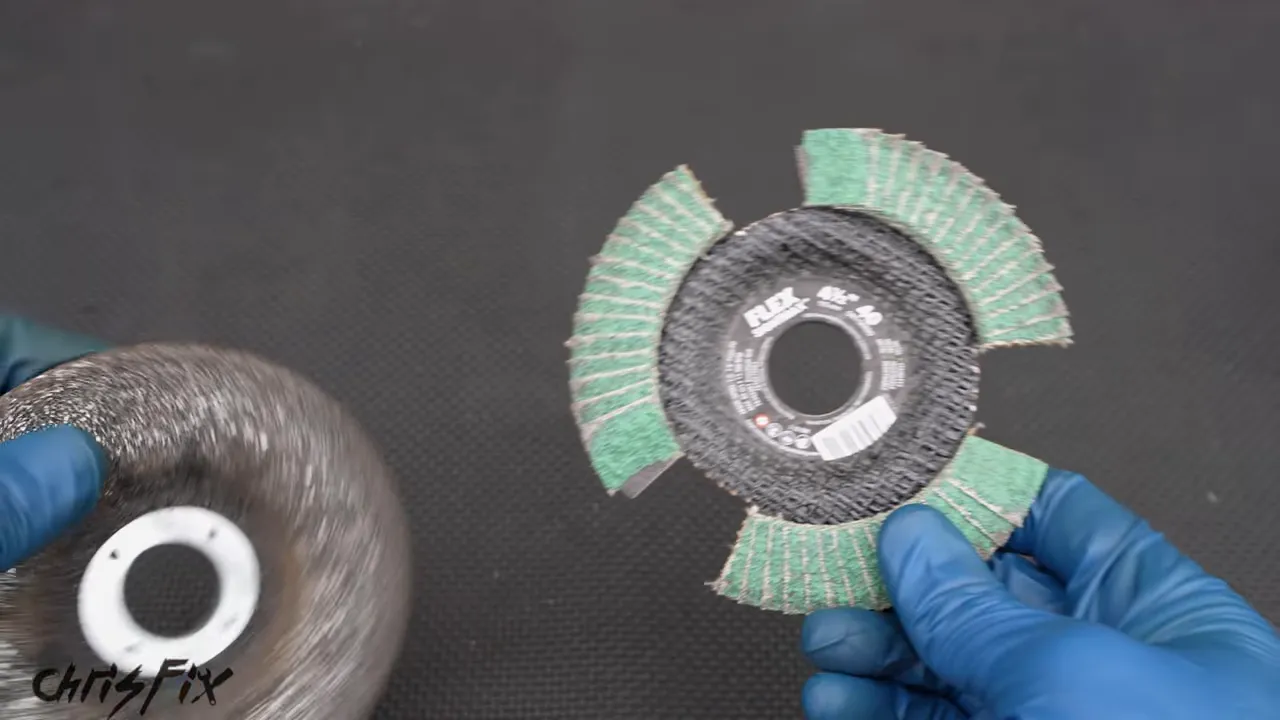
On the welded test pieces, the difference was clear. Being able to see the bead made it easier to grind evenly instead of removing too much from one area and too little from another.
Disconnect power before changing a disc, and follow the grinder and disc manufacturers' instructions. For additional safety context, OSHA provides guidance on abrasive wheel machinery.
4. Pocket Pry Bars: Small Tools With a Lot of Uses
A pocket pry bar doesn't look like much until you start carrying one. Then you realize how often you need a little tool to release a clip, lift an edge, or reach something your fingers can't.
My ChrisFix pocket pry bar set includes two 5-inch tools, both made in the USA. They have black oxide finishes to help resist rust and pocket clips so they're easy to keep within reach.
One straight, one angled
- Straight pry bar: Has a relatively thin tip that can serve as a flathead screwdriver in a pinch, plus a magnet at the handle end for retrieving small nuts and bolts.
- Angled pry bar: Has a 27-degree bend that provides leverage for jobs such as easing a hose off or lifting a panel clip.
I've used them for popping panel clips, tightening a hose clamp, releasing electrical connectors, removing old O-rings, opening boxes, and picking up dropped hardware in tight spaces.
The straight tool's magnet is particularly useful when a nut or bolt lands somewhere you can see but can't comfortably reach. The angled version helps get underneath clips and hoses without trying to force a straight tool into the wrong position.
These join my earlier extendable ratchets in 1/4-inch, 3/8-inch, and 1/2-inch drive sizes, and my hands-free neck lights. The ratchets add leverage when extended, while the lights help illuminate under-hood jobs such as checking fluids or replacing a belt or hose.
The pocket pry bars are affordable, and proceeds from all my ChrisFix tools go to charity.
Stocking stuffer: modular pliers and screwdriver organizers
I'm big on keeping tools organized. Every tool should have a place, and foam cutouts are great because an empty space immediately tells you something is missing.
But my pliers drawer was another story. Different brands, sizes, and shapes made it difficult to organize efficiently. Simply lining them up looked better, but it didn't leave enough room for everything.
The solution was StealthMounts DrawerHive pliers organizers, along with matching screwdriver organizers. These UK-made, firm rubber holders interlock to create rows.
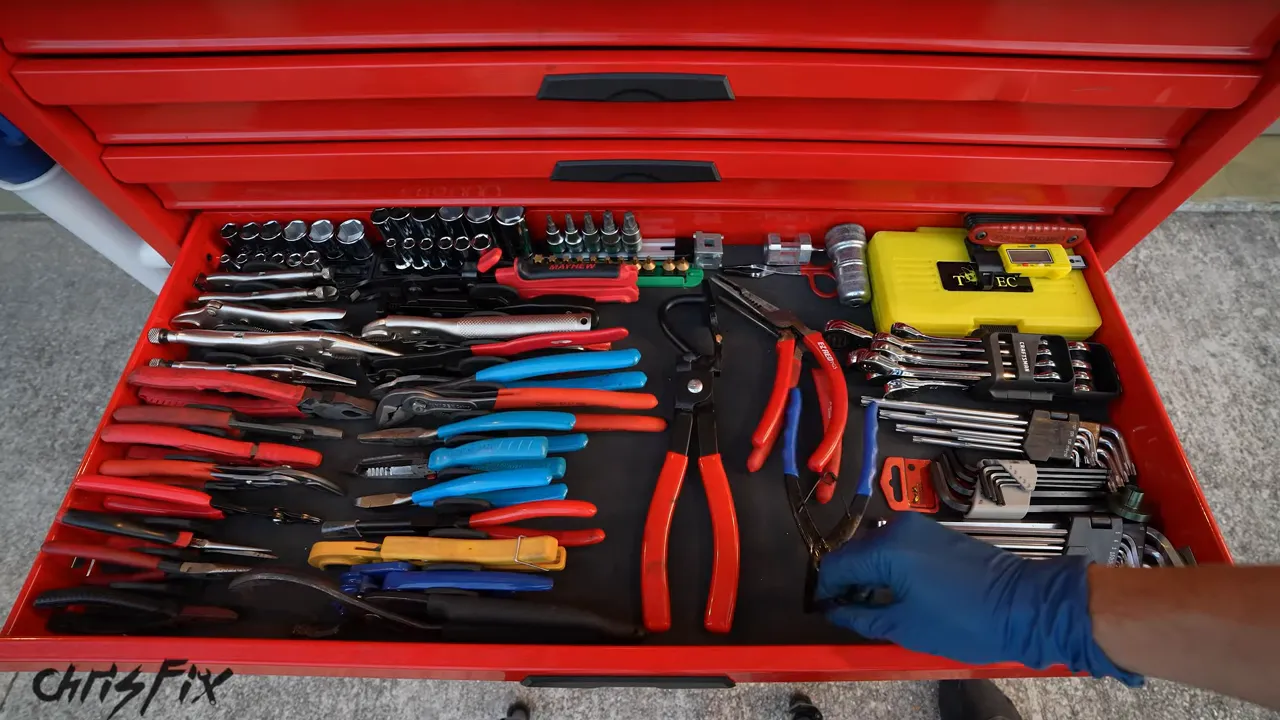
Here's what worked for my drawer:
- Interlock the holders across to the end of the drawer so the row stays in place.
- Position the pliers with their handles toward the drawer edge.
- Add another row to use the available space.
- Lay oversized or unusually shaped pliers off to the side if standing them up prevents the drawer from closing.
Each kit contains 10 holders. My setup used 26, so it took three bags. After a couple of months of moving the toolbox around, the pliers were still held in place. The screwdriver holders use the same basic approach.
5. A Swivel Sprayer and Foam Cannon for Easier Car Washing
If somebody enjoys detailing their car, a well-designed pressure washer sprayer and foam cannon kit can make the process much more comfortable.
There's a nice small-business story behind this one. About seven years ago, someone from the community contacted me because he was tired of poor-quality foam cannons and had developed his own. Mine had just broken, so I accepted one to test.
I liked it enough to feature it, and orders followed. I've kept his thank-you note ever since. But the reason the business continued doing well is the product itself. My original cannon has been dropped, left outside in the sun, and still works without a cracked bottle.
What makes the foam cannon useful
The cannon uses brass and stainless steel components with durable plastic. The newer bottle is wider than the older, taller design, which makes it less likely to tip over.
Add your car soap, then water, following the soap and cannon instructions. A high-sudsing car shampoo is a good match for producing thick foam.
I used the setup on my new diesel pickup, the first new vehicle I've bought. And don't worry, the little truck isn't going anywhere.
The cannon laid down a thick coating of suds, but using it on the end of a long pressure washer wand exposed one problem: all that weight out front gets uncomfortable.
The short swivel sprayer is the real comfort upgrade
The compact sprayer brings the foam cannon closer to your hand for better control. It has a light trigger pull, textured grip, brass and stainless steel internals, and a quick-disconnect layout that's easy to operate.
My favorite feature is the swivel connection at the hose. Instead of a loop tightening into a kink as you pull, the connection can rotate and let the hose unwind.
For my setup, I removed the original wand, installed the supplied hose adapter hand-tight, and clicked the sprayer into place. With the cannon attached, it felt much easier to control. I thought the foam looked thicker too, but the definite improvement was handling.
Give the detailing tools a storage spot
The matching stainless steel organizer is intended for a wall, but I mounted mine to my detailing cart.
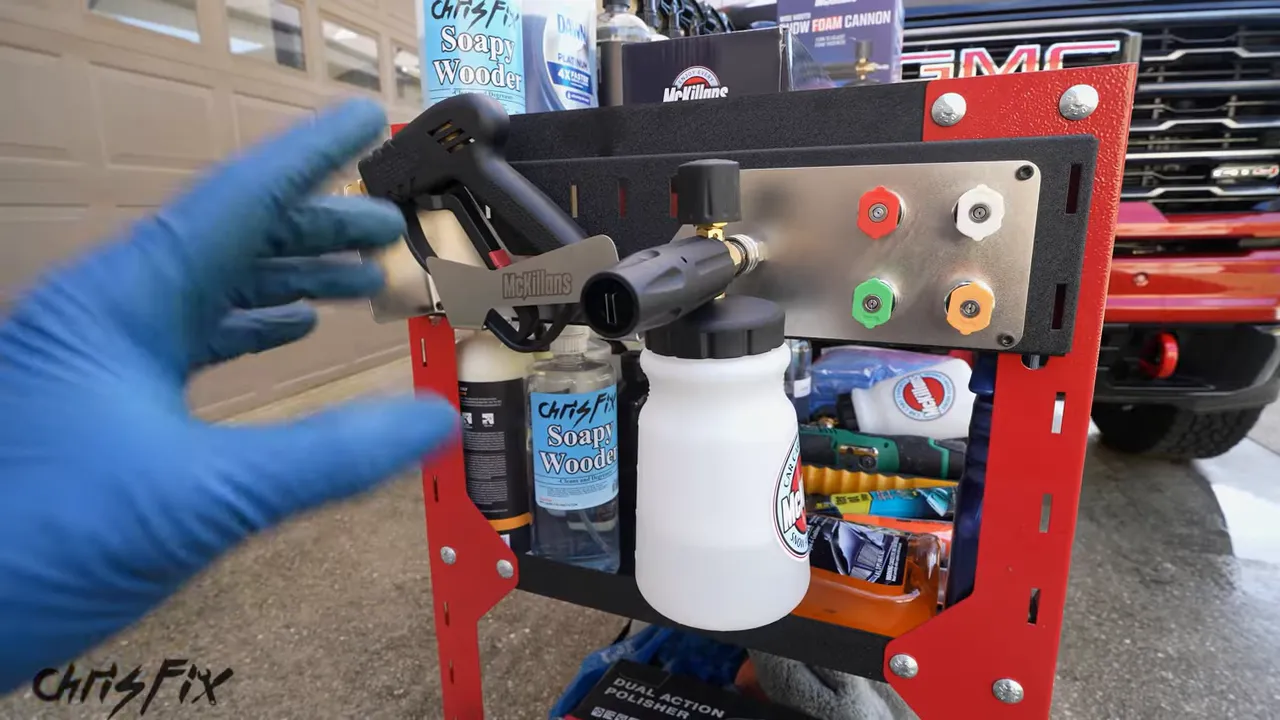
That gives the sprayer, four spray nozzles, and foam cannon dedicated storage right where I use them. It's a simple way to keep the whole washing setup together instead of leaving attachments scattered around the garage.
Stocking stuffer: drill brushes for carpet cleaning
The final stocking stuffer is an inexpensive nine-piece drill brush kit. The round brushes are the ones I use most, especially for carpeted floor mats.
Insert the brush shaft into a drill and tighten the chuck securely. The drill does the scrubbing, but the cleaning sequence still matters.
How I cleaned a badly stained floor mat
- Vacuum first. Remove loose dirt and dust from the entire mat.
- Pretreat the stain. Saturate the stained area with carpet cleaner and work it in with a hand brush.
- Flush the treated area. Use a hose or pressure washer to rinse the loosened contamination out of the removed mat.
- Clean the whole mat. Apply carpet cleaner across the surface to even out the cleaning.
- Scrub in overlapping passes. Move the drill brush back and forth, overlapping each pass by about 50 percent.
- Change direction. Repeat perpendicular to the first set of passes to work through the fibers thoroughly.
- Extract the dirty water. Use an extractor vacuum with overlapping passes to remove soapy water and help dry the carpet.
For a second, heavily muddy carpet, I brushed off the surface mud before vacuuming. Then I applied cleaner, scrubbed in both directions with the drill brush, rinsed out the dirty soap, and extracted the remaining water.
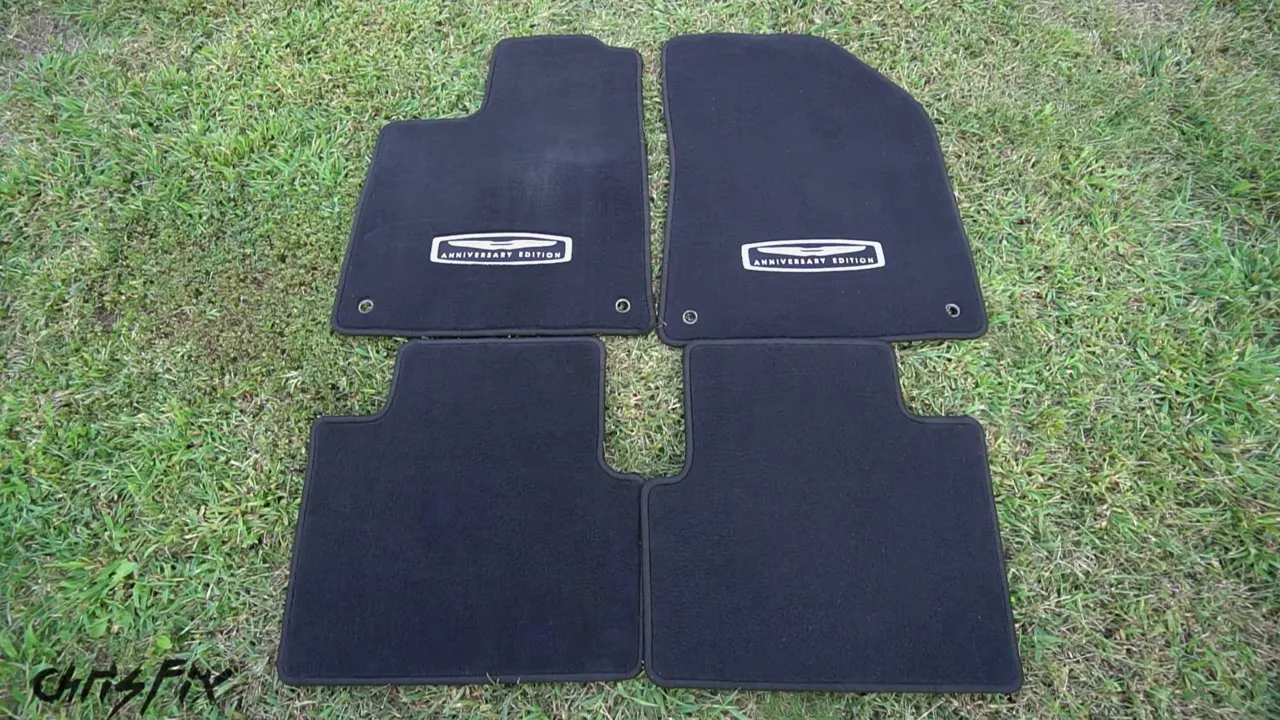
Both examples show why these brushes are so useful. They make thorough agitation much quicker than doing all the scrubbing by hand. These rinse-heavy examples are for removed mats, not a reason to hose down carpet inside a vehicle.
A Bonus Gift for Young Car Enthusiasts
For younger kids who are starting to get interested in cars, my children's books are another inexpensive option. At the time of this gift list, they were $9.99 and printed on demand.
They're a way to encourage that interest before somebody is ready for a toolbox of their own.
|
Pick the Gift That Solves Their Everyday Frustration
The right choice depends on what the person enjoys doing. A cordless heat gun and connectors suit wiring repairs. A blower or foam cannon makes sense for someone who loves detailing. Drawer organizers are perfect for the person who has plenty of tools but can't find the pliers they need.
And if their project car has left a permanent-looking mark on the driveway, oil stain remover might get a bigger reaction than you'd expect.
That's what makes these useful gifts: each one takes a familiar job and makes it a little easier. Merry Christmas, happy Hanukkah, happy New Year, and whatever you celebrate, enjoy some time with friends and family.


