Our high-mileage BMW 330xi did not disappear. It went off to get a roll cage, came back with only five days left before our first endurance race, and immediately turned into an all-day, every-day scramble to get it ready.
We had already fixed the major problems and stripped hundreds of pounds out of the interior. But a running, lightweight BMW is not the same thing as an endurance race car. We still needed driver cooling, communications, fire suppression, brakes, tires, and a whole lot more.
Here is how our scratched-up E46 went from a cheap project car to a BMW loaded into the trailer for its first 24 Hours of Lemons race.
Key Takeaways
- Selling $720 in removed parts reduced the BMW’s net purchase cost from $1,100 to $380.
- Removing 430 pounds improved both acceleration and braking before the brake hardware was replaced.
- The cage, structural reinforcement, fire suppression, and driver equipment were central to race preparation.
- Five days of intensive work prepared the car, but the team still lacked wheel-to-wheel racing experience.
Table of Contents
- Our $500 Race Car Started With an $1,100 Purchase
- Fixing the BMW’s Biggest Mechanical Problems
- Removing 430 Pounds Made a Measurable Difference
- The Roll Cage and E46 Rear Structure Reinforcement
- Keeping the Driver Cool Through a Long Stint
- Communications, Tow Straps, and an Exhaust Repair
- Fire Suppression, Battery Cutoff, and Driver Fit
- Rebuilding the Brakes for Endurance Racing
- Yokohama Tires, Lighter Wheels, and a Race Alignment
- The Car Was Ready. The Team Still Had a Lot to Learn.
Our $500 Race Car Started With an $1,100 Purchase
The challenge started when eBay Motors asked us to put together an endurance race car for the 24 Hours of Lemons. This is wheel-to-wheel endurance racing built around cheap cars, with a $500 car budget intended to keep a big bank account from being the biggest performance advantage.
Go over that budget, and you can end up with penalty laps. In our case, buying a car for $1,100 put us $600 over the limit, which meant facing 60 penalty laps before we even got started. That is not exactly a competitive starting position!
So why buy this particular car?
We found a 2004 BMW 330xi with about 240,000 miles, all-wheel drive, and plenty of cosmetic damage. The bumpers were scuffed and cracked, both sides had been keyed, and there were dents and scratches all over it. None of that bothered us. For a budget race car, ugly paint is a negotiating advantage.
The mechanical problems helped bring the price down, too. The car barely ran, the sunroof would not close, and the power steering did not work. Those were problems we could tackle.
Selling Parts Brought the Net Car Cost Below $500
Stripping the interior gave us more than weight reduction. It also left us with a pile of parts that other BMW owners could use.
My teammate Pierce handled selling those parts and documenting the transactions so we would have evidence for the budget judges. Some of the sales included:
- Pillar and lower interior trim pieces for $100.
- The center console for $100.
- The sunroof cassette for $160.
In total, we sold $720 worth of parts. Subtract that from the $1,100 purchase price, and our net car cost dropped to $380. That put us below the $500 target, hopefully eliminating those 60 penalty laps once the judges reviewed everything.
That $380 figure is the purchase price minus parts sales, not the cost of the finished race car. As the cage and safety equipment make very clear, preparing a cheap car for racing involves a lot more than buying the car itself.
Fixing the BMW’s Biggest Mechanical Problems
Before we could think about racing, we had to make the BMW run properly, keep rain out, and make it possible to steer for more than a few minutes at a time.
A New Mass Airflow Sensor Fixed the Rough Idle
The engine would barely start and barely stay running. Scanning the car’s computer helped us trace the problem to a failed mass airflow sensor.
We removed the old sensor, installed the replacement, secured it in place, and reconnected the wiring harness. With that swapped out, the BMW started and idled properly. That was a pretty important first step for a race car!
Manually Closing the Stuck Sunroof
The sunroof was stuck open, leaving a giant hole above an interior we did not want soaked.
For a temporary fix, I accessed the sunroof motor and turned its manual Torx drive counterclockwise to close the roof. Later, during the weight reduction work, the entire sunroof assembly came out anyway.
Replacing the Power Steering Pump and Lines
The failed power steering made this car seriously difficult to steer. Between the BMW’s weight and its all-wheel-drive front suspension layout, wrestling the wheel through an endurance stint was not going to work.
We installed a new power steering pump and replaced the rusty power steering lines. But one of my favorite parts of this repair was taking apart the old pump to find out why it failed.
A piece of metal had gotten inside and jammed the pumping mechanism, causing the internal drive to shear. The pulley could still spin, but the pump was no longer moving fluid. A spinning pulley does not necessarily mean a working pump.
After the new parts went in, we filled the system with fresh fluid and tested it. Finally, we had nice, light steering. The complete power steering pump replacement goes through that repair in more detail.
Removing 430 Pounds Made a Measurable Difference
Next, we gutted the interior to prepare the car for a welded roll cage. Before removing everything, though, we measured how the car performed so we could compare the results.
- Starting weight: 3,370 pounds.
- Original 0 to 60 mph time: 6.8 seconds.
- Original 60 to 0 mph braking distance: 170 feet.
The all-wheel-drive launches were consistent, but that braking distance was not good. We had plenty of room for improvement.
Where the Weight Came From
I broke the interior removal into sections and weighed the parts as they came out:
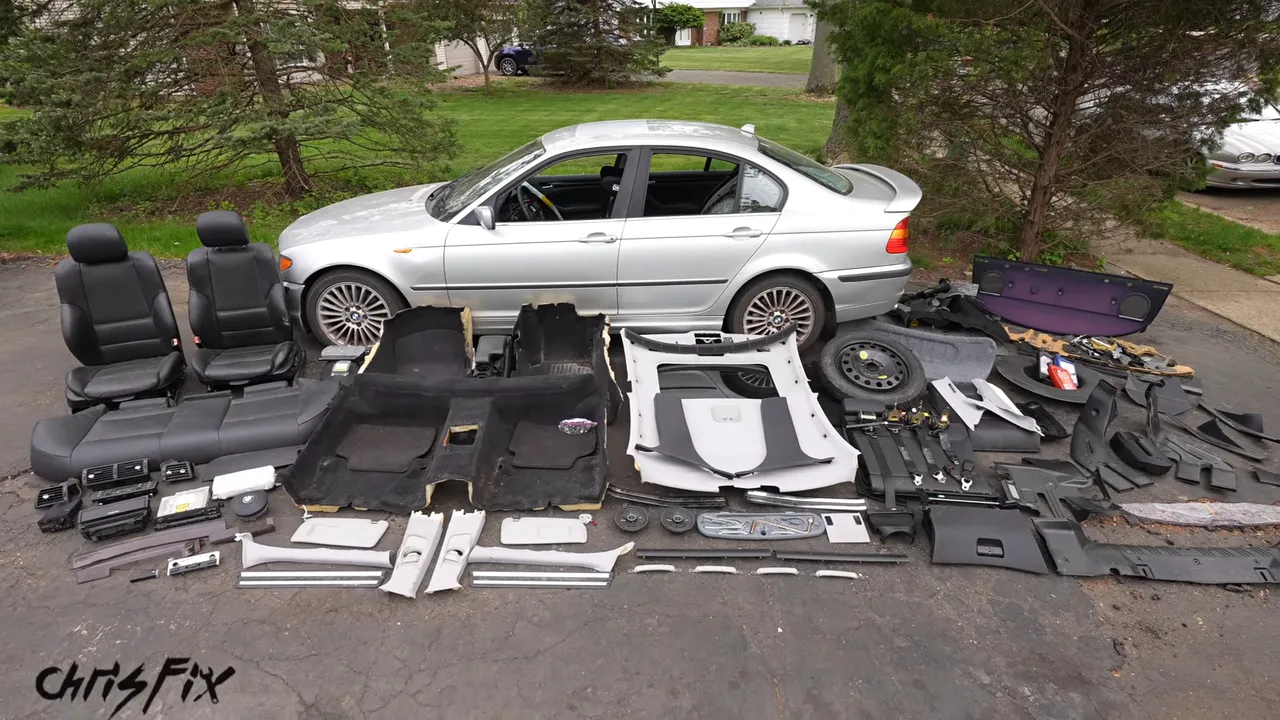
- Front and rear seats: 180 pounds, with a roughly 20-pound racing seat planned as the replacement.
- Trunk contents: 75 pounds.
- Plastic interior pieces and speakers: 50 pounds.
- Carpeting: 45 pounds.
- Headliner and glass sunroof assembly: another 40 pounds removed from high in the car.
The sound deadening also came out. I used dry ice to freeze it, then broke it loose with a hammer so it would separate from the sheet metal.
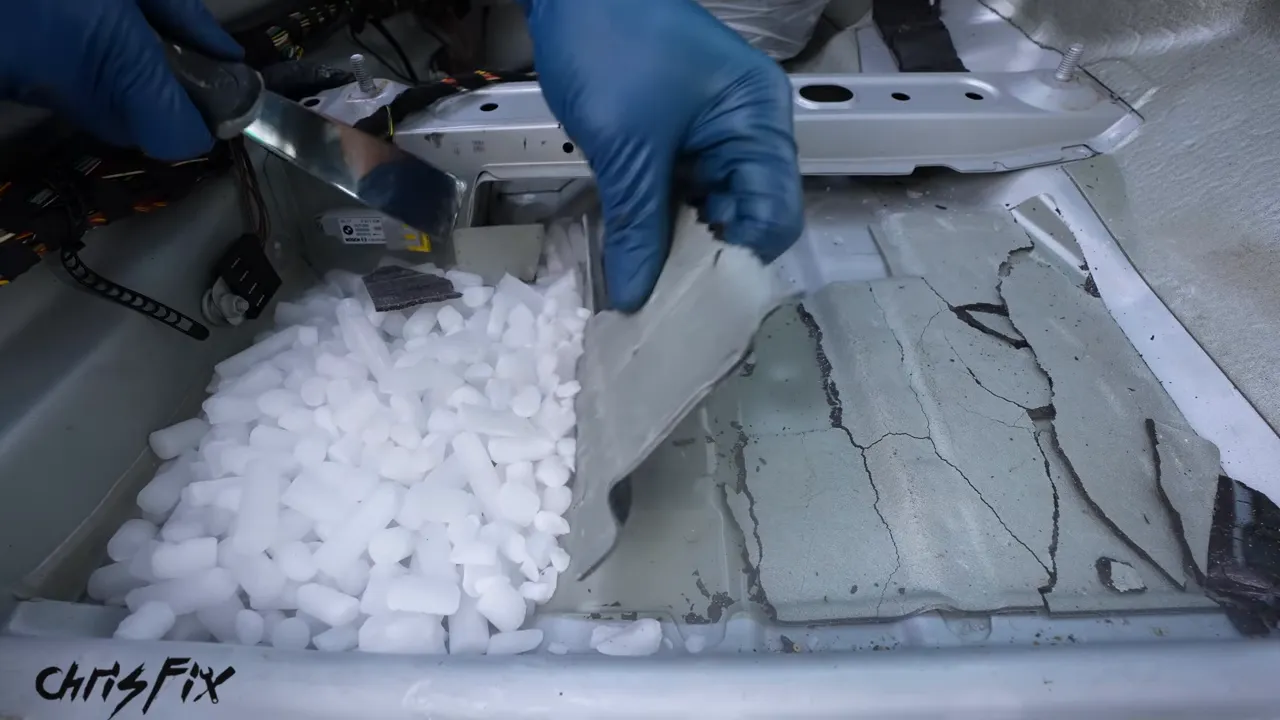
That job was about more than saving weight. The cage needed clean, bare metal at its mounting locations, not a layer of sound deadening. Removing that material also reduced material that could give off hazardous fumes in a fire.
Taking the sunroof out lowered the weight high above the ground, which helped lower the center of gravity. Of course, it also reopened that giant hole in the roof. A two-pound composite filler panel closed it back up.
With almost everything except the dashboard removed, we had taken out 430 pounds, bringing the car down to about 2,940 pounds at that stage of the build.
The Before-and-After Performance Results
Back at the test area, the car felt quicker, and the measurements backed that up:
- 0 to 60 mph: improved from 6.8 seconds to 5.97 seconds.
- 60 to 0 mph braking: improved from 170 feet to 140 feet.
That is nearly a second off the acceleration time and a 30-foot reduction in stopping distance, without replacing the brake pads or rotors yet.
Weight reduction was doing useful work in both directions: getting the car moving and getting it stopped. The complete weight reduction project covers the removal process and testing in more detail.
The Roll Cage and E46 Rear Structure Reinforcement
With the car repaired and stripped, we sent it to the welder. When it came back, we had an awesome six-point roll cage, but only five days left before the race.
We went beyond the minimum cage requirements because my team’s safety was the priority. The cage and associated reinforcement cost $3,800.
Door Bars, Anti-Intrusion Bars, and Mounting Plates
The sides received NASCAR-style door bars. Up front, anti-intrusion bars were added to help resist the wheel and suspension being pushed into the footwell during a frontal impact.
Another important detail was how the cage attached to the car. The BMW is a unibody, and its original sheet metal is relatively thin. At each cage mounting point, the fabricator used substantial steel plates to spread the load over a larger area.
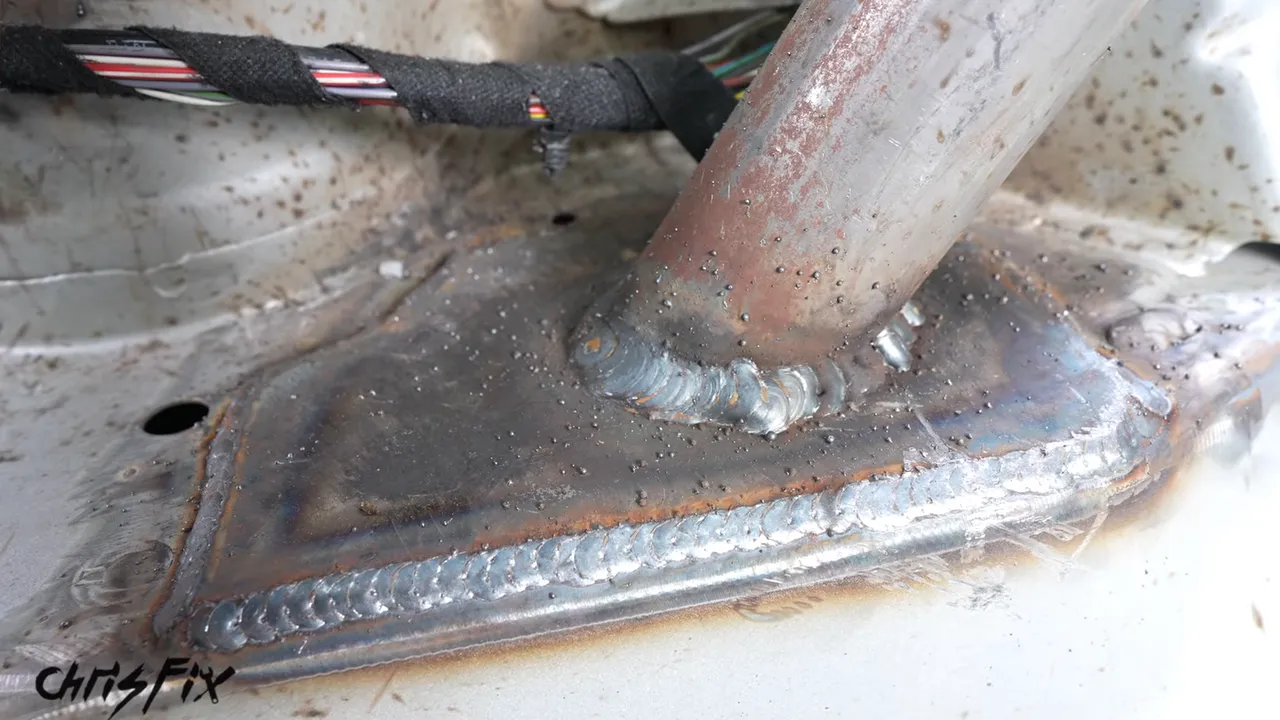
The goal is to keep concentrated cage loads from punching through the body during a rollover or impact. The cage was MIG welded, and I was really happy with how the fabrication came out.
There was already a little surface rust on the bare tubing, so painting the cage remained on the list for after the race. Blue was my favorite option because it fit the soapy-water theme, but getting the car ready to run came first.
Addressing a Known E46 Weak Point
We also reinforced the rear subframe mounting area. E46 BMWs can develop cracks and tearing in the body structure around the rear subframe mounts, and sustained hard driving was exactly what we were planning.
A friend’s street-driven E46 already showed cracking and rust around one of those mounting areas. That was a useful reminder that this was not something to ignore just because our car was cheap.
Our reinforcement tied the rear mounting structure into the body and incorporated connections to both rear shock towers. The goal was a more rigid structure better prepared for endurance racing loads.
This is not an area to improvise. Cage design, mounting, welding, and structural reinforcement need to meet the applicable racing rules and be handled by someone qualified for the work.
Keeping the Driver Cool Through a Long Stint
A race car has to support the person driving it, too. Inside this BMW, we expected temperatures above 100°F. Add a full race suit, racing shoes, gloves, and a helmet, and driver cooling becomes a pretty important part of the build.
We installed a cool-shirt system built around a cooler with an electric pump, securely strapped into the trunk.
The system is straightforward:
- Fill the cooler with water and frozen water bottles.
- The pump circulates cold water through hoses routed toward the driver.
- The hoses connect to a shirt containing small water tubes.
- The shirt sits against the driver’s skin to carry heat away.
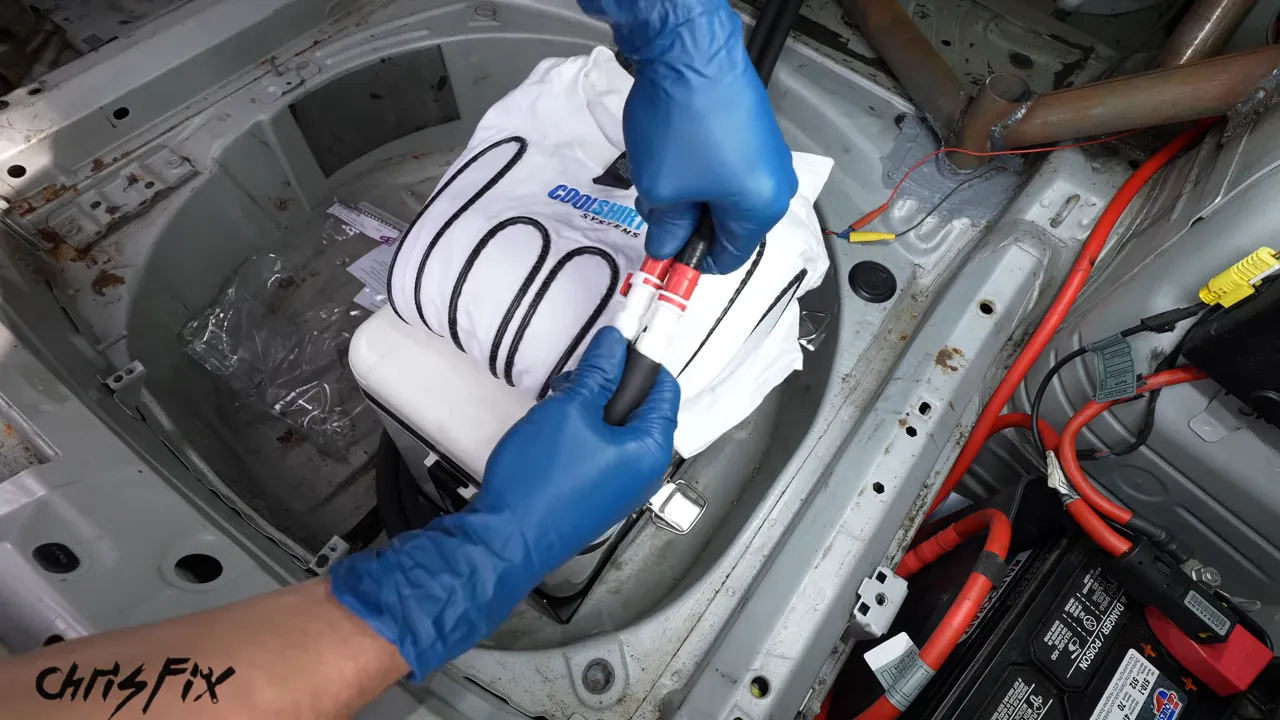
It is a simple idea, but having cold water circulating against your body makes a lot more sense than just hoping you stay comfortable in a hot, stripped-out race car.
Communications, Tow Straps, and an Exhaust Repair
A Radio System for Driver and Team
We needed to communicate about fuel stops, driver changes, and whatever else happened during the race. To get useful range around the track, we drilled the roof and installed an external radio antenna.
The team had a handheld radio and a headset to make it easier to hear over the noise. Each driver’s helmet received a microphone and speaker setup.
For the push-to-talk switch, we chose a spot on the shifter. The driver could press and hold the button while keeping a hand on the shift knob instead of reaching across the dashboard.
Accessible Tow Points at Both Ends
We installed USA-made tow straps in the factory threaded tow locations at the front and rear bumpers. If the car stopped on track, the recovery crew would have an accessible place to hook up and get it moved.
Hopefully, we would not need them. But hoping is not a substitute for making the car recoverable.
Fixing the Exhaust Leak
A major exhaust leak also needed attention, so the exhaust came off and received a new gasket.
And yes, we briefly started the car with the exhaust off. Naturally, we had to find out what it sounded like. The answer was not nearly as good as we expected, and definitely not something we wanted to listen to for an endurance race.
Fire Suppression, Battery Cutoff, and Driver Fit
Next came one of the most important systems in the car: onboard fire suppression.
We mounted the suppression bottle, ran its plumbing, and installed an activation pull handle in the cockpit. We also carried out a separate test discharge demonstration while learning about the system. This was not just a matter of throwing a handheld extinguisher in the passenger seat.
Directly below the suppression pull handle, we installed the battery cutoff. Both emergency controls needed a deliberate location as part of the cockpit layout.
Then every teammate got into the car so we could check the racing seat’s distance from the steering wheel and pedals. A setup that works for one driver does not automatically work for everybody on an endurance team.
We also installed a quick-release steering wheel. The quick-release steering wheel installation covers that work separately.
Rebuilding the Brakes for Endurance Racing
The original brakes were rusty enough that they needed more than a quick inspection. We replaced the major components and serviced the hydraulic system:
- New OEM calipers.
- New rotors.
- NRS endurance racing brake pads.
- New stainless steel brake hoses in place of the worn original hoses.
- A full flush with fresh racing brake fluid.
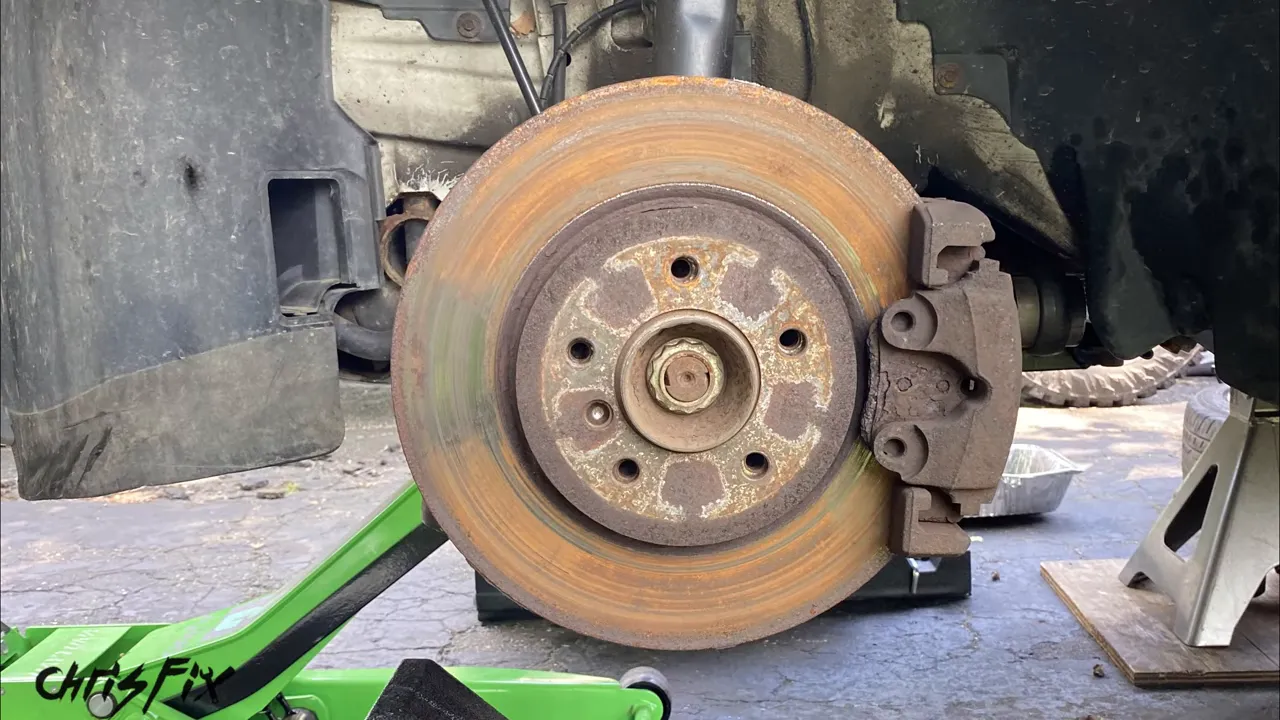
The old brake fluid was dark, and I estimated its boiling point could be around 330°F. The replacement racing fluid cost about $40 per liter and had a stated boiling point of approximately 620°F.
Those are the figures we used for this build, not a guarantee that any fluid will perform identically under every condition. The important point was giving the braking system fresh fluid suitable for the heat of repeated heavy braking, rather than leaving the old fluid in place.
Yokohama Tires, Lighter Wheels, and a Race Alignment
For tires, we chose Yokohama Advan A052s after getting plenty of recommendations. We went as wide as we could within our wheel fitment and stock-offset constraints to maximize grip.
The A052s had a 200 treadwear rating, which was above the 190 minimum for our race. That made them legal for the event we were preparing to enter.
The new wheel-and-tire combination also weighed 30 pounds less in total than the stock setup. That weight came out of components that both rotate and move with the suspension, making it a particularly useful place to save weight.
Finally, just one day before the race, the BMW went in for an alignment. We used race-oriented camber and toe settings with two goals: maximize grip and keep tire wear under control so the tires would last as long as possible.
We were preparing for endurance racing, not just one quick lap. Tire life mattered.
The Car Was Ready. The Team Still Had a Lot to Learn.
For five straight days, we worked from about 6 a.m. until midnight. The cooling system, radios, brakes, tires, and safety equipment were only some of the jobs on the list.
Eventually, the BMW was ready to load into the trailer. We had turned a rough, high-mileage street car into something prepared for its first endurance event.
But there was one big item we could not install in the driveway: experience.
We had no meaningful practice time in the completed race setup, and none of us had wheel-to-wheel racing experience. The car had received a huge amount of preparation. As a team, we still had a lot to learn.
So what happened to the Lemons BMW? It got its cage, received a frantic final round of race preparation, and made it into the trailer. The first race experience, including technical inspection, budget judging, and actual wheel-to-wheel competition, was the next chapter. So was the catastrophic failure that followed.
Getting the car ready was an achievement. Finding out whether the car and team could survive endurance racing was a completely different challenge.


